In an older blog post, I wrote about the unreliability of file uploads over HTTP. It's, by default, an all-or-nothing operation where you have to send the file in one piece to the server and hope that, during the transfer, the connection does not break. If the application loses connection, it has to start the upload from the beginning. A solution to this is splitting a file into multiple pieces (chunks) on the client and uploading them one by one. If the connection breaks, an application can resume the upload from the last successfully uploaded chunk and no longer has to start from the beginning.
In the previous blog post I showed you a solution of this pattern with the Flow.js library. In this blog post, I'm going to revisit this topic and show you examples with a similar library: tus.io
tus.io is, first and foremost, a description of a protocol to split files and transfer the individual chunks over HTTP.
You can find the text of the tus resumable upload protocol here:
https://tus.io/protocols/resumable-upload.html
The authors of the specification wrote several client and server-side implementations for JavaScript, Java, Python, Go, ASP.NET, and Node.js.
The community also wrote many additional implementations. You can find a list of all available implementations on this page: https://tus.io/implementations.html
In the following examples, we are going to use the official JavaScript and Java clients, and we will use a community-driven Java implementation for the back end.
JavaScript Client 
This example is written in TypeScript and Ionic/Angular and leverages the recordrtc library to show a video and record it.
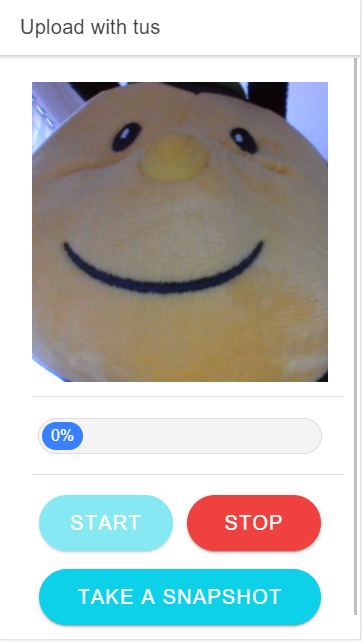
Each time the user taps on the Take a Snapshot button, the application creates a JPEG of the current video frame and uploads it with tus to the server. When the user taps on Stop, the application stops recording and uploads the video to the Spring Boot server.
The progress bar is a component from a blog post by Josh Morony:
https://www.joshmorony.com/build-a-simple-progress-bar-component-in-ionic-2/
You install the tus JavaScript client like any other library with npm install
npm install tus-js-client
and then import it with the following statement
import {Upload} from 'tus-js-client';
In this section, I focus on the method that uploads the files to the server. If you are interested in the complete source code, you can find it on GitHub: https://github.com/ralscha/blog2019/tree/master/uploadtus/client
The method uploadFile() expects a File object as a parameter and starts by creating an Upload object.
This object takes the file as the first argument and a configuration object as the second argument.
  private uploadFile(file: File): void {
    this.uploadProgress = 0;

    const upload = new Upload(file, {
      endpoint: `${environment.serverURL}/upload`,
      retryDelays: [0, 3000, 6000, 12000, 24000],
      chunkSize: 20000,
      metadata: {
        filename: file.name,
        filetype: file.type
      },
      onError: async (error) => {
        const toast = await this.toastCtrl.create({
          message: 'Upload failed: ' + error,
          duration: 3000,
          position: 'top'
        });
        toast.present();
      },
      onChunkComplete: (chunkSize, bytesAccepted, bytesTotal) => {
        this.uploadProgress = Math.floor(bytesAccepted / bytesTotal * 100);
        this.changeDetectionRef.detectChanges();
      },
      onSuccess: async () => {
        this.uploadProgress = 100;
        this.changeDetectionRef.detectChanges();
        const toast = await this.toastCtrl.create({
          message: 'Upload successful',
          duration: 3000,
          position: 'top',
        });
        toast.present();
      }
    });

    upload.start();
  }
The endpoint specifies the URL to a tus back end. chunkSize specifies the size of the individual pieces in bytes. The files in this example are not very big, so I use a tiny chunk size to see the effect of the splitting.
retryDelays is an array specifying how many milliseconds the library should wait before retrying an interrupted transfer.
The length of the array indicates the number of retry attempts. With the configuration above, the library waits 0 milliseconds after
the first failed attempt, then 3, 6, 12, and finally 24 seconds before it gives up if the last attempt fails too.
For more information about the retry mechanism, visit the official documentation: https://github.com/tus/tus-js-client#automated-retries
The metadata object allows an application to send additional data to the server. On the server, we are going to use the original filename for storing the files.
The lifecycle hooks onError, onChuckComplete, and onSuccess are called by the library in case of an error, whenever
a chunk was transferred successfully, and once when the whole file was uploaded successfully.
We use these hooks for displaying toast messages and for updating the progress bar.
This example shows only a few of the available configuration options. You can find a detailed description of all supported options in the readme: https://github.com/tus/tus-js-client#documentation
After creating and configuring the Upload object from the tus library, the application starts the upload transfer with a call to start().
Java Server (Spring Boot) 
The server is a Spring Boot application created with https://start.spring.io and the Web (spring-boot-starter-web) dependency.
There is no official tus Java implementation for the server-side, but a tus.io community member wrote an implementation: https://github.com/tomdesair/tus-java-server
We add the library with the following dependency coordinates.
    <dependency>
        <groupId>me.desair.tus</groupId>
        <artifactId>tus-java-server</artifactId>
        <version>1.0.0-3.0</version>
    </dependency>
Whenever you write a Spring Boot application that handles file uploads, you should check and configure the following two max size settings.
spring.servlet.multipart.max-file-size=50KB
spring.servlet.multipart.max-request-size=50KB
These settings specify the maximum size of an HTTP request and the maximum size of a file inside a request.
Because you can send multiple files inside one HTTP request, there are two settings.
If a client tries to send larger requests, the underlying web server of the Spring Boot application will not accept them.
The defaults are 1MB for max-file-size and 10MB for max-request-size. These values should be greater than or equal to the chunk size
you specify on the client. The JavaScript tus client only sends one chunk per HTTP request, so we can set both settings to the same value.
Next, we need to specify a directory where the Java tus library can store the uploaded chunks. I externalized these settings by creating
a @ConfigurationProperties POJO (https://github.com/ralscha/blog2019/blob/master/uploadtus/server/src/main/java/ch/rasc/upload/AppProperties.java) and then configure the paths in src/main/resources/application.properties
app.tus-upload-directory=e:/temp/upload/tus
app.app-upload-directory=e:/temp/upload/app
The tus-upload-directory is used by the Java tus library internally and is a mandatory setting.
The tus library manages this directory, and after an upload finishes successfully, you have to extract the file from this directory.
For demo purposes, I store the files in another directory specified with the app-upload-directory setting. In a real-world application,
you would maybe store the files in a database or send them to another service.
The next step is creating a TusFileUploadService instance. This class handles the upload process and can be a singleton.
We configure it, therefore, as a Spring-managed bean. The service expects a path to the directory where it can store the
uploaded chunks and the URI we use as upload endpoint.
  @Bean
  TusFileUploadService tusFileUploadService(AppProperties appProperties) {
    return new TusFileUploadService()
        .withStoragePath(appProperties.getTusUploadDirectory()).withUploadUri("/upload");
  }
Next, we create the UploadController that is responsible for handling the tus upload requests from the JavaScript client.
If you need to enable CORS (Cross-Origin Resource Sharing), you have to expose the Location and Upload-Offset HTTP headers.
The JavaScript library needs to access these headers and is not able to do that in a CORS environment if the server does not give the proper permission.
@Controller
@CrossOrigin(exposedHeaders = { "Location", "Upload-Offset" })
public class UploadController {
In the constructor, we are going to inject the TusFileUploadService and create the app upload directory.
You don't have to create the tus upload directory. The tus library automatically creates the directory if it does not exist.
  public UploadController(TusFileUploadService tusFileUploadService,
      AppProperties appProperties) {
    this.tusFileUploadService = tusFileUploadService;

    this.uploadDirectory = Paths.get(appProperties.getAppUploadDirectory());
    try {
      Files.createDirectories(this.uploadDirectory);
    }
    catch (IOException e) {
      Application.logger.error("create upload directory", e);
    }

    this.tusUploadDirectory = Paths.get(appProperties.getTusUploadDirectory());
  }
Next, we implement an HTTP endpoint that listens for upload requests. Make sure that the endpoint
not only listens to /upload but to all requests starting with /upload/....
Also, the method has to listen for POST, PATCH, HEAD, DELETE, and GET requests.
  @RequestMapping(value = { "/upload", "/upload/**" }, method = { RequestMethod.POST,
      RequestMethod.PATCH, RequestMethod.HEAD, RequestMethod.DELETE, RequestMethod.GET })
  public void upload(HttpServletRequest servletRequest,
      HttpServletResponse servletResponse) throws IOException {
    this.tusFileUploadService.process(servletRequest, servletResponse);
A user of the library only needs to call the process() method of the TusFileUploadService and pass
the request and response object as arguments. The tus Java library takes care of the rest.
We want to move the files from the tus upload directory to our app upload directory. So we need to check if the upload is finished. To do that, we need access to the UploadInfo object. The TusFileUploadService stores all the uploads under a key, which is the
request URI. With the getUploadInfo() method, we get a reference to the UploadInfo object.
The UploadInfo class provides the isUploadInProgress() method, which returns false when the last chunk was uploaded.
With the tusFileUploadService.getUploadedBytes() method, we can extract
the bytes of the uploaded file. This method expects, like getUploadInfo(), the key of the upload, which is the request URI.
The application then copies the file from the tus directory to the app upload directory and stores the file under the original filename we specified in the JavaScript code in the metadata section.
    String uploadURI = servletRequest.getRequestURI();

    UploadInfo uploadInfo = null;
    try {
      uploadInfo = this.tusFileUploadService.getUploadInfo(uploadURI);
    }
    catch (IOException | TusException e) {
      Application.logger.error("get upload info", e);
    }

    if (uploadInfo != null && !uploadInfo.isUploadInProgress()) {
      try (InputStream is = this.tusFileUploadService.getUploadedBytes(uploadURI)) {
        Path output = this.uploadDirectory.resolve(uploadInfo.getFileName());
        Files.copy(is, output, StandardCopyOption.REPLACE_EXISTING);
      }
      catch (IOException | TusException e) {
        Application.logger.error("get uploaded bytes", e);
      }

      try {
        this.tusFileUploadService.deleteUpload(uploadURI);
      }
      catch (IOException | TusException e) {
        Application.logger.error("delete upload", e);
      }
    }
  }
Lastly, it's essential that the application calls tusFileUploadService.deleteUpload() after the file was processed.
This method call signals the tus library to delete the uploaded chunks from its upload directory.
The files will stay there forever if you don't delete them.
Cleanup 
It is also recommended to clean up the tus upload directory from time to time, to remove expired and stale uploads. These are artifacts from uploads that started but never finished. If the application does not clean up the directory, the chunks of these failed uploads would be stored forever.
In a Spring application, this can easily be achieved
with a @Scheduled method. This application runs the cleanup() method every 24 hours.
The method first checks if the tus upload directory already exists. It is possible that the directory does not exist because
nobody has uploaded any files yet. For triggering the actual clean-up job, you need to call cleanup() on the TusFileUploadService.
  @Scheduled(fixedDelayString = "PT24H")
  private void cleanup() {
    Path locksDir = this.tusUploadDirectory.resolve("locks");
    if (Files.exists(locksDir)) {
      try {
        this.tusFileUploadService.cleanup();
      }
      catch (IOException e) {
        Application.logger.error("error during cleanup", e);
      }
    }
  }
Remember to add @EnableScheduling on a configuration class. Scheduling is not enabled by default in a Spring Boot application.
@EnableScheduling
Java Client 
As mentioned at the beginning, there are many implementations of the tus.io protocol. There is also an official Java client implementation. In this section, I show you a Java program that sends a file to a Spring Boot back end. We reuse the Spring Boot from the last example; there is no change needed on the server-side.
For using the tus client, we add the following dependency to our project.
    <dependency>
        <groupId>io.tus.java.client</groupId>
        <artifactId>tus-java-client</artifactId>
        <version>0.5.1</version>
    </dependency>
The first part of our Java client is not tus.io related; it just downloads a test file from picsum.photos with the Java 11 HTTP client.
    var httpClient = HttpClient.newBuilder().followRedirects(Redirect.NORMAL).build();

    // Download test file
    Path testFile = Paths.get("test.jpg");
    if (!Files.exists(testFile)) {
      var request = HttpRequest.newBuilder()
          .uri(URI.create("https://picsum.photos/id/970/2000/2000.jpg")).build();
      httpClient.send(request, BodyHandlers.ofFile(testFile));
    }
Next, we need to create an instance of TusClient. The TusClient instance can be used for multiple uploads.
We need to specify the address of the tus server, and we enable the resume feature. The library only provides one implementation of the TusURLStore interface: TusURLMemoryStore.
This implementation stores all information about an upload in a Map in memory.
    var client = new TusClient();
    client.setUploadCreationURL(URI.create("http://localhost:8080/upload").toURL());
    client.enableResuming(new TusURLMemoryStore());
Then we instantiate TusUpload with a path to our file we want to upload.
TusUpload upload = new TusUpload(testFile.toFile());
This class contains information about a file that will be uploaded later. This class is not doing the actual upload.
Next, we need to implement a TusExecutor. This is an abstract class, and we need to implement the makeAttempt() method.
First, we call resumeOrCreateUpload() to create a TusUploader instance.
This class is doing the actual upload, and it also knows which chunks are already successfully uploaded and which are not.
For this example, I set the chunk size to a very low value (1024 Bytes) because the test file
is not very large. If you don't specify a chunk size, TusUploader uses a default of 2MB.
    var executor = new TusExecutor() {

      @Override
      protected void makeAttempt() throws ProtocolException, IOException {
        TusUploader uploader = client.resumeOrCreateUpload(upload);
        uploader.setChunkSize(1024);

        do {
          long totalBytes = upload.getSize();
          long bytesUploaded = uploader.getOffset();
          double progress = (double) bytesUploaded / totalBytes * 100;

          System.out.printf("Upload at %6.2f %%.\n", progress);
        }
        while (uploader.uploadChunk() > -1);

        uploader.finish();
      }

    };
The actual upload consists of a loop where an application calls uploadChunk() repeatedly, which transfers the chunks
to the server. The method returns the number of transferred bytes and -1 when there are no more pieces left to upload. As a final step, the upload calls finish() to signal the end of the upload.
TusExecutor is a class that catches all exceptions thrown by makeAttempt() and retries calling the method.
You can also specify the delays at which the class will issue a retry if makeAttempt() throws an exception.
Here is an example that sets the delays to 2, 4, and 8 seconds.
executor.setDelays(new int[]{2, 4, 8});
For this example, we don't set the delays and thus use the defaults of 500 ms, 1, 2, and 3 seconds.
The number of elements in the delay array also specifies the number of retry attempts. By default,
it tries to call makeAttempt() four times, and when every call throws an exception, TusExecutor gives up.
To start the upload progress, we have to call the makeAttempts() method, which internally calls makeAttempt().
boolean success = executor.makeAttempts();
The method returns either true when the file was successfully uploaded or false if the thread was
interrupted (for example, with Thread.currentThread().interrupt()).
The method throws ProtocolException or IOException if the upload is unsuccessful.
To test the application, you have first to start the Spring Boot application, then run the client, and if everything goes well, you should see a test.jpg file in the upload folder of the server.
The complete source code of the JavaScript and Java client and the Spring Boot server is hosted on GitHub:
https://github.com/ralscha/blog2019/tree/master/uploadtus