Service Workers can not only intercept requests from the browser and cache assets, but they also bring another tool to the Web platform: Push Messages.
In this blog post, we're going to create a simple Spring Boot application that periodically sends push messages over Firebase Cloud Messaging (FCM) to subscribed clients. The client is a basic JavaScript application that displays the messages. As an example payload, we use the jokes from the Internet Chuck Norris Database.
The setup is very similar to my previous blog about Push Messages in a Cordova App. The difference is that this example works in any browser with a Service Worker implementation and does not depend on any native plugins.
Firebase 
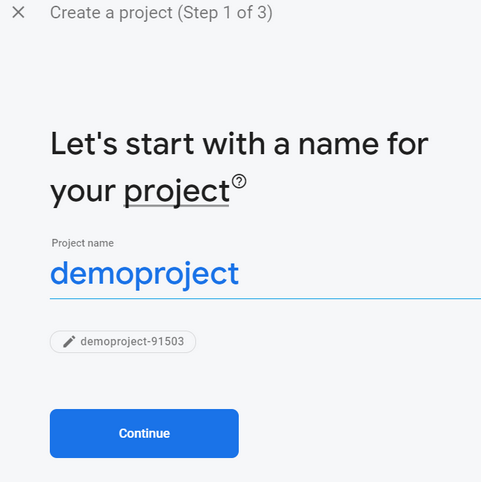
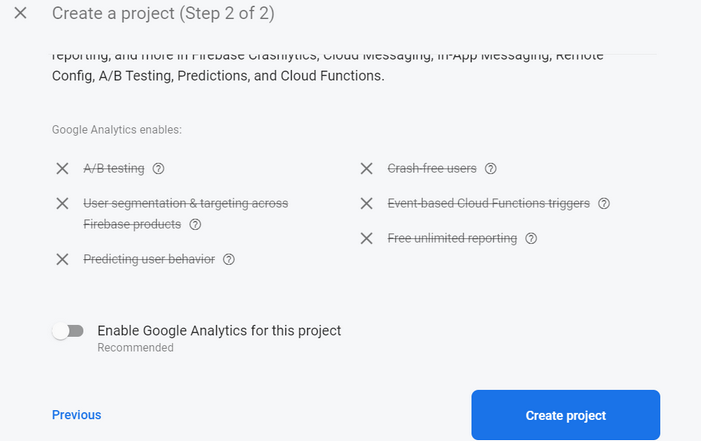
Before we start coding, we need to set up a Firebase project. Log in to your Firebase Console at https://console.firebase.google.com and create a new project or use an existing one.
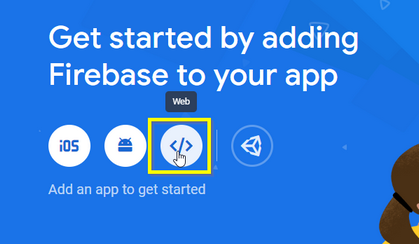
On the home page, click on the "Add Web App" icon.
Give the web app an arbitrary name and click on "Register app".
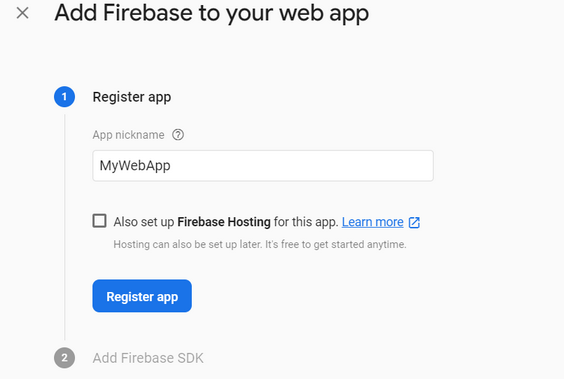
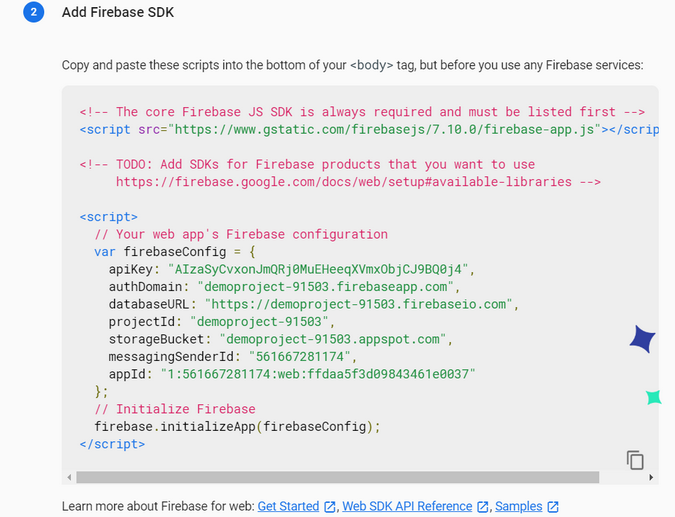
From the next screen, we need the firebaseConfig object. Copy the information to the clipboard or save it into a temporary text file.
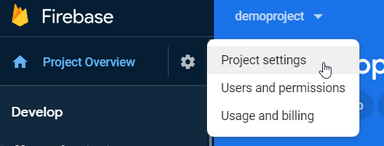
Click on the cogwheel icon, then click "Project settings," and then open the Cloud Messaging tab.

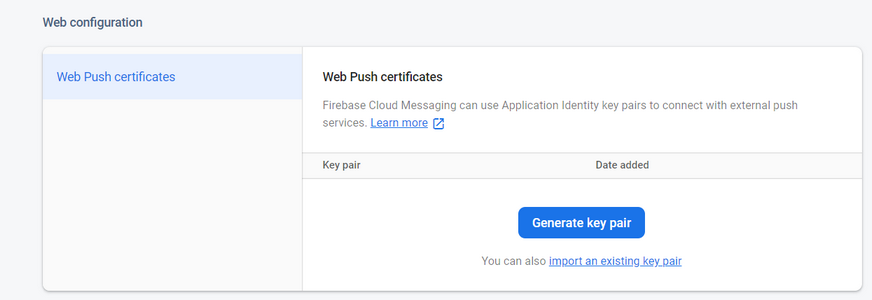
Scroll down to "Web Push certificates" and click "Generate key pair".
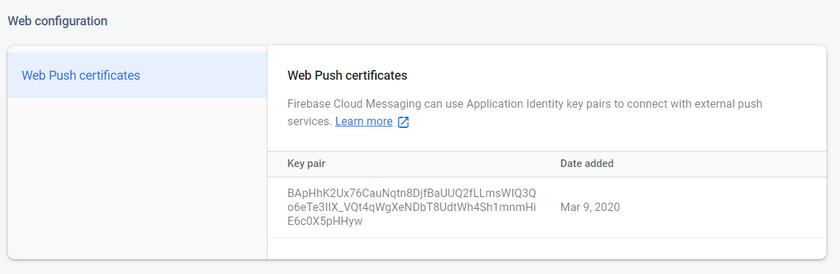
Copy the key pair and save it in a temporary location. We need this key later when we write the JavaScript code.
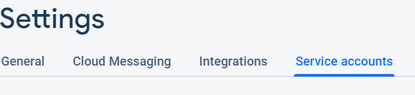
Next, we need to create a Service Account for the Java code. Select the tab "Service accounts".
Click on "Generate new private key".
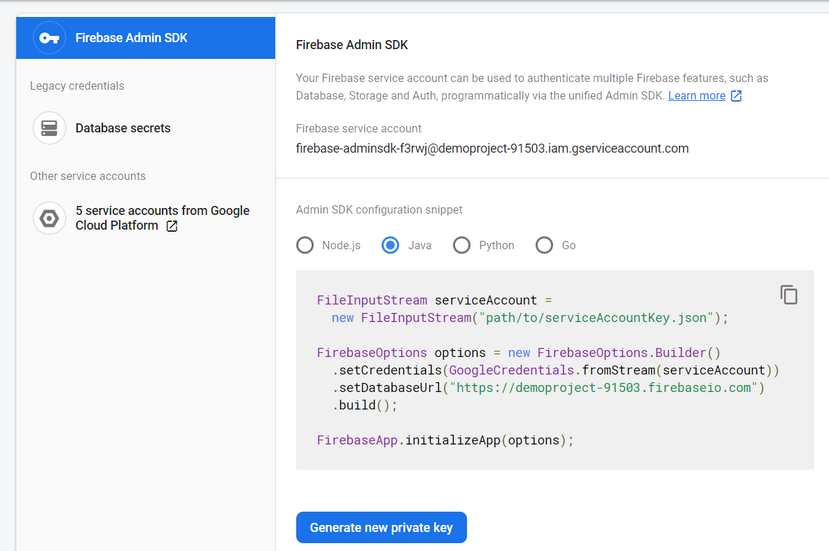
Download the service account file with "Generate key".
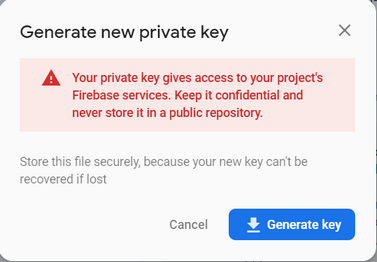
Keep this file safe and don't commit it to a public repository. Everyone with access to this file has full access to the Firebase project.
Server 
The server is a Spring Boot application built with the https://start.spring.io page. As the sole dependency, I added "Reactive Web" to the project.
The server needs to know the location of the Service Account file. To externalize this setting, I created a new application setting and added it to application.properties.
fcm.service-account-file=C:/work/ws/blog/sw-push/demopush-7dacf-firebase-adminsdk-f038n-7c47ad4d8e.json
To read this setting, I created a POJO annotated with @ConfigurationProperties and @Component.
package ch.rasc.swpush;

import org.springframework.boot.context.properties.ConfigurationProperties;
import org.springframework.stereotype.Component;

@ConfigurationProperties(prefix = "fcm")
@Component
public class FcmSettings {
  private String serviceAccountFile;

  public String getServiceAccountFile() {
    return this.serviceAccountFile;
  }

  public void setServiceAccountFile(String serviceAccountFile) {
    this.serviceAccountFile = serviceAccountFile;
  }

}
The PushChuckJokeService bean is responsible for fetching a joke from the Internet Chuck Norris Database and sending push messages over FCM to the subscribed clients.
  @Scheduled(fixedDelay = 30_000)
  public void sendChuckQuotes() {
    IcndbJoke joke = this.webClient.get().uri("http://api.icndb.com/jokes/random")
        .retrieve().bodyToMono(IcndbJoke.class).block();
    try {
      sendPushMessage(joke);
    }
    catch (InterruptedException | ExecutionException e) {
      Application.logger.error("send chuck joke", e);
    }
  }
To send push messages, we use the official Firebase Admin SDK for Java.
    <dependency>
      <groupId>com.google.firebase</groupId>
      <artifactId>firebase-admin</artifactId>
      <version>9.4.1</version>
    </dependency>
The SDK is also available for Node.js, Go, and Python.
Before we can use the SDK, we need to set it up. For that, we need to call the FirebaseApp.initializeApp() method with an options object. For our example, we only need to specify the path to the Service Account file we downloaded earlier from the Firebase console.
  public FcmClient(FcmSettings settings) {
    Path p = Paths.get(settings.getServiceAccountFile());
    try (InputStream serviceAccount = Files.newInputStream(p)) {
      FirebaseOptions options = FirebaseOptions.builder()
          .setCredentials(GoogleCredentials.fromStream(serviceAccount)).build();

      FirebaseApp.initializeApp(options);
    }
    catch (IOException e) {
      Application.logger.error("init fcm", e);
    }
  }
In this example, we send the messages to a topic that is routed to all clients that are subscribed to this topic. FCM also supports sending messages to specific clients.
The Firebase SDK provides the sendAsync() method that pushes messages to the clients. It takes a Message instance as a parameter. In the Message object, we specify the topic and specify the time to live in seconds. If FCM cannot deliver the message in that time frame, FCM deletes the message, and the client never receives it. You can specify a TTL of up to 4 weeks. The chance that you reach all connected clients is higher with a longer TTL. But even with a long time to live, it is possible that we don't reach all clients when they don't start their browser during that time.
  public void send(Map<String, String> data)
      throws InterruptedException, ExecutionException {

    Message message = Message.builder().putAllData(data).setTopic("chuck")
        .setWebpushConfig(WebpushConfig.builder().putHeader("ttl", "300")
            .setNotification(new WebpushNotification("Background Title (server)",
                "Background Body (server)", "mail2.png"))
            .build())
        .build();

    String response = FirebaseMessaging.getInstance().sendAsync(message).get();
    System.out.println("Sent message: " + response);
  }
The notification object is optional and provides information that is displayed in the small popup window that appears when the client receives the message while the browser is in the background. We're going to see later that you can configure this information on the client too.
The data part of the message consists of custom key-value pairs (String->String). This is the data the client receives and has access to in the push message. Note that the data is limited to 4KB.
Client 
On the client-side, we first create the index.html page. We add a div section where the JavaScript code displays the received messages.
We also add a link to the manifest.json file and import the Firebase JavaScript libraries and index.js, which contains our JavaScript application.
<!DOCTYPE html>
<html>
<head>
  <meta charset=utf-8 />
  <title>Web Push</title>
  <link rel="manifest" href="manifest.json">
  <style>
     body {
        font-family: -apple-system, BlinkMacSystemFont, "Segoe UI", Roboto, Helvetica, Arial, sans-serif;
     }
     .header {
        font-family: monospace;
        font-size: 1.1em;
     }
     .joke {
        margin-bottom: 10px;
     }
  </style>

</head>
<body>
<div id="outTable">
</div>
<script src="https://www.gstatic.com/firebasejs/7.10.0/firebase-app.js"></script>
<script src="https://www.gstatic.com/firebasejs/7.10.0/firebase-messaging.js"></script>
<script src="index.js"></script>
</body>
</html>
Next, we write the Service Worker (sw.js). First, we need to import the Firebase library.
Then the application has to call the initializeApp method with the apiKey, projectId, messageSenderId, and appId.
These are the keys we got when we added a Web app to our Firebase project.
We also configure the public VAPID with messaging.usePublicVapidKey. This is the key we created under the section "Web Push certificates" in the Firebase Console.
importScripts('https://www.gstatic.com/firebasejs/7.10.0/firebase-app.js');
importScripts('https://www.gstatic.com/firebasejs/7.10.0/firebase-messaging.js');

firebase.initializeApp({
  apiKey: "AIzaSyAMBZJQqEL9ZjA2Y01E0bj9wV4BGZMvdJU",
  projectId: "demopush-7dacf",
  messagingSenderId: "425242423819",
  appId: "1:425242423819:web:e34dad8cf7e765216c8d0e"
});

const messaging = firebase.messaging();
messaging.usePublicVapidKey('BE-ASg0VyvsQIxoCzGF7K7cT5Xzj_eJCsnZytY3q71Mwou_5i7S0-9NTQwfpU8wdmZXRb3w7DXSfoXms0QXeybc');
Our Service Worker installs an event listener that listens for the push event. The browser emits this event each time a new push message arrives from FCM, regardless of whether the application is in the foreground or the tab with the application is closed, or the browser runs in the background.
The handler reads the key-value pairs from the data section (event.data.json().data) and stores them into an IndexedDB database. IndexedDB is one of the few interfaces that you can access from Service Workers and from foreground scripts. Both have access to the same databases.
self.addEventListener('push', async event => {
  const db = await getDb();
  const tx = this.db.transaction('jokes', 'readwrite');
  const store = tx.objectStore('jokes');

  const data = event.data.json().data;
  data.id = parseInt(data.id);
  store.put(data);

  tx.oncomplete = async e => {
    const allClients = await clients.matchAll({ includeUncontrolled: true });
    for (const client of allClients) {
      client.postMessage('newData');
    }
  };
});
After the handler stores the message in the database, it sends a message to the foreground script with client.postMessage('newData');.
It is possible that the application is open in multiple tabs. Therefore, we loop over all clients that are associated with this Service Worker.
The foreground script (index.js) listens for this message with a message handler.
  navigator.serviceWorker.addEventListener('message', event => {
    if (event.data === 'newData') {
      showData();
    }
  });
Note: Both handlers, the push handler in the Service Worker and the message handler in the foreground, are called when a push message arrives while the application is in the foreground. When the application is not open or is in the background, only the push handler in the Service Worker is called.
The foreground script, in our example, ignores message invocations from the push service and only reacts to the postMessage('newData') call from the Service Worker (if (event.data === 'newData')).
In the foreground script (index.js), we configure Firebase as we do in the Service Worker.
  const registration = await navigator.serviceWorker.register('/sw.js');
  await navigator.serviceWorker.ready;
  firebase.initializeApp({
    apiKey: "AIzaSyAMBZJQqEL9ZjA2Y01E0bj9wV4BGZMvdJU",
    projectId: "demopush-7dacf",
    messagingSenderId: "425242423819",
    appId: "1:425242423819:web:e34dad8cf7e765216c8d0e"
  });
  const messaging = firebase.messaging();
  messaging.usePublicVapidKey('BE-ASg0VyvsQIxoCzGF7K7cT5Xzj_eJCsnZytY3q71Mwou_5i7S0-9NTQwfpU8wdmZXRb3w7DXSfoXms0QXeybc');
Then we need to link the Service Worker with the Firebase library (messaging.useServiceWorker).
There is an alternative way to do that. Name your Service Worker file firebase-messaging-sw.js and then remove the navigator.serviceWorker.register and messaging.useServiceWorker lines. The Firebase library, in that case, automatically installs the Service Worker for you. This is a more convenient way to set things up. But in this example, I set everything up manually.
  messaging.useServiceWorker(registration);

  try {
    await messaging.requestPermission();
  } catch (e) {
    console.log('Unable to get permission', e);
    return;
  }
After the setup, we have to request permission from the user. An application can only receive push messages when the user gives permission. messaging.requestPermission() opens a small dialog that asks for permission. The user sees this dialog only once per domain. If the user declines the request, there is no way for an application to ask again.
When the user gives permission, and the client can connect to FCM, a token is assigned to this client. This is a unique reference for this particular client.
You can access this token with the messaging.getToken() method.
You should also install a handler for the tokenRefresh event. Firebase could assign a new token while the application is running.
  const currentToken = await messaging.getToken();
  fetch('/register', { method: 'post', body: currentToken });
  showData();

  messaging.onTokenRefresh(async () => {
    console.log('token refreshed');
    const newToken = await messaging.getToken();
    fetch('/register', { method: 'post', body: currentToken });
  });
The sender of push messages, in our example, the Spring Boot application, needs to know this client token so it can subscribe the client to the topic.
We send the token to the /register HTTP endpoint with a POST request.
In the Spring Boot application, we add a Controller for this endpoint.
  @PostMapping("/register")
  @ResponseStatus(HttpStatus.NO_CONTENT)
  public Mono<Void> register(@RequestBody Mono<String> token) {
    return token.doOnNext(t -> this.fcmClient.subscribe("chuck", t)).then();
  }
When you address clients directly with the token, you need to store it somewhere and perhaps associate it with a logged-in user.
But in this example, we send messages to a topic, so we subscribe the client to the topic chuck.
We don't have to manage the subscriptions ourselves. Firebase does that for us. We only have to send Firebase the token of the client and the topic name.
The Firebase SDK provides the method subscribeToTopicAsync() for this purpose. It takes as the first parameter one or more client tokens and as the second parameter, the topic name. FCM then subscribes all provided clients to this topic.
  public void subscribe(String topic, String clientToken) {
    try {
      TopicManagementResponse response = FirebaseMessaging.getInstance()
          .subscribeToTopicAsync(Collections.singletonList(clientToken), topic).get();
      System.out
          .println(response.getSuccessCount() + " tokens were subscribed successfully");
    }
    catch (InterruptedException | ExecutionException e) {
      Application.logger.error("subscribe", e);
    }
  }
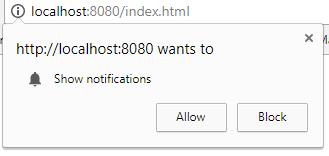
To test the application, start Spring Boot and then open the application in the browser with the URL http://localhost:8080/index.html.
When everything is set up correctly, you should see a new joke appear every 30 seconds.
Now close the tab or open another tab or minimize the browser window. You should see a small popup dialog when a message arrives.
You only see this message when the tab with our application is closed or not activated. The browser is only able to receive push messages when it is running. In Desktop Chrome, you can enable the following setting, and it stays in the background when you close the browser.

Notification 
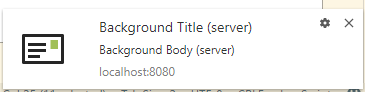
In the sending part, you saw that we also specified a notification object together with the payload of the message.
    Message message = Message.builder().putAllData(data).setTopic("chuck")
        .setWebpushConfig(WebpushConfig.builder().putHeader("ttl", "300")
            .setNotification(new WebpushNotification("Background Title (server)",
                "Background Body (server)", "mail2.png"))
            .build())
        .build();
You see this information in the popup window that the browser displays when the message arrives. As mentioned before, you only see this window when the tab with our application is not active or is in the background.
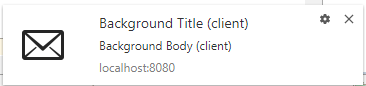
Instead of sending the notification object from the server, you can configure it in the Service Worker code.
For that purpose, you need to install a background message handler. In that handler, you construct a notification object and display the notification with
self.registration.showNotification.
messaging.setBackgroundMessageHandler(function(payload) {
  const notificationTitle = 'Background Title (client)';
  const notificationOptions = {
    body: 'Background Body (client)',
    icon: '/mail.png'
  };

  return self.registration.showNotification(notificationTitle,
      notificationOptions);
});
Note that this background handler is NOT called when the push message already contains a notification object.
If you want to test the client configuration, you need to remove the setNotification() call in the Java code.
 Message message = Message.builder().putAllData(data).setTopic("chuck")
        .setWebpushConfig(WebpushConfig.builder().putHeader("ttl", "300").build())
        .build();
When everything is set up correctly, you should see this message.
This concludes our journey into Web Push Message territory. Thanks to the Firebase JavaScript library, the setup on the client is straightforward because the library does most of the work for us.