It is pretty common to access cloud services and run our applications in the cloud in today's application software world. Businesses are moving more and more IT infrastructure into the cloud instead of running their own data centers.
The challenge for DevOps engineers is to set up and manage these cloud services. Most services can be provisioned and managed over a web interface or with a CLI from a shell.
Setting up services manually this way requires a lot of effort and time, has a high human cost, and increases the possibility of human errors.
A typical setup in bigger projects/companies is to have multiple environments of the same cloud services. For example, for development, testing, and production. If you only have a handful of services to manage, it might be feasible to do that manually. But with dozens of services, it is quite a big and error-prone task to copy the configuration into different environments.
The manual way also has the problem that you don't know who changed what and when. If something breaks because of a configuration change, it might be challenging to figure out the old, working configuration.
When you work in a team with multiple DevOps engineers, the manual way could get out of hand very fast. It's challenging to keep an overview of who is working on what. It's also challenging to coordinate work and prevent members from overwriting configuration options created by other team members.
Infrastructure as Code (IaC) tools help us to tackle these challenges. IaC tools can be categorized into one of these categories:
- Initial infrastructure setup
- Manage infrastructure
- Initial application setup
- Manage/Update applications
There are many IaC tools available, but there is no tool that can do everything. Most often, as a DevOps engineer, you will use multiple tools.
In this blog post, I will focus on Pulumi, an IaC tool that is used for the initial setup and for managing the infrastructure.
Pulumi belongs to the same category of tools as Terraform and AWS Cloudformation. Pulumi, like Terraform, supports many different services. Cloudformation only supports the AWS cloud.
These tools allow us, as DevOps engineers, to describe the desired configuration of services in a text file. The tool reads the file, compares the configuration with the current infrastructure, and updates it accordingly.
The benefit of writing the desired state in a text file is that we can store it in a source code management system that automatically tracks all the changes. Multiple team members can easily contribute to the same configuration. Changes can be reviewed before applying them to an environment to reduce misconfigurations. In addition, applying the changes via a tool can decrease downtime and increase reliability. It is also easier to set up multiple environments the same way. We take the existing configuration of one environment and copy it to a new environment.
Each of the tools mentioned above uses a different way to describe the configuration. For example, Cloudformation expects the input to be JSON or YAML. Terraform developers write the configuration in a particular domain-specific language: HashiCorp Configuration Language (HCL). Pulumi uses a different approach and reads configurations written in general-purpose programming languages. Currently (May 2022), Pulumi supports the following programming languages: TypeScript, JavaScript, Java, Python, Go, and any .NET Core language (C#, F#, VB). Pulumi also supports a declarative approach with Pulumi YAML.
Writing the configuration of an infrastructure in a programming language has several benefits:
- Working with a familiar language
- All the constructs of the language can be used (e.g., conditions, loops, classes, ...)
- Code completion in an IDE
- Code can be compiled to detect syntax errors.
- Common functionality can be packaged into packages/libraries and deployed to a repository. For example, in the TypeScript/Javascript ecosystem, libraries can be published to npm.
- Pulumi configuration programs are real programs that get executed, so they can read files, access databases, and other services.
The developers of Terraform and Cloudformation also see the benefit of using a general-purpose programming language and are providing or working on similar solutions:
- Terraform: Cloud Development Kit for Terraform (CDKTF)
- Cloudformation: AWS Cloud Development Kit
This article shows you how to use Pulumi to provision S3 buckets and EC2 servers on AWS.
Installation 
First, you need to install Pulumi. Follow the following link to the installation instructions for Windows, macOS, and Linux: https://www.pulumi.com/docs/install/
After the installation, test if you can run the pulumi command in a shell.
pulumi version
v3.181.0
If you see the version number, you are ready to work with Pulumi.
AWS 
In the following tutorial, we will work with AWS S3 and EC2. If you want to follow along, you must have an AWS account. Pulumi requires AWS credentials to create and update resources on AWS. The best practice is to set up a separate user. Do not use your root AWS account for this task.
Log in to the AWS web console and open the IAM console. Create a new user, enter a name, and select Access key - Programmatic access. Next, assign permissions to this user. Here you have two options. You either attach the AWS managed policy AdministratorAccess, which permits the user to configure everything in this account, or, my recommendation, you restrict access to just the services you want to provision with Pulumi. For the following examples, the managed policies AmazonS3FullAccess and AmazonEC2FullAccess suffice.
After creating the user, you see a dialog with the access key and secret access key. Make a note and store them somewhere safe. Do not commit them to a source code management system.
To pass the credentials to Pulumi, set the following two environment variables:
AWS_ACCESS_KEY_ID = <YOUR_ACCESS_KEY_ID>
AWS_SECRET_ACCESS_KEY = <YOUR_SECRET_ACCESS_KEY>
Instead of using the environment variables, you may also add the credentials to the ~/.aws/credentials file. This is the configuration file where the AWS CLI stores its credentials. Note that you don't have to install the AWS CLI for using Pulumi.
I use aws-vault, a tool that securely stores and accesses AWS credentials in development environments. With this tool, you start Pulumi as a subprocess of aws-vault. aws-vault creates a temporary session token and passes it to Pulumi.
aws-vault exec <profile_name> -- pulumi ...
Setup stack location 
Before I start with the examples, I run the following command.
pulumi login --local
This command changes the location where Pulumi stores the state. By default, Pulumi stores the state in the hosted Pulumi Cloud Engineering Platform. This service is free for unlimited individual use.
It's okay to store the state locally on your drive when you just want to experiment with Pulumi. Don't (!) do this when you start provisioning real projects with Pulumi. I will explain later what exactly the state is and why the location of the state matters.
Install language runtime 
Because our configurations will be written in a programming language, we have to install the SDK and runtime for that language.
For JavaScript and TypeScript, you must install Node.js. For Go, you install the software development kit. For Python, the Python platform, and for the .NET Core languages, you must install .NET Core.
The following examples are written in Go, but you can choose any of the supported languages. The Pulumi concepts are the same for all supported languages.
Create resources 
Now we are finally ready to set up our first resource in the cloud. Create a new directory and create a Pulumi project.
mkdir first
cd first
pulumi new
Pulumi lists all available project starter templates. Select the aws-... template for your language. I choose aws-go for my examples. If you already know the template, pass it to the new subcommand: pulumi new aws-go
The new subcommand walks you through the setup process. Enter the project name, a description, and the stack name (press enter if you want to accept the defaults). Enter a password. This password is used for encrypting secrets. And finally, enter the AWS region where the resource should reside.
After that, Pulumi sets up the project and creates a few files in the current directory.
The following two files are standard in all Pulumi projects, regardless of the language you write the code. If you open them, you see that they contain the information entered during the setup process.
Pulumi.dev.yaml
Pulumi.yaml
The other files in the directory are our Pulumi configuration program. When you use Go, you see these three files.
go.mod
go.sum
main.go
You can commit all these files to a source code management system like Git.
Open main.go, and you see a complete Pulumi program that creates an S3 bucket.
package main

import (
    "github.com/pulumi/pulumi-aws/sdk/v4/go/aws/s3"
    "github.com/pulumi/pulumi/sdk/v3/go/pulumi"
)

func main() {
    pulumi.Run(func(ctx *pulumi.Context) error {
        // Create an AWS resource (S3 Bucket)
        bucket, err := s3.NewBucket(ctx, "my-bucket", nil)
        if err != nil {
            return err
        }

        // Export the name of the bucket
        ctx.Export("bucketName", bucket.ID())
        return nil
    })
}
In Go, we need to pass our configuration as a function to the pulumi.Run method. We have to import the module of the corresponding resource we want to set up. In this example, github.com/pulumi/pulumi-aws/sdk/v4/go/aws/s3. The methods we have to call are different for each resource. For example, for creating an S3 bucket, we call the s3.NewBucket method.
Visit the Pulumi Registry to find the documentation for the resources you want to provision. For example, you find the S3 bucket documentation here: https://www.pulumi.com/registry/packages/aws/api-docs/s3/bucket/
In the registry, you also find how-to guides with examples in all supported languages.
We can run our program with go run main.go, but nothing will happen; the program exits with an error. So, to create the S3 bucket, we don't run the program ourselves. Instead, we start Pulumi with the following command, and Pulumi executes the program.
pulumi up
First, Pulumi asks for the password. You may set the PULUMI_CONFIG_PASSPHRASE environment variable if you don't want to enter the password each time you run Pulumi.
When you run Pulumi the first time, you see that it downloads the AWS plugin. This way, Pulumi can support all kinds of cloud services. They are not part of the core program; instead, they are plugins that Pulumi downloads the first time it sees them in the code.
Pulumi takes the code from the current directory, compiles it, and runs it. Pulumi tracks all the calls that affect a resource, computes the necessary actions, and shows them in the console.
Previewing update (dev):
     Type                 Name       Plan
 +   pulumi:pulumi:Stack  first-dev  create
 +   └─ aws:s3:Bucket     my-bucket  create

Resources:
    + 2 to create

Do you want to perform this update?  [Use arrows to move, enter to select, type to filter]
  yes
> no
  details
Here you have the option to apply the change or to stop the program. In addition, details prints out more information about the changes.
The stack is a Pulumi concept and does not create a resource on AWS. Select yes, and Pulumi creates an S3 bucket. In the output, you should now see the bucket name.
Outputs:
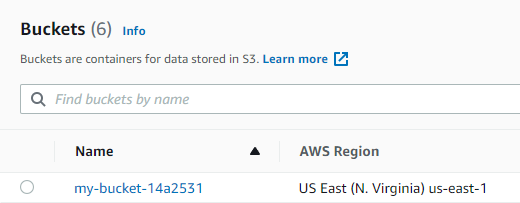
bucketName: "my-bucket-14a2531"
This is the result of the Export method in our code.
ctx.Export("bucketName", bucket.ID())
Notice that the second argument of s3.NewBucket(ctx, "my-bucket", nil) is not the bucket name; it's a logical name for this resource. Pulumi differentiates between a logical and a physical name. By default, Pulumi derives the physical name by appending a few random characters to the logical name. There are two main reasons why Pulumi does that. First, stacks are often instantiated multiple times, and random suffixes ensure no naming collisions. Secondly, it allows for zero-downtime updates. Sometimes updates to resources can happen in place; however, some changes require replacing a resource. With auto-naming enabled, Pulumi can create the new resource first before deleting the old resource.
When you open the S3 web console, you see the newly created bucket.
If you only want to see the actions that Pulumi would execute, run the following command
pulumi preview
This prints out the same output as pulumi up but does not create or change any resources.
Modify resources 
Now let's see what happens when we change the configuration of our bucket. As an example, we enable the S3 versioning feature. Change the code in the following manner.
        bucket, err := s3.NewBucket(ctx, "my-bucket",
            &s3.BucketArgs{Versioning: &s3.BucketVersioningArgs{
                Enabled: pulumi.Bool(true),
            }})
And then rerun Pulumi.
pulumi up
Pulumi tells us that it wants to change the bucket's configuration and enable the versioning flag.
Previewing update (dev):
     Type                 Name       Plan       Info
     pulumi:pulumi:Stack  first-dev
 ~   └─ aws:s3:Bucket     my-bucket  update     [diff: ~versioning]

Resources:
    ~ 1 to update
    1 unchanged

Do you want to perform this update?  [Use arrows to move, enter to select, type to filter]
  yes
> no
  details
Select yes, and Pulumi updates the bucket. This is an example of an in-place update where an existing resource can be modified. However, this is not always possible. Sometimes a resource needs to be recreated because of a configuration change.
Destroy resources 
If you want to delete a specific resource, delete the code in the Pulumi program and run pulumi up.
If you instead want to destroy all provisioned resources from a project, issue the following command.
pulumi destroy
This command deletes all resources of the selected stack that are managed by this Pulumi project. Note that resources created by the same project but in other stacks are not affected. The command also does not destroy resources created by other Pulumi projects or manually created resources.
In this example, pulumi destroy only deletes the my-bucket-14a2531 S3 bucket.
Note that the code still exists in your Pulumi program. Next time you run pulumi up, the resources will be recreated.
We provisioned, modified, and destroyed our first resource with Pulumi.
In the following sections, I'm going to take a closer look at the Pulumi concepts stack and state, and in the last section, I will show you how Pulumi handles secrets.
Stack 
A stack is an isolated, independently configurable instance of a Pulumi program. Stacks are commonly used for setting up different environments. A typical stack setup consists of development, testing, and production. You are not limited in the number or names of the stacks.
Pulumi creates one stack with the default name dev when you create a new Pulumi project.
To create a new stack, run the following command.
pulumi stack init production
production is the name of the new stack. For each stack you create, Pulumi creates a file Pulumi.<stack_name>.yaml in the current directory.
For AWS projects, you need to configure the region after creating a new stack. The AWS region is a stack-specific configuration; each stack could be deployed to a different region.
pulumi config set aws:region us-east-1
To list all stacks of this project, run the following command.
pulumi stack ls
In our example project, we see two stacks.
NAME         LAST UPDATE     RESOURCE COUNT
dev          22 minutes ago  3
production*  n/a             n/a
The stack denoted with * is the currently selected stack. Most Pulumi commands target the currently selected stack unless you specify a stack with the -s argument.
If you run pulumi up with the production stack enabled, Pulumi will create another S3 bucket.
To switch to another stack, use the select subcommand.
pulumi stack select dev
To delete a stack, run
pulumi stack rm
This command will fail when the provisioned resources still exist. Therefore, you must destroy them first with pulumi destroy before being able to delete the stack.
Configuration 
Usually, when you have different stacks, you want to provision the same resources but sometimes with a different configuration. For example, when you provision EC2 servers, you want to choose a less powerful machine for development and a more potent instance for production.
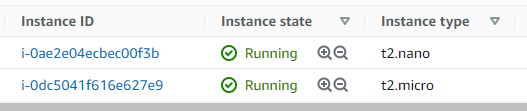
The following example shows you how Pulumi supports this use case with stack-specific configurations. We create two stacks, dev and prod, and provision a t2.nano EC2 instance in dev and a t2.micro instance in prod.
Create a new Pulumi project and accept the defaults.
pulumi new aws-go
The generated project has one stack with the name dev
Create the prod stack
pulumi stack init prod
pulumi config set aws:region us-east-1
pulumi stack ls
NAME   LAST UPDATE  RESOURCE COUNT
dev    n/a          n/a
prod*  n/a          n/a
The config subcommand allows us to set and get stack-specific configuration values. Make sure that you select the correct stack before setting the values.
pulumi stack select dev
pulumi config set ec2:type t2.nano

pulumi stack select prod
pulumi config set ec2:type t2.micro
Alternatively, use the -s argument
pulumi config set -s dev  ec2:type t2.nano
pulumi config set -s prod ec2:type t2.micro
Pulumi writes these values into the Pulumi.<stack_name>.yaml files. You may add and change the options directly in these files.
To read a configuration value, run config get.
pulumi stack select prod
pulumi config get ec2:type
t2.micro
pulumi config get -s dev ec2:type
t2.nano
To list all configured configuration values, execute the following command.
pulumi config -s prod
KEY         VALUE
aws:region  us-east-1
type        t2.micro

pulumi config -s dev
KEY         VALUE
aws:region  us-east-1
type        t2.nano
Next, we write the Pulumi program. Here is the code that provisions an EC2 instance.
package main

import (
    "github.com/pulumi/pulumi-aws/sdk/v4/go/aws/ec2"
    "github.com/pulumi/pulumi/sdk/v3/go/pulumi"
    "github.com/pulumi/pulumi/sdk/v3/go/pulumi/config"
)

func main() {
    pulumi.Run(func(ctx *pulumi.Context) error {

        mostRecent := true
        ami, err := ec2.LookupAmi(ctx, &ec2.LookupAmiArgs{
            Filters: []ec2.GetAmiFilter{
                {
                    Name:   "name",
                    Values: []string{"amzn-ami-hvm-*-x86_64-ebs"},
                },
            },
            Owners:     []string{"137112412989"},
            MostRecent: &mostRecent,
        })
        if err != nil {
            return err
        }

        conf := config.New(ctx, "")
        instanceType := conf.Require("type")

        srv, err := ec2.NewInstance(ctx, "my-server", &ec2.InstanceArgs{
            InstanceType: pulumi.String(instanceType),
            Ami:          pulumi.String(ami.Id),
        })
        if err != nil {
            return err
        }

        // Export the resulting server's IP address and DNS name.
        ctx.Export("publicIp", srv.PublicIp)
        ctx.Export("publicHostName", srv.PublicDns)
        return nil
    })
}
Configuration values can be retrieved with the config.Get and the config.Require method.
config.Get will return the empty string ("") if the configuration value was not provided, and config.Require will panic.
Provision the two EC2 instances with the following commands.
pulumi up -s dev
pulumi up -s prod
Open the EC2 web console. There you should find a t2.nano and a t2.micro EC2 instance.
Don't forget to destroy the instances if you no longer need them because they cost money.
pulumi destroy -s dev
pulumi destory -s prod
This concludes this overview about Pulumi stacks.
Check out the documentation for more information about stacks:
https://www.pulumi.com/docs/concepts/stack/
State 
In the first example, we wrote the following code to provision an S3 bucket.
bucket, err := s3.NewBucket(ctx, "my-bucket", nil)
Pulumi then ran this code and created a bucket with the name my-bucket-14a2531 in S3.
In the second example, we changed the configuration of our S3 bucket with this code.
bucket, err := s3.NewBucket(ctx, "my-bucket",
    &s3.BucketArgs{Versioning: &s3.BucketVersioningArgs{
        Enabled: pulumi.Bool(true),
    }})
Pulumi updated the configuration of the bucket my-bucket-14a2531.
The question arises: how does Pulumi know that it had to update the bucket with the name my-bucket-14a2531? When you search through all your project files, you will not find any reference to this name.
And here is where the state comes into play. The answer to the question is that Pulumi stores every provisioned resource in the state. The state is a file where Pulumi stores the connection between the logical resource name (from the code) and the physical resource name from the actual resource.
Because I changed the storage backend of the state to local, I can examine the state files. I find the following configuration in the state file ~/.pulumi/stacks/dev.json.
    "urn": "urn:pulumi:dev::first::aws:s3/bucket:Bucket::my-bucket",
    "custom": true,
    "id": "my-bucket-14a2531",
    "type": "aws:s3/bucket:Bucket",
Here you see the urn, which is the logical resource name. Derived from your project name, the stack name, the resource type, and the name we used in our code. And the id denotes the physical resource name. The actual name of the S3 bucket.
We can also programmatically verify that this connection exists. We take our second example and break the connection by changing the logical name to my-bucket-2.
bucket, err := s3.NewBucket(ctx, "my-bucket-2",
When you run pulumi up, you see that Pulumi wants to destroy and create an S3 bucket.
Previewing update (dev):
     Type                 Name         Plan
     pulumi:pulumi:Stack  first-dev
 +   ├─ aws:s3:Bucket     my-bucket-2  create
 -   └─ aws:s3:Bucket     my-bucket    delete

Outputs:
  ~ bucketName: "my-bucket-0aa446c" => output<string>

Resources:
    + 1 to create
    - 1 to delete
    2 changes. 1 unchanged

Do you want to perform this update? details
  pulumi:pulumi:Stack: (same)
    [urn=urn:pulumi:dev::first::pulumi:pulumi:Stack::first-dev]
    + aws:s3/bucket:Bucket: (create)
        [urn=urn:pulumi:dev::first::aws:s3/bucket:Bucket::my-bucket-2]
        acl         : "private"
        bucket      : "my-bucket-2-a93d06d"
        forceDestroy: false
    --outputs:--
  ~ bucketName: "my-bucket-14a2531" => output<string>
    - aws:s3/bucket:Bucket: (delete)
        [id=my-bucket-14a2531]
        [urn=urn:pulumi:dev::first::aws:s3/bucket:Bucket::my-bucket]
Pulumi first looks for a resource with the logical name urn:pulumi:dev::first::aws:s3/bucket:Bucket::my-bucket-2 in the state. Because there is no entry for this resource, Pulumi creates the bucket in S3 and adds it to the state.
Pulumi then checks if there are resources in the state that are no longer referenced in the code. In this example, the resource with the logical name urn:pulumi:dev::first::aws:s3/bucket:Bucket::my-bucket no longer exists in our Go code; that means Pulumi needs to destroy this resource in S3.
Now you see that the state is crucial for Pulumi because of this connection between logical and physical names.
Backend 
Where Pulumi stores the state is determined by the configured backend. In the beginning, I changed the backend to local storage, which is okay if you only want to experiment with Pulumi. But for real projects, you should store these files somewhere safe. If multiple members are part of your team and all have to manage cloud infrastructure, everybody must access the same state.
The most convenient way is storing the state in the Pulumi Cloud Engineering Platform. That's a cloud service hosted by Pulumi.
You configure the connection to Pulumi's cloud service with
pulumi login
Next, you have to create a Pulumi account. In the menu Settings->Access Tokens, generate the necessary token for the command line. Copy and paste this token into the shell.
The service is free for individual use. Check out the pricing page for more information: https://www.pulumi.com/pricing/
Pulumi not only supports the local and Cloud Engineering Platform backend, it also supports the object storage services of the big cloud providers as a backend.
Note that the S3 backend also works together with API-compatible products like Minio, Ceph, and SeaweedFS.
To set up the S3 backend, run the following command.
pulumi login s3://<bucket-name>
Make sure that the S3 bucket exists. Pulumi does not automatically create it. From now on, the state will be stored in S3.
Visit this link to learn more about state and backend:
https://www.pulumi.com/docs/concepts/state/#state-and-backends
Import 
Pulumi is only aware of resources that are stored in the state. This is a good thing because Pulumi will not accidentally delete resources that you have manually created. But that's a problem if you want to manage manually provisioned resources with Pulumi. For example, you started your project by manually configuring resources in the cloud, and later you decided to use an IaC tool to manage these resources.
Tools like Pulumi and Terraform support a process called import to bring existing resources into the management of the tool. Import is a two-step process. First, Pulumi imports the current configuration into the state file, and secondly, you have to paste the code for the imported resource into the Pulumi program.
Let's see how this works with an example. Start with an empty Pulumi project.
pulumi new aws-go
Delete the existing code that creates the S3 bucket.
package main

import (
    "github.com/pulumi/pulumi/sdk/v3/go/pulumi"
)

func main() {
    pulumi.Run(func(ctx *pulumi.Context) error {
        return nil
    })
}
Create an S3 bucket with the AWS CLI or via the S3 web console
aws s3 mb s3://pulumi-import-example
When you run pulumi up, Pulumi only creates the stack, an entry in the state, but no resource in AWS. Our Pulumi program does nothing, so the desired state is empty, and the current state is also empty; therefore, Pulumi does not have to apply any changes to AWS. This confirms that Pulumi is not aware of the manually created S3 bucket.
Now we import the S3 bucket into the state with the following command:
pulumi import aws:s3/bucket:Bucket example-bucket pulumi-import-example
We see the connection between logical and physical resource names. example-bucket is the logical name, and pulumi-import-example is the physical name, in this case, the name of the bucket.
The import subcommand imports the configuration of the bucket into the state and prints out the source code we have to paste into the Go program.
package main

import (
    "github.com/pulumi/pulumi-aws/sdk/v4/go/aws/s3"
    "github.com/pulumi/pulumi/sdk/v3/go/pulumi"
)

func main() {
    pulumi.Run(func(ctx *pulumi.Context) error {
        _, err := s3.NewBucket(ctx, "example-bucket", &s3.BucketArgs{
            Acl:          pulumi.String("private"),
            Bucket:       pulumi.String("pulumi-import-example"),
            ForceDestroy: pulumi.Bool(false),
        }, pulumi.Protect(true))
        if err != nil {
            return err
        }
        return nil
    })
}
When you run pulumi up again, you see no changes because our desired state (code) matches the current state. From now on, we can change the configuration of our initial manually created S3 bucket with Pulumi.
When Pulumi imports resources into the state, it marks them by default as protected with the flag protect. This ensures that imported resources are not accidentally deleted if you forget to add the code into the Pulumi program. This also means you can't simply delete such a resource by deleting the code. Before you can do that, you have to reset the protect flag. You do that by changing the flag to false in the code pulumi.Protect(false) and run pulumi up.
It's also worth noting that if you accidentally delete the complete state, importing the resources is the only way to fix the connections between the logical and physical resources. You don't need to write the code because the code is still there, but you have to import the resources into the state.
To learn more about importing resources, check out the following site:
https://www.pulumi.com/docs/using-pulumi/adopting-pulumi/import/
Secrets 
When you provision and configure infrastructure in the cloud, you come in contact with secrets sooner or later. Managing secrets is quite a challenge because you always need to ensure they do not get accidentally exposed to the public. Unfortunately, there are a lot of bad examples where secrets can be found in public GitHub repositories.
Pulumi has built-in support for managing secrets. You already came in contact with this support when you created a Pulumi project. Pulumi asked you for a password during the project setup.
In Pulumi's world, the state plays an important role. Most of the time, values stored in the state are not sensitive, like server names, configuration settings, etc. But there are some values like database passwords or service tokens that should not be stored in plain text. So Pulumi encrypts these sensitive data in the state with a per-stack encryption key. By default, Pulumi uses the password you entered during the project setup as the key.
Not only values in the state can be sensitive, but you might also have secrets as part of your stack configuration. To store an encrypted value in the stack configuration, you execute this command.
pulumi config set --secret secret_key secret_value
Like the regular config set subcommand, this stores the key and value in the Pulumi.<stack>.yaml file. But the value will be encrypted with the key before storing it in the file.
To read a secret from your stack configuration file, you use either config.GetSecret or config.RequireSecret. Like their plaintext counterparts, GetSecret returns an empty string ("") if the configuration is not provided, and RequireSecret panics.
    conf := config.New(ctx, "")
    value := conf.RequireSecret("secret_key")
The secret storage built into Pulumi is usually sufficient. In larger organizations, however, likely, a centralized secret management system is already in use, like AWS Key Management System, Azure Key Vault, Google Cloud Key Management, or Hashicorp Vault. Pulumi supports all these services out of the box.
For example, if you want to encrypt secret values with KMS from AWS, you configure this during stack creation
pulumi stack init prod --secrets-provider="awskms://86c5f3ec-1947-4f56-8576-2a04bc6c6127?region=us-east-1"
The secret provider is a per-stack setting. You can, for example, use the default password provider for the dev and use a KMS key for the prod stack.
Note that with KMS, you need to manually create the key with the AWS CLI or the web console. It has to be a symmetric key, and you must make sure that the user you run Pulumi with has permission to access this key.
You can also switch to another secret provider after creating the stack with the following command.
pulumi stack change-secrets-provider "awskms://86c5f3ec-1947-4f56-8576-2a04bc6c6127?region=us-east-1"
This command switches the provider and migrates the secrets in the stack configuration and the state to the new provider.
The following link gives you a more in-depth look at the secret support of Pulumi
https://www.pulumi.com/docs/concepts/secrets/
This concludes my Pulumi overview.
If you want to learn more and dive deeper into Pulumi, check out the following resources: