WebAuthn (Web Authentication) is a web standard for authenticating users to web-based applications using public/private key cryptography. Strictly speaking, WebAuthn is just the name of the browser API and is part of FIDO2. FIDO2 is the overarching term for a set of specifications, including WebAuthn and CTAP. FIDO2 is the successor to the FIDO Universal 2nd Factor (U2F) legacy protocol.
As a web application developer, we don't deal with CTAP (Client-to-Authenticator Protocol), which is the protocol that the browser uses to communicate with an authenticator, such as a FIDO security key.
FIDO2 works with public/private keys. The user has an authenticator, which creates public/private key pairs. These key pairs are different for each site. The public key is transferred to the server and stored in the user's account. The private key never leaves the authenticator. To log in, the server first creates a random challenge (a random sequence of bytes) and sends it to the authenticator. The authenticator signs the challenge with its private key and sends the signature back to the server. Finally, the server verifies the signature with the stored public key and grants access if the signature is valid.
Traditionally, this technology needs a hardware security token like a Yubico key.
FIDO2 still supports these hardware keys, but the technology also supports alternatives. If you have an Android 7+ phone or a Windows 10 system, you don't need to buy a FIDO2 security key if you want to experiment with WebAuthn. In April 2019, Google announced that any phone running Android 7+ can function as a FIDO2 security key. In November 2018, Microsoft announced that you can use Windows Hello as a security key for FIDO2.
I've successfully tested the demo application I wrote for this blog post with an Android 9 smartphone, and on my Windows 10 laptop, I used a 4-year-old Yubico Edge USB key and the Chrome browser.
WebAuthn is implemented in all modern browsers. Visit caniuse.com to check out the current state of implementations: https://caniuse.com/#search=webauthn
In this blog post, I will show you how to integrate WebAuthn into a web application (Ionic/Angular) and a Spring Boot back end. I created a trivial password-less authentication demo, where the user does not have to enter a username or password to log in.
This blog post does not go into the details of the WebAuthn protocol and does not explain or show every feature. However, there are excellent resources on the web if you want to dive deeper into the standard and learn more.
- https://fidoalliance.org/fido2/
- https://webauthn.io/
- https://webauthn.guide/
- https://github.com/herrjemand/awesome-webauthn
Check out the WebAuthn website from Auth0. The demo on the website shows you all the data that flows between the components.
Also, check out the Yubico website about WebAuthn and the project page of the Java library the demo application uses.
WebAuthn API 
The Web Authentication API is an extension of the Credential Management API.
In my previous blog post, I used this API to interact with the password manager in the browser. WebAuthn extends the two functions from the Credential Management API, navigator.credentials.create() and navigator.credentials.get(), so they accept a publicKey parameter.
We are going to use the create() method for registration and get() for the sign-in process.
An easy way to check if a browser supports WebAuthn is to check the presence of the PublicKeyCredential interface.
if (window.PublicKeyCredential) {
    // WebAuthn supported
}
Demo application 
For this blog post, I wrote an Ionic / Angular TypeScript web application and a Spring Boot backend with Java.
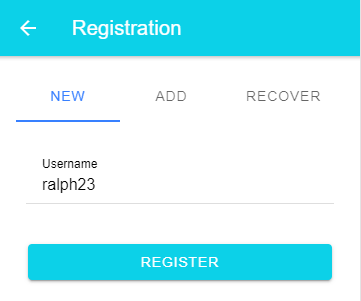
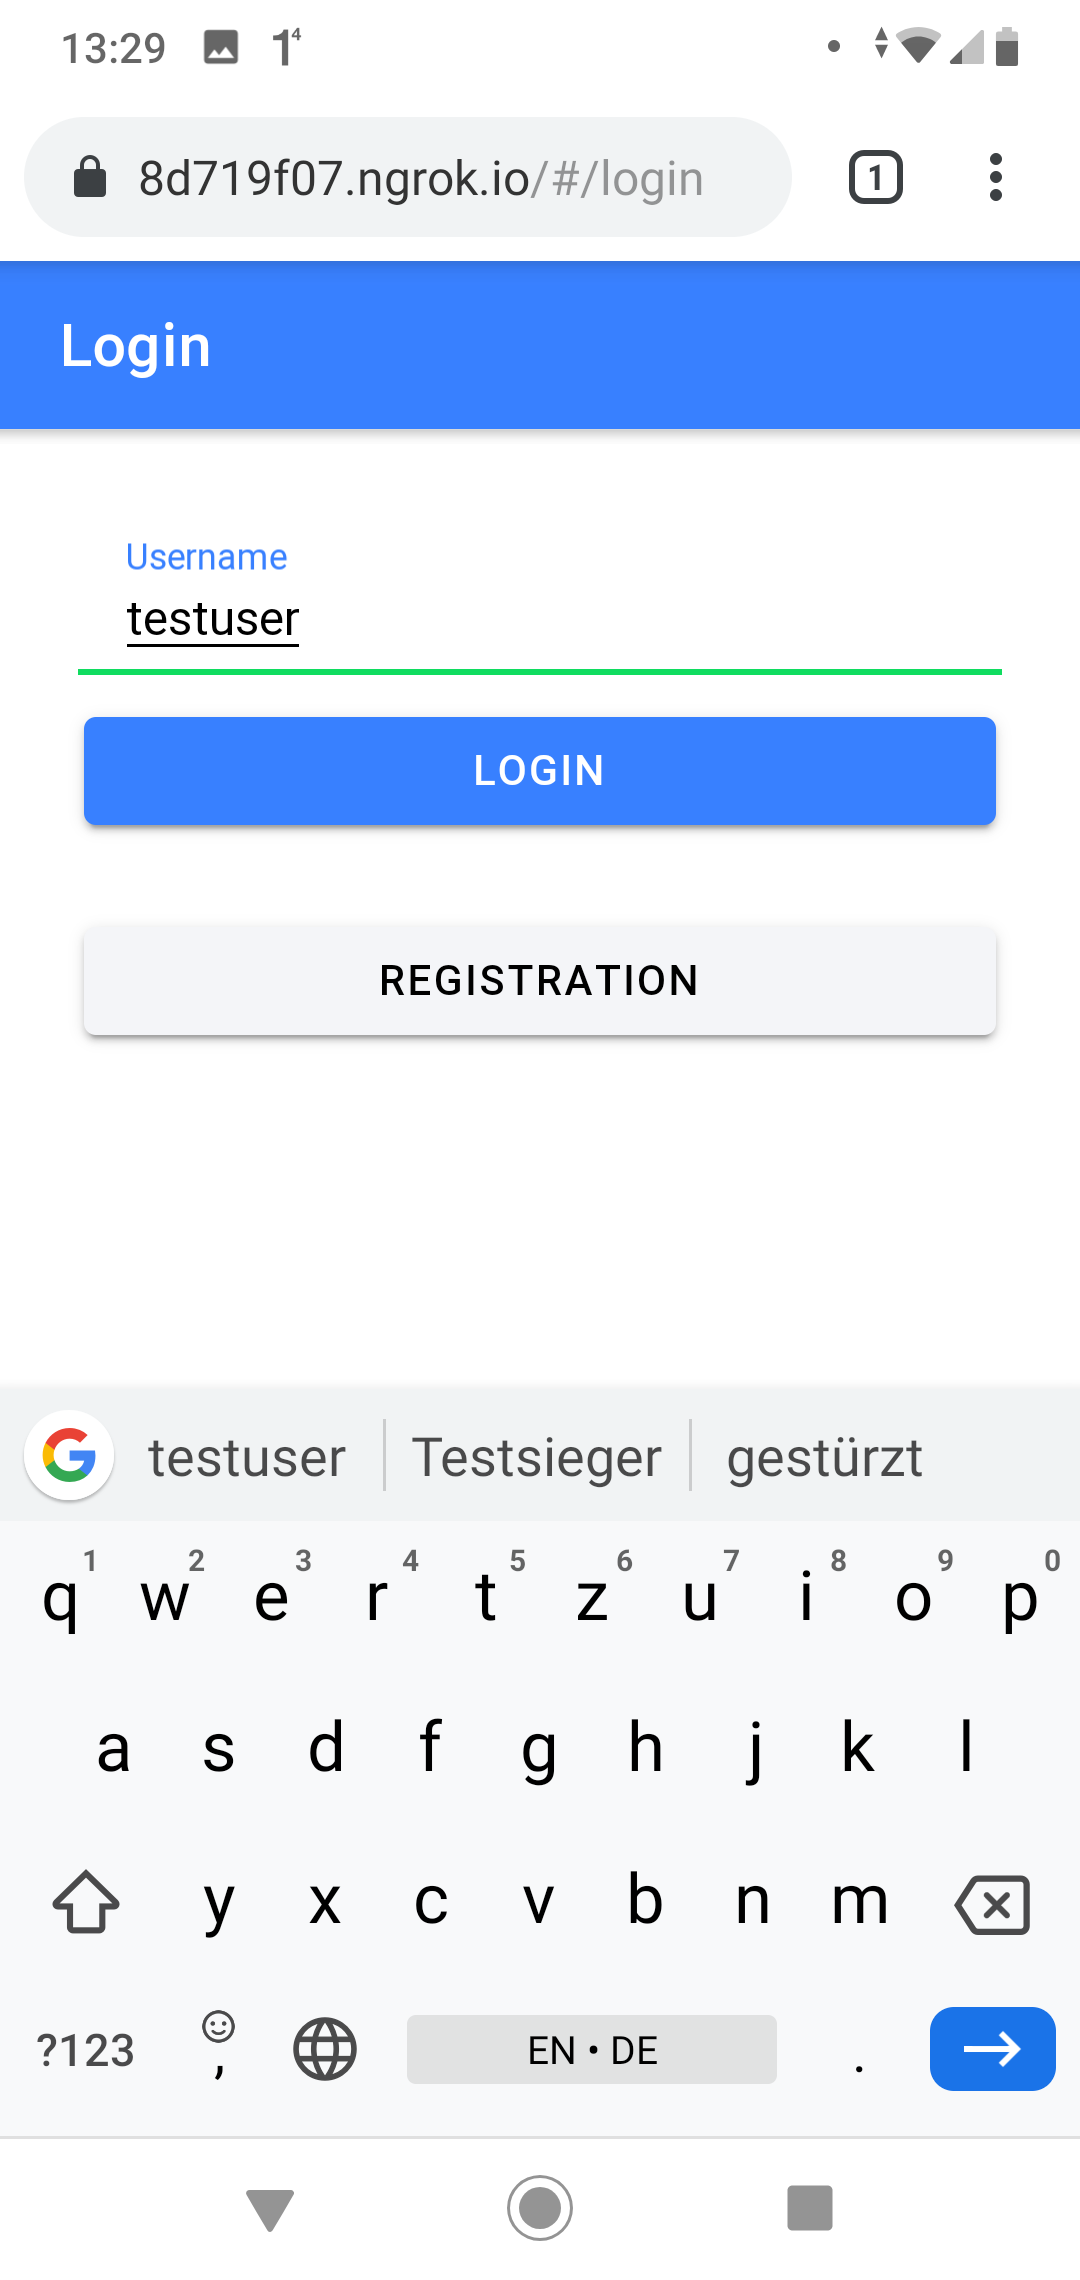
The web application consists of a register and a sign-in page. To keep it simple, the registration page only asks for the mandatory username.
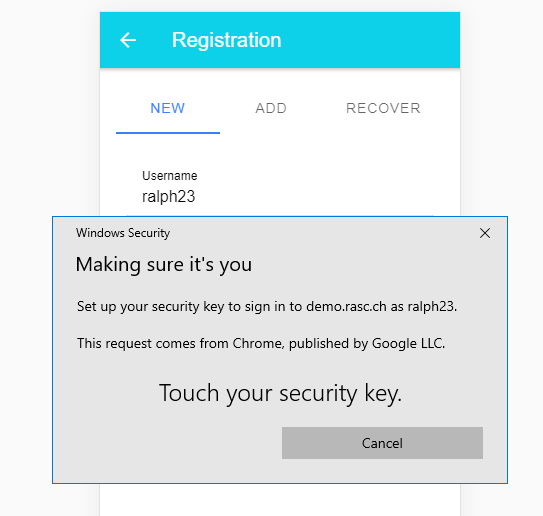
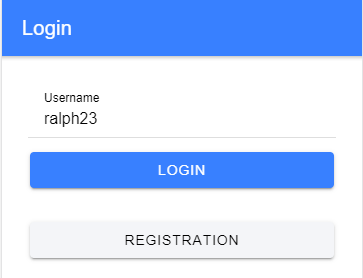
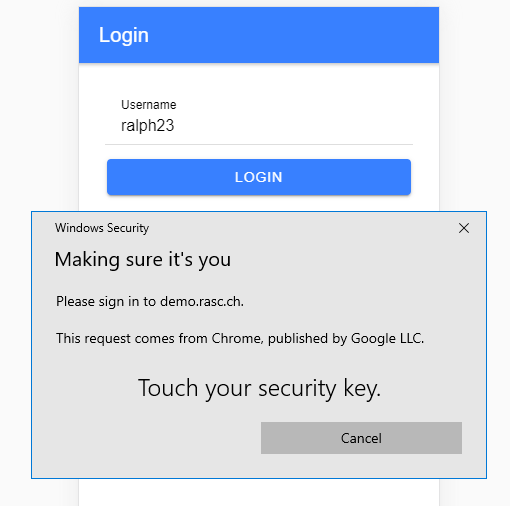
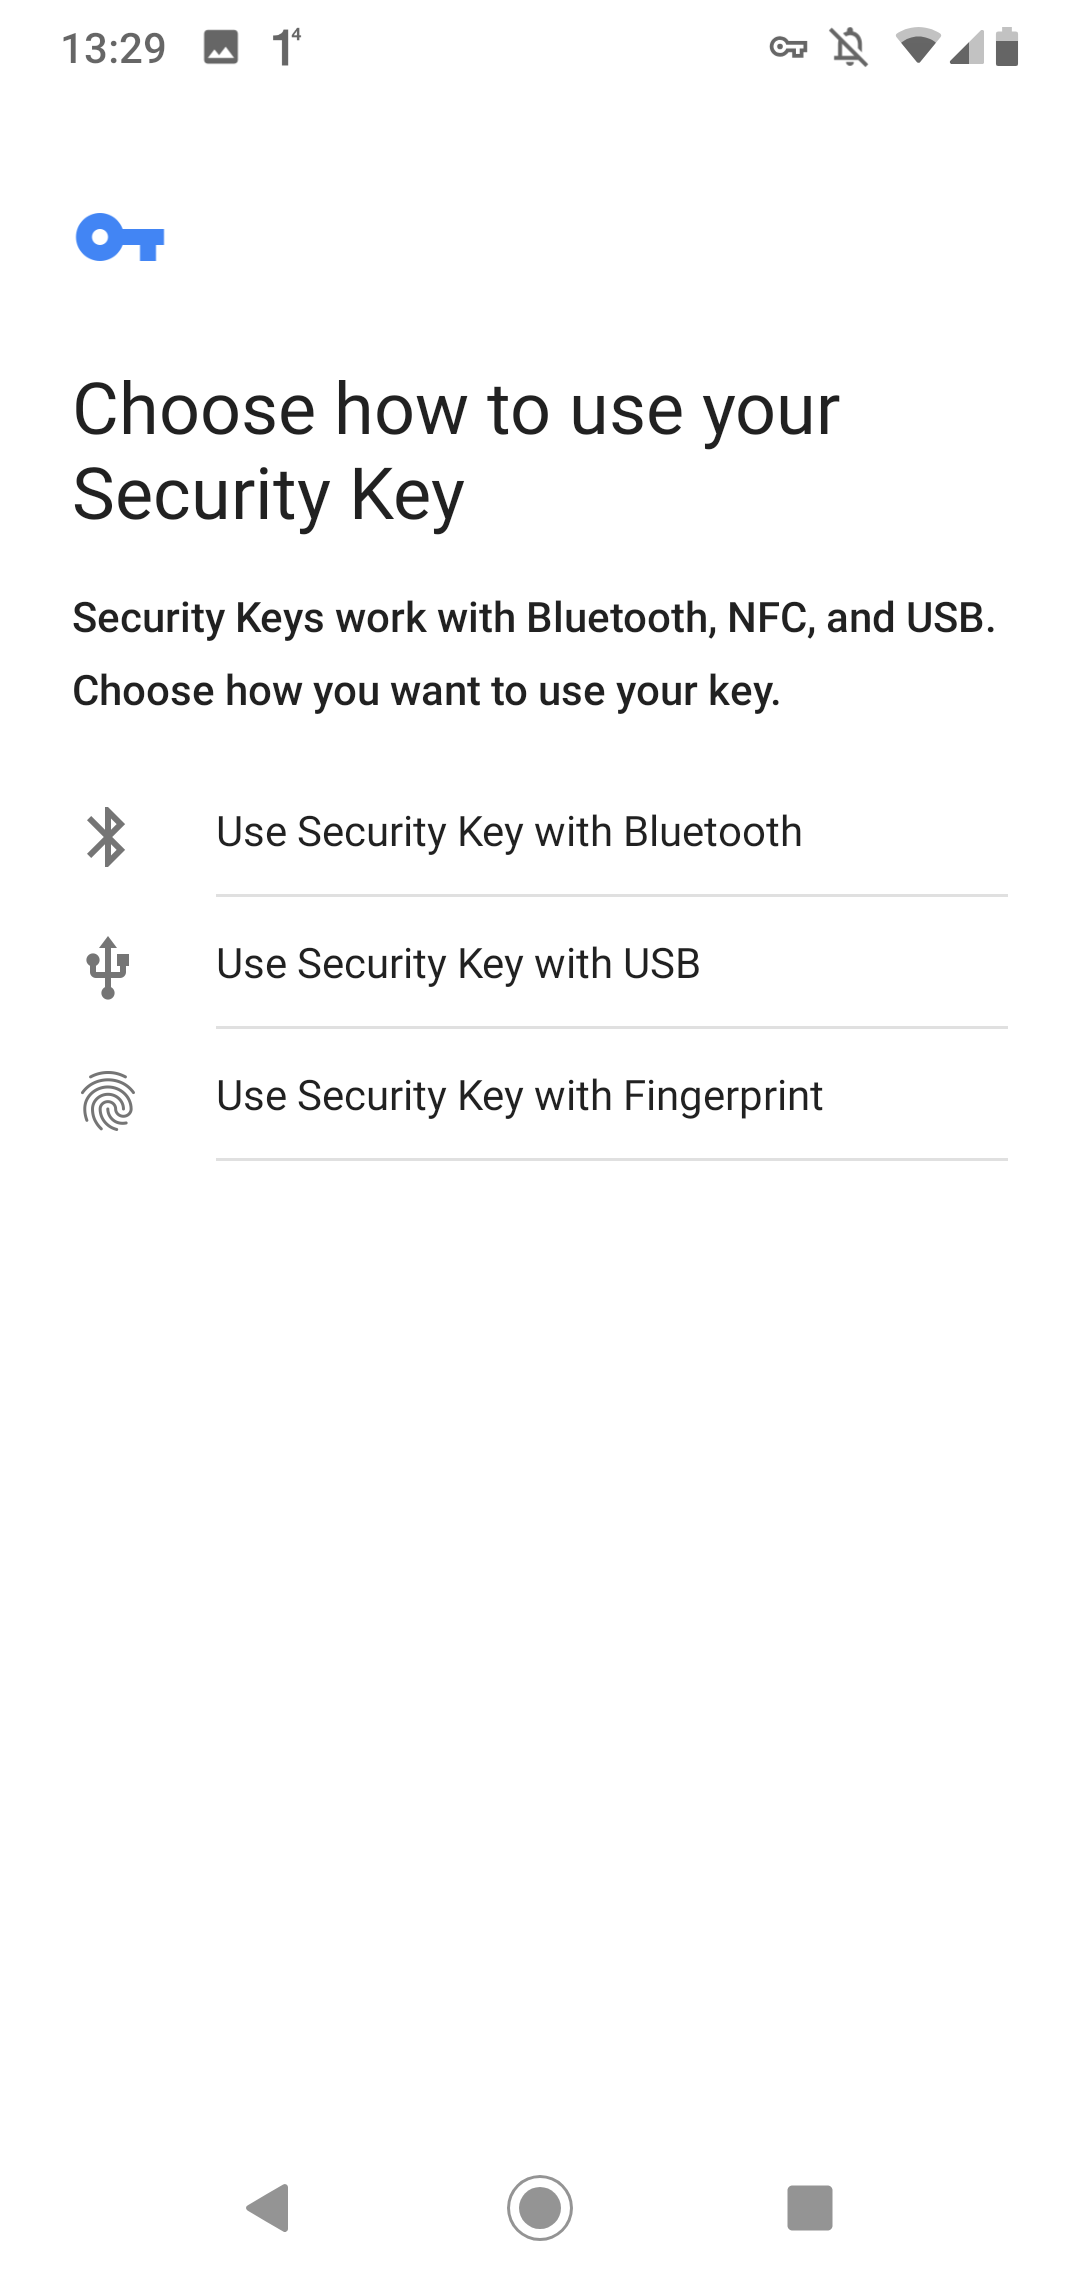
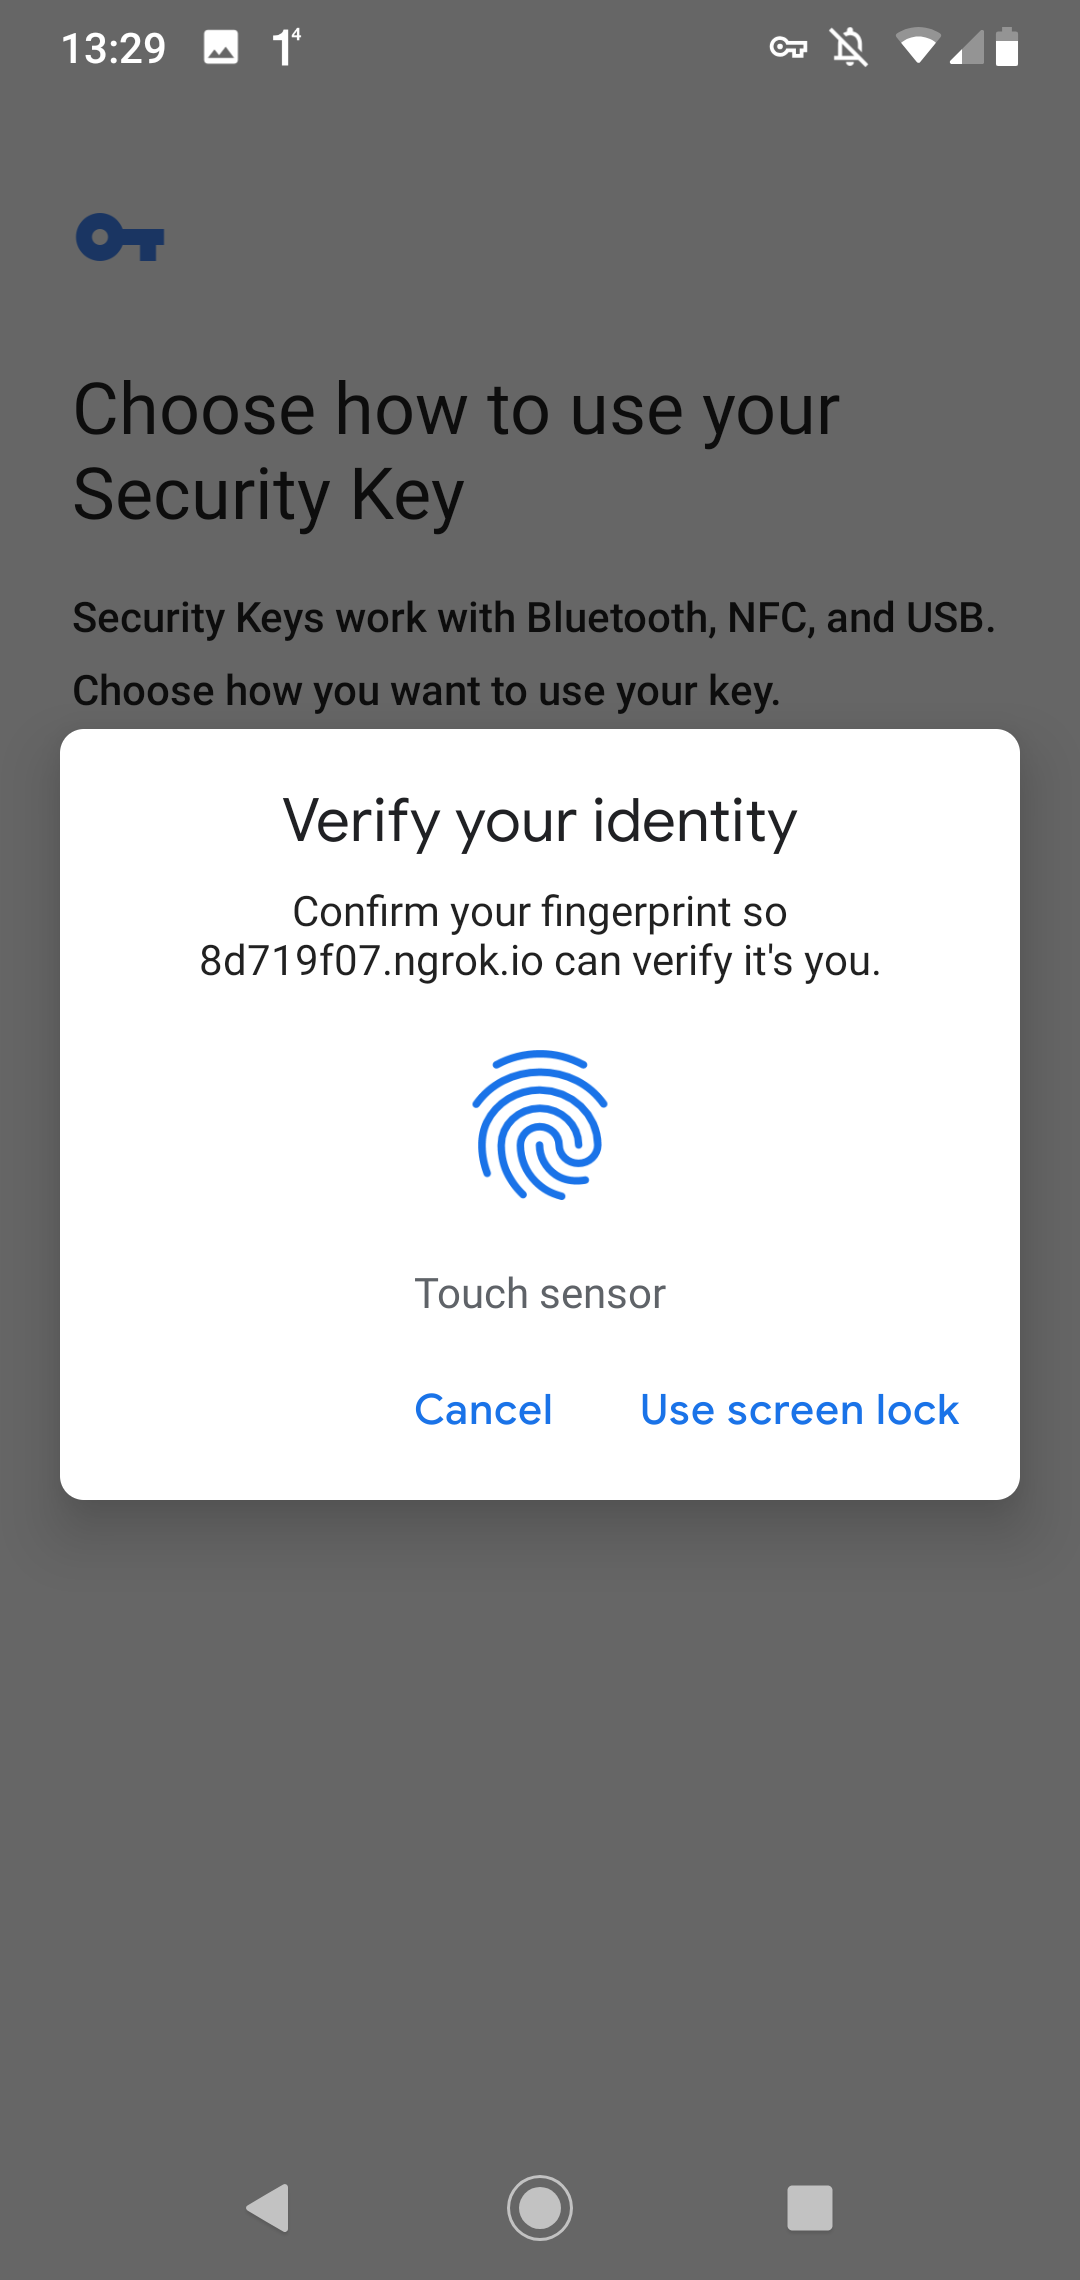
To log in, the user enters their username, and the browser presents a system dialog.
On an Android device, the user experience looks a bit different.
Registration
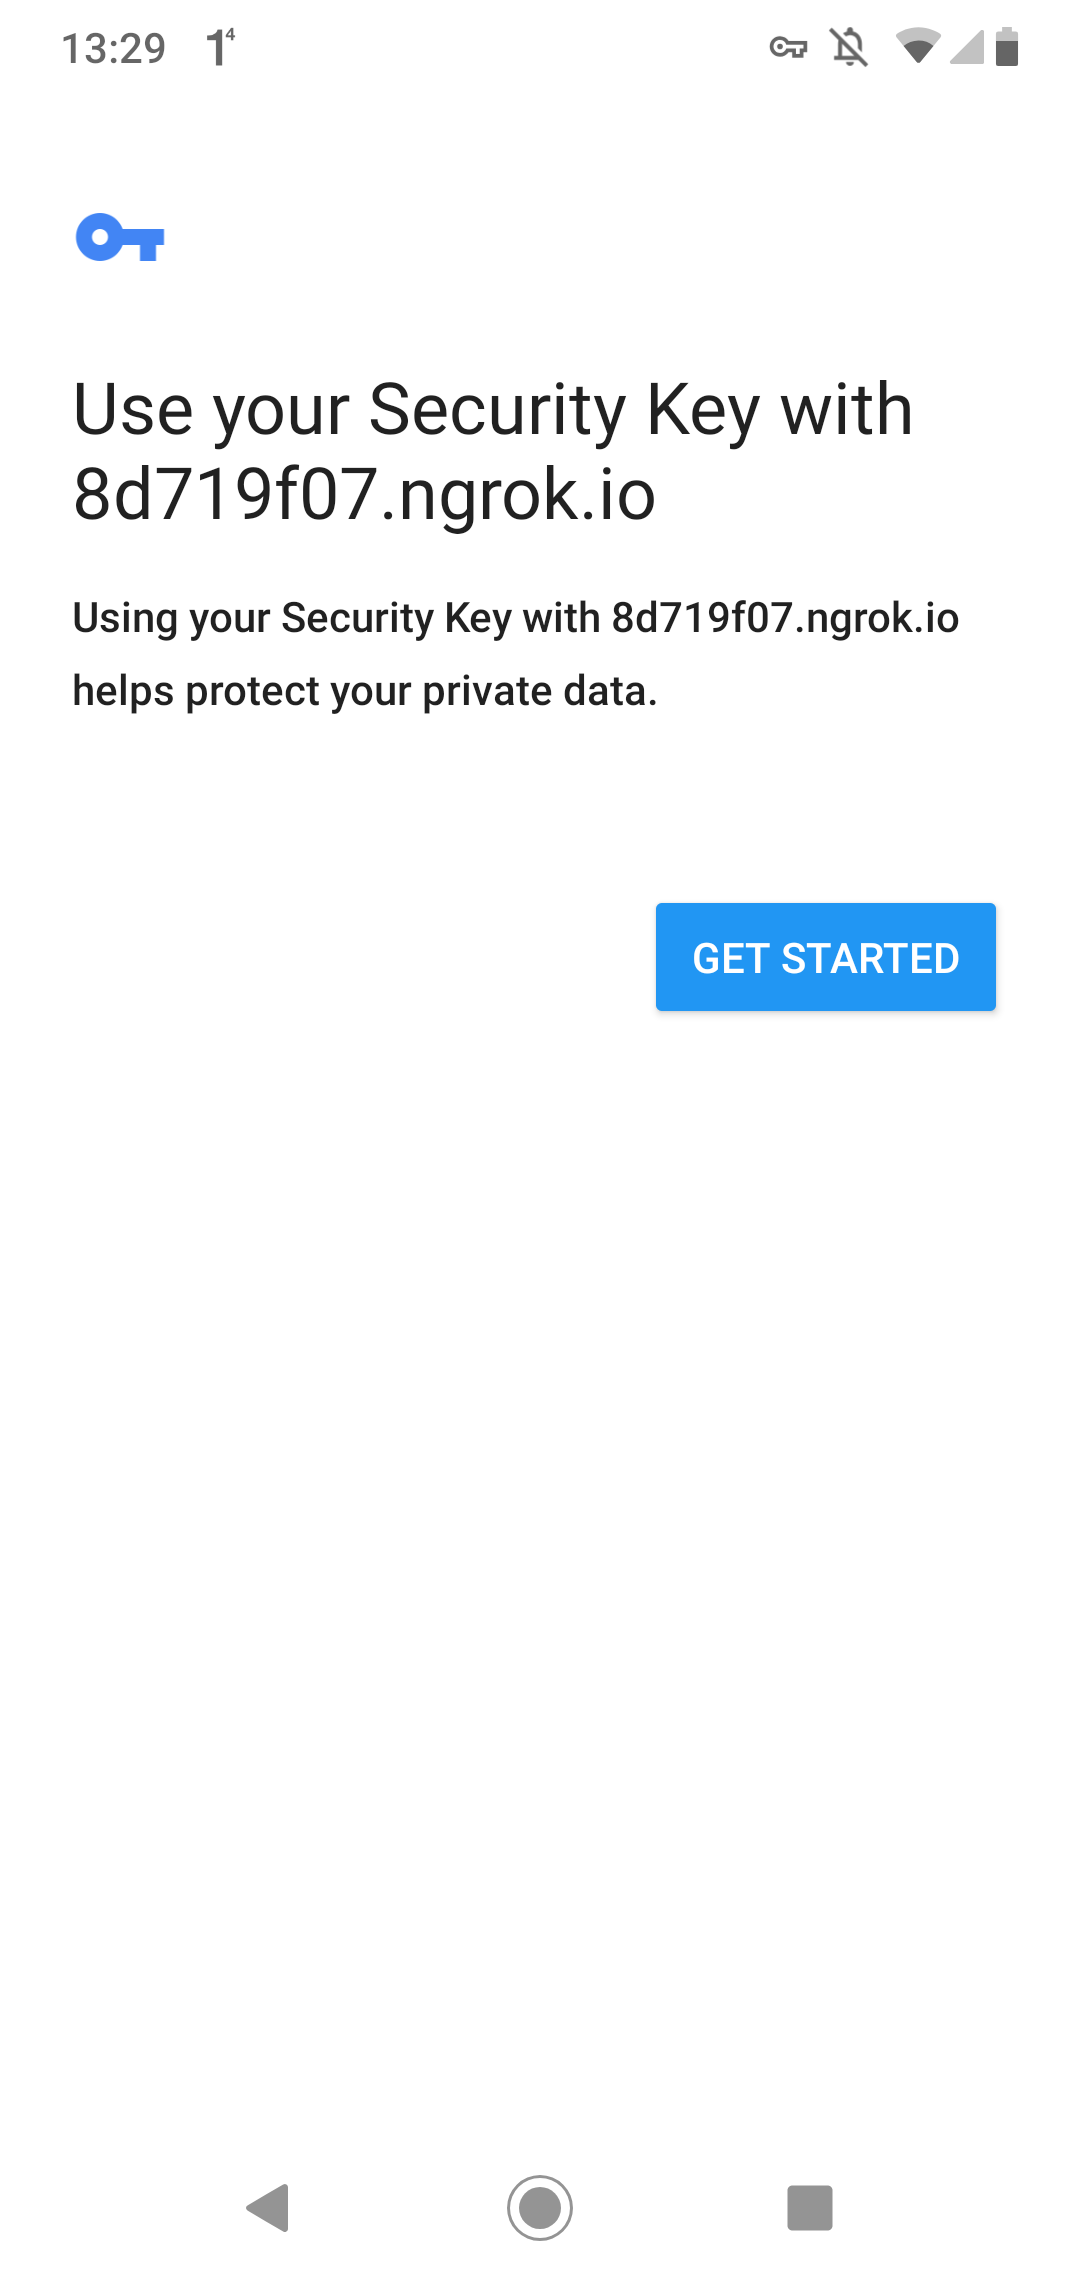
Login
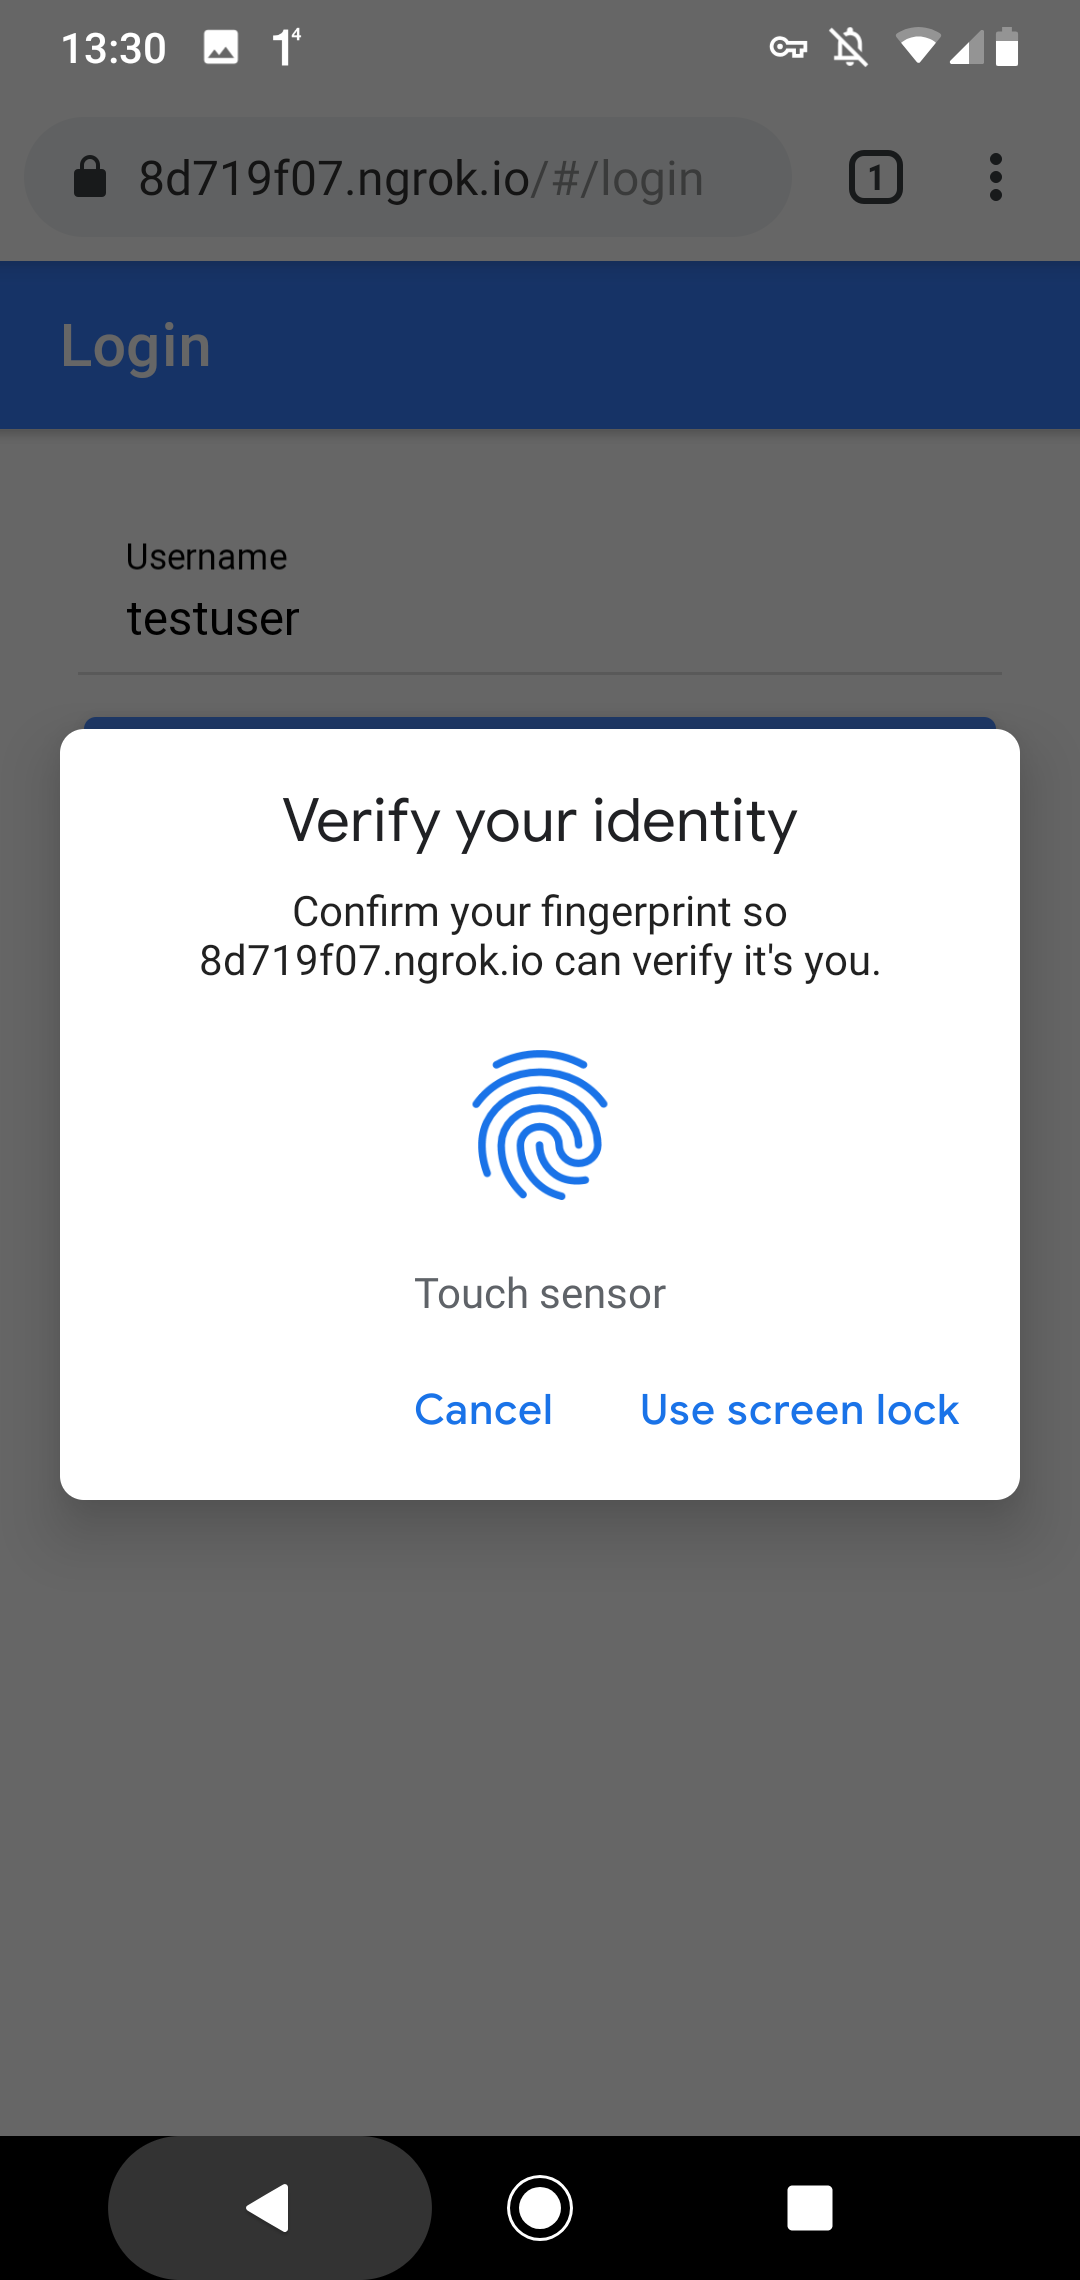
Note that WebAuthn has nothing to do with biometric authentication. Android 7+ devices can play the role of a security key thanks to the TPM (Trusted Platform Module) chip built into the devices. To allow WebAuthn access to this chip, the user needs to give permission. In my case, with the fingerprint, it could also be a PIN or a password.
Source Code 
The source code for the demo application is stored in this GitHub repository: https://github.com/ralscha/webauthn-demo
The Spring Boot application is located in the server folder.
You can start it inside an IDE or from a shell
with mvnw spring-boot:run. The server listens on port 8080.
You find the web application in the client folder, and you start it with
ionic serve. The application is served from port 8100.
Because the two applications run on different ports, you have to either enable CORS (Cross-Origin Resource Sharing) in
the Spring Boot application or create a proxy file in the client application that instructs ionic serve (and ng serve)
to redirect requests. I implemented the latter approach for this application and wrote this proxy file.
If you use a proxy file, you must enable it in the angular.json file.
Add the proxyConfig option to the serve command.
        "serve": {
          "builder": "@angular/build:dev-server",
          "options": {
            "proxyConfig": "proxy.conf.json",
            "buildTarget": "app:build"
          },
Libraries 
To handle the FIDO2/WebAuthn requests and create the correct responses on the server, I use the Yubico java-webauthn-server library. You add it with the following coordinates to your Java project.
    <dependency>
      <groupId>com.yubico</groupId>
      <artifactId>webauthn-server-core</artifactId>
      <version>2.7.0</version>
    </dependency>
    <dependency>
      <groupId>com.yubico</groupId>
      <artifactId>yubico-util</artifactId>
      <version>2.7.0</version>
    </dependency>
On the client-side, beyond the standard Ionic and Angular libraries, we don't need any additional libraries.
Implementation details 
The Yubico java-webauthn-server library requires implementing the CredentialRepository interface.
You find my implementation here: JooqCredentialRepository.java
java-webauthn-server uses this implementation to read the database's credentials and store new credentials into the database.
The library also needs an instance of RelyingParty. The demo application creates the instance as a Spring-managed bean.
The two important properties we have to set are RelyingPartyIdentity.id and RelyingParty.origins.
The id must be set to the origin of your web application URL. If you test this with https://www.example.com, id must be set to the value www.example.com. The id is checked on the client, and if
this value does not match the URL of your application, the navigator.credentials.create() and navigator.credentials.get() methods fail with an error.
The second important property, origins, must contain the full URL of our application. With the URL above, it has to be set to https://www.example.com. The origins property is checked on the server. The java-webauthn-server library throws an exception if the web application URL is not listed in the origins collection.
  @Bean
  public RelyingParty relyingParty(JooqCredentialRepository credentialRepository,
      AppProperties appProperties) {

    RelyingPartyIdentity rpIdentity = RelyingPartyIdentity.builder()
        .id(appProperties.getRelyingPartyId()).name(appProperties.getRelyingPartyName())
        .build();

    return RelyingParty.builder().identity(rpIdentity)
        .credentialRepository(credentialRepository)
        .origins(appProperties.getRelyingPartyOrigins()).build();
  }
I externalized these settings with a @ConfigurationProperties annotated POJO, AppProperties.java, so I can easily change the values in the application.properties file or from the command line.
For testing on localhost, I use these values.
app.relying-party-id=localhost
app.relying-party-name=Example Application
app.relying-party-origins=http://localhost:8100
Entities 
The application stores the user information and credentials (public key) in a relational database. The application uses these two tables.
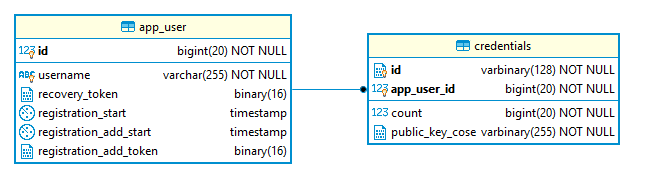
For WebAuthn, we only need the app_user.id and app_user.username fields. We will discuss the purpose of the other fields a bit later. Each user can add multiple authenticators to their account. Therefore, we have a one-to-many relation between the app_user and credentials tables.
In the credentials table, we store the credential ID, which is an authenticator-generated identification, the public key, and a signature counter to thwart replay attacks.
The application uses jOOQ and Flyway to access and create the tables. If you are interested in this setup, check out my blog post about this topic.
Registration 
Overview of the registration process.
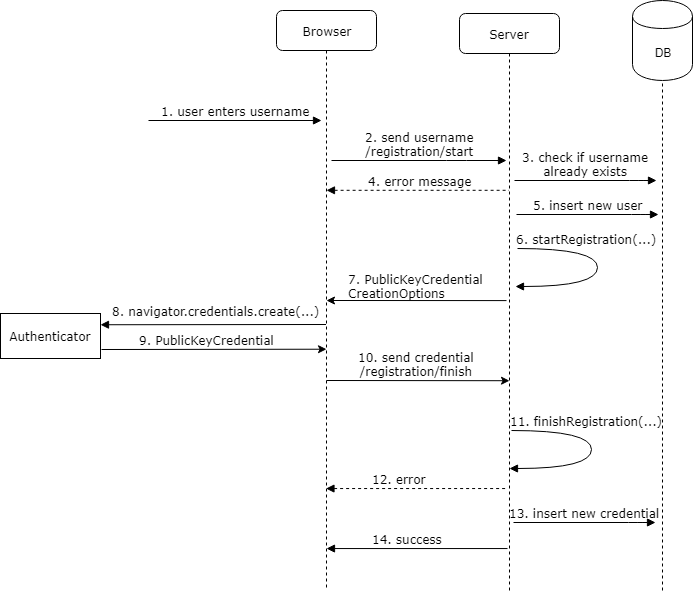
Registration requires two round trips from the client to the server.
First, the user enters their username (1), and the client sends a POST request
to /registration/start (2). The server checks if the username is already taken (3) and sends back an error message if that is the case (4).
Otherwise, the application inserts the user into the app_user table (5).
  @PostMapping("/registration/start")
  public RegistrationStartResponse registrationStart(
      @RequestParam(name = "username", required = false) String username,
      @RequestParam(name = "recoveryToken", required = false) String recoveryToken) {

    long userId = -1;
    String name = null;
    Mode mode = null;

    if (username != null && !username.isEmpty()) {
      // cancel if the user is already registered
      int count = this.dsl.selectCount().from(APP_USER)
          .where(APP_USER.USERNAME.equalIgnoreCase(username)).fetchOne(0, int.class);
      if (count > 0) {
        return new RegistrationStartResponse(
            RegistrationStartResponse.Status.USERNAME_TAKEN);
      }

      userId = this.dsl
          .insertInto(APP_USER, APP_USER.USERNAME, APP_USER.REGISTRATION_START)
          .values(username, LocalDateTime.now()).returning(APP_USER.ID).fetchOne()
          .getId();
      name = username;
      mode = Mode.NEW;
    }
Next, the handler calls the startRegistration() method from the RelyingParty singleton, which we created earlier.
This call requires a UserIdentity instance, which we build with the username and user ID. The method returns a PublicKeyCredentialCreationOptions instance with a random challenge. Our endpoint sends this object back to the client (7).
      PublicKeyCredentialCreationOptions credentialCreation = this.relyingParty
          .startRegistration(StartRegistrationOptions.builder()
              .user(UserIdentity.builder().name(name).displayName(name).id(webAuthnId)
                  .build())
              .authenticatorSelection(AuthenticatorSelectionCriteria.builder()
                  .residentKey(ResidentKeyRequirement.REQUIRED)
                  .userVerification(UserVerificationRequirement.PREFERRED).build())
              .build());

      byte[] registrationId = new byte[16];
      this.random.nextBytes(registrationId);
      RegistrationStartResponse startResponse = new RegistrationStartResponse(mode,
          Base64.getEncoder().encodeToString(registrationId), credentialCreation);

      this.registrationCache.put(startResponse.getRegistrationId(), startResponse);
      this.registrationUserIdCache.put(startResponse.getRegistrationId(), userId);

      return startResponse;
We must store the PublicKeyCredentialCreationOptions instance in a cache because, in step 11, we need to pass this object
to the finishRegistration() method as an argument. I run only a single instance of this application, so I store it in a
Caffeine in-memory cache.
  private final Cache<String, RegistrationStartResponse> registrationCache;
  private final Cache<String, Long> registrationUserIdCache;
This does not work if you run multiple instances of your server application. For this scenario, you have to store the information in a database or in an in-memory clustered cache like Hazelcast.
The client receives a JSON response. First, it creates the PublicKeyCredentialCreationOptions from this JSON response by calling the static method PublicKeyCredential.parseCreationOptionsFromJSON().
This object is then passed to the navigator.credentials.create() (8) method as value of the publicKey property.
  private async createCredentials(response: RegistrationStartResponse): Promise<void> {
    const publicKey = PublicKeyCredential.parseCreationOptionsFromJSON(response.publicKeyCredentialCreationOptions);
    const cred = (await navigator.credentials.create({publicKey})) as PublicKeyCredential;
    const credential = cred.toJSON();

    const credentialResponse = {
      registrationId: response.registrationId,
      credential
    };
The browser interacts with the security key and gets back a PublicKeyCredential object (9). This object contains an AuthenticatorAttestationResponse object with the public key and the signed challenge.
The web application converts this object into a JSON with toJSON() and sends it with a POST request to the /registration/finish endpoint (10).
    this.httpClient.post('registration/finish', credentialResponse, {responseType: 'text'})
      .subscribe({
        next: recoveryToken => {
          if (recoveryToken) {
            this.recoveryToken = recoveryToken;
          } else {
            this.messagesService.showErrorToast('Registration failed');
          }
        },
        error: () => {
          loading.dismiss();
          this.messagesService.showErrorToast('Registration failed');
        },
        complete: () => loading.dismiss()
      });
The finish endpoint retrieves the response object of the first request from the Caffeine cache, calls the finishRegistration() method, and passes the PublicKeyCredential response from the client (9)
and the PublicKeyCredentialCreationOptions from step 7 as the arguments.
  @PostMapping("/registration/finish")
  public String registrationFinish(@RequestBody RegistrationFinishRequest finishRequest) {

    RegistrationStartResponse startResponse = this.registrationCache
        .getIfPresent(finishRequest.getRegistrationId());
    this.registrationCache.invalidate(finishRequest.getRegistrationId());
    Long userId = this.registrationUserIdCache
        .getIfPresent(finishRequest.getRegistrationId());
    this.registrationUserIdCache.invalidate(finishRequest.getRegistrationId());

    if (startResponse != null) {
      try {
        RegistrationResult registrationResult = this.relyingParty
            .finishRegistration(FinishRegistrationOptions.builder()
                .request(startResponse.getPublicKeyCredentialCreationOptions())
                .response(finishRequest.getCredential()).build());
The finishRegistration() method validates the signature and public key and throws a RegistrationFailedException if that fails.
If the call succeeds, the application stores the new credential into the credentials table (13) (addCredential()) and sends back a success message to the server.
        UserIdentity userIdentity = startResponse.getPublicKeyCredentialCreationOptions()
            .getUser();

        String transports = null;
        Optional<SortedSet<AuthenticatorTransport>> transportOptional = registrationResult
            .getKeyId().getTransports();
        if (transportOptional.isPresent()) {
          transports = "";
          for (AuthenticatorTransport at : transportOptional.get()) {
            if (transports.length() > 0) {
              transports += ",";
            }
            transports += at.getId();
          }
        }
        this.credentialRepository.addCredential(userId, userIdentity.getId().getBytes(),
            registrationResult.getKeyId().getId().getBytes(),
            registrationResult.getPublicKeyCose().getBytes(), transports,
            finishRequest.getCredential().getResponse().getParsedAuthenticatorData()
                .getSignatureCounter());

        if (startResponse.getMode() == Mode.NEW
            || startResponse.getMode() == Mode.RECOVERY) {
          byte[] recoveryToken = new byte[16];
          this.random.nextBytes(recoveryToken);

          this.dsl.update(APP_USER).set(APP_USER.REGISTRATION_START, (LocalDateTime) null)
              .set(APP_USER.RECOVERY_TOKEN, recoveryToken).where(APP_USER.ID.eq(userId))
              .execute();

          return Base58.encode(recoveryToken);
        }

        return "OK";
There is one issue we have to solve.
We see that the registration process requires two round trips from the client to the server (steps 2 and 10), and we insert the user during the first request (step 5). The application does this to get a unique key for the user, but at this point, we don't know if the client successfully finishes the registration process. The client may never send the second POST request (step 10). Maybe the client crashes, or it loses the network connection.
If that happens, we end up with a user in the database that is not correctly set up.
For this purpose, I added the field app_user.registration_start. When the application inserts the user,
it sets this field to the current date and time, and in the second POST request (10),
when the registration has been successfully validated, the application sets this field to NULL.
To complete the picture, I added a cleanup job that regularly deletes users
with a registration_start value not equal to NULL and with a timestamp older than 10 minutes.
  @Scheduled(cron = "0 0 * * * *")
  public void doCleanup() {
    // Delete all users with a pending registration older than 10 minutes
    this.dsl.delete(APP_USER)
        .where(APP_USER.REGISTRATION_START.le(LocalDateTime.now().minusMinutes(10)))
        .execute();
  }
Sign-In 
The sign-in process looks very similar to the registration process.
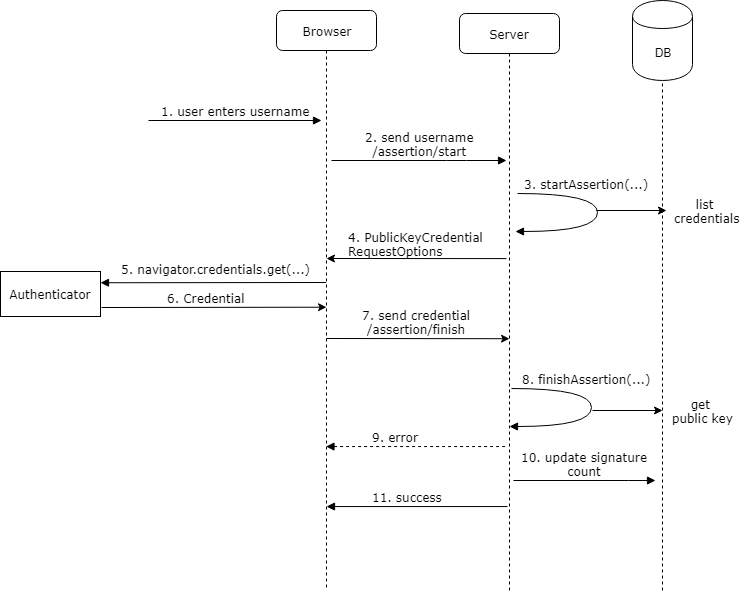
One difference is that the user does not have to enter anything. In this example we use discoverable credentials, the user can select one of the available credentials that are associated with the domain the application is running on.
The webapplication first sends a POST request to /assertion/start (2).
The server calls the startAssertion() method (3) of the RelyingParty object to create an instance
of PublicKeyCredentialRequestOptions. To create this object, the startAssertion() creates a random challenge. Like in the registration process, we have
to store this object in a cache because we need to pass it to the finishAssertion() method in step 8.
  @PostMapping("/assertion/start")
  public AssertionStartResponse start() {
    byte[] assertionId = new byte[16];
    this.random.nextBytes(assertionId);

    String assertionIdBase64 = Base64.getEncoder().encodeToString(assertionId);
    StartAssertionOptionsBuilder userVerificationBuilder = StartAssertionOptions.builder()
        .userVerification(UserVerificationRequirement.PREFERRED);
    AssertionRequest assertionRequest = this.relyingParty
        .startAssertion(userVerificationBuilder.build());

    AssertionStartResponse response = new AssertionStartResponse(assertionIdBase64,
        assertionRequest);

    this.assertionCache.put(response.getAssertionId(), response);
    return response;
  }
The server sends back the object (4) as a JSON response. The client creates the PublicKeyCredentialRequestOptions instance from this JSON with the static method PublicKeyCredential.parseRequestOptionsFromJSON() and passes it to the navigator.credentials.get() method (5).
  private async handleAssertionStart(response: AssertionStartResponse): Promise<void> {
    const publicKey = PublicKeyCredential.parseRequestOptionsFromJSON(response.publicKeyCredentialRequestOptions);
    const cred = (await navigator.credentials.get({publicKey})) as PublicKeyCredential;
    const credential = cred.toJSON();

    const assertionResponse = {
      assertionId: response.assertionId,
      credential: credential
    };
The message goes to the authenticator, which signs the random challenge from the server with
its private key and sends back a Credential object (6). Unlike the PublicKeyCredential object
we get back from the create() method, Credential only contains the challenge and signature without the public key.
The Ionic application converts this response into a JSON with toJSON() and sends it with a POST request to the /assertion/finish endpoint (7).
The server then validates and verifies the signature by reading the corresponding public key from the credentials table. If the validation succeeds, the application updates the signature counter (credentials.count) in the database. The counter serves as a protection against replay attacks.
  @PostMapping("/assertion/finish")
  public boolean finish(@RequestBody AssertionFinishRequest finishRequest,
      HttpServletRequest request, HttpServletResponse response) {

    AssertionStartResponse startResponse = this.assertionCache
        .getIfPresent(finishRequest.getAssertionId());
    this.assertionCache.invalidate(finishRequest.getAssertionId());

    try {
      AssertionResult result = this.relyingParty.finishAssertion(
          FinishAssertionOptions.builder().request(startResponse.getAssertionRequest())
              .response(finishRequest.getCredential()).build());

      if (result.isSuccess()) {
        if (!this.credentialRepository.updateSignatureCount(result)) {
          Application.log.error(
              "Failed to update signature count for user \"{}\", credential \"{}\"",
              result.getUsername(), finishRequest.getCredential().getId());
        }

        var appUserRecord = this.dsl.select(APP_USER.asterisk()).from(APP_USER)
            .innerJoin(CREDENTIALS).onKey()
            .where(CREDENTIALS.WEBAUTHN_USER_ID
                .eq(result.getCredential().getUserHandle().getBytes()))
            .fetchOne().into(APP_USER);

        if (appUserRecord != null) {
          AppUserDetail userDetail = new AppUserDetail(appUserRecord,
              new SimpleGrantedAuthority("USER"));
          AppUserAuthentication auth = new AppUserAuthentication(userDetail);
          SecurityContextHolder.getContext().setAuthentication(auth);
          this.securityContextRepository.saveContext(SecurityContextHolder.getContext(),
              request, response);
          return true;
        }
      }
    }
    catch (AssertionFailedException e) {
      Application.log.error("Assertion failed", e);
    }

    return false;
  }
Spring Security 
In the /assertion/finish handler, we also see how the demo application interacts with Spring Security to log in the user after the signature has been successfully validated. For this purpose, the application creates an instance of AppUserDetail and an instance of AppUserAuthentication and puts them into the thread-local variable managed by SecurityContextHolder.
          AppUserDetail userDetail = new AppUserDetail(appUserRecord,
              new SimpleGrantedAuthority("USER"));
          AppUserAuthentication auth = new AppUserAuthentication(userDetail);
          SecurityContextHolder.getContext().setAuthentication(auth);
          this.securityContextRepository.saveContext(SecurityContextHolder.getContext(),
              request, response);
To complete the Spring Security integration, we first disable the authentication part of Spring Security because the Authentication object we put into the SecurityContextHolder is already authenticated.
Disabling the authentication part of Spring Security is easy by providing an AuthenticationManager bean that does nothing.
@Configuration
public class SecurityConfig {

  @Bean
  AuthenticationManager authenticationManager() {
    return authentication -> {
      throw new AuthenticationServiceException("Cannot authenticate " + authentication);
    };
  }
The application uses a session cookie (JSESSIONID) to store the login information. You could certainly also use a token like JWT instead of cookies. The architecture of this part is not affected by WebAuthn, and you can use any technology you have already used before.
The configuration tells the /logout endpoint to return a status
code instead of the default redirect response and delete the session cookie. The /registration/* and
/assertion/* endpoints we need for registration and sign-in are public, and all other
endpoints are protected. When somebody calls a protected endpoint, the application sends back the HTTP status code 401 instead of the default redirect response.
  @Bean
  public WebSecurityCustomizer webSecurityCustomizer() {
    return web -> web.ignoring().requestMatchers("/", "/assets/**", "/svg/**", "/*.br",
        "/*.gz", "/*.html", "/*.js", "/*.css");
  }

  @Bean
  public SecurityFilterChain filterChain(HttpSecurity http) throws Exception {
    http.csrf(CsrfConfigurer::disable)
        .securityContext(securityContext -> securityContext
            .securityContextRepository(delegatingSecurityContextRepository()))
        .logout(customizer -> {
          customizer.logoutSuccessHandler(new HttpStatusReturningLogoutSuccessHandler());
          customizer.deleteCookies("JSESSIONID");
        }).authorizeHttpRequests(customizer -> {
          customizer.requestMatchers("/registration/*", "/assertion/*").permitAll();
          customizer.anyRequest().authenticated();
        }).exceptionHandling(customizer -> customizer
            .authenticationEntryPoint(new HttpStatusEntryPoint(HttpStatus.UNAUTHORIZED)));
    return http.build();
  }
Recovery 
I've implemented a very trivial recovery workflow. After the registration request has been successfully validated, the server creates a 16-byte random byte array and stores that in the field app_user.recovery. The server then converts this into a Base58 encoded string and sends it back as a response to a successful registration process.
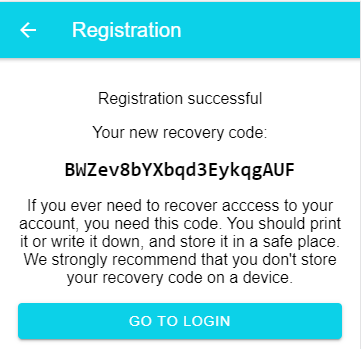
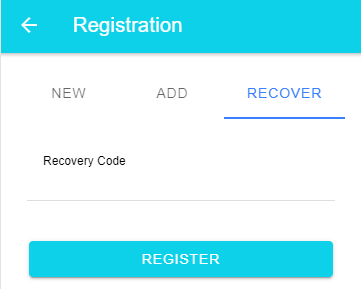
When the user loses their authenticator, they open the registration recovery menu and type in this code. The server then deletes all stored credentials and starts a new registration process. During this workflow, no new user will be created. Instead, the application associates the newly registered authenticator with the existing user.
Add additional authenticators 
This system supports multiple authenticators for one user account. This is also a way for the user to prevent losing access to their account if they set up multiple authenticators. If they lose one security key, they can still log in with another.
I came up with this solution. Like the recovery process, a user can request a special token to add more authenticators to their account. I added a function that generates a token on the server in the secure area. The token is stored in the database in the column app_user.registration_add_token, and the creation timestamp is stored in the column app_user.registration_add_start. I needed a timestamp because I wanted to limit the token's lifespan to 10 minutes. The server sends back the token, and the web application shows it to the user.
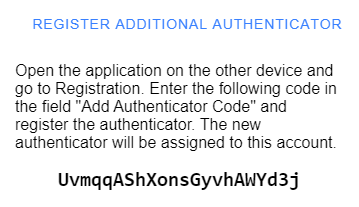
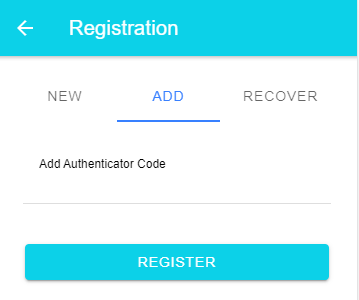
On the other device, the user opens the web application, navigates to the register add authenticator page, enters this code, and the standard registration workflow starts.
Like in the recovery workflow, this does not create a new user; instead, it associates the new authenticator with the existing account, but it does not delete the other credentials as the recovery process does.
Conclusion 
You've reached the end of this blog post. I hope you find this information helpful.
The source code for the demo application is hosted on GitHub:
https://github.com/ralscha/webauthn-demo/
If you find bugs or have a question, open an issue or send me a message.