Google Fonts is a popular collection of fonts you can use on your web page and web application. The fonts are free of charge and are straightforward to integrate. In this tutorial, we are going to look at two ways to integrate Google Fonts into an Ionic application.
Although I use Ionic here as an example, the framework does not matter. The integration works with any client-side JavaScript framework. You only have to adjust the style rules and paths according to your project setup.
Link To Google Fonts 
The first example shows you how to integrate the fonts with a link to the Google Fonts server.
I'm starting with a blank new Ionic application.
ionic start myapp blank
Go to the Google Fonts website and select the font(s) you want to use in your project.
For this example, I choose "Indie Flower". The website gives you code and a description of how to integrate the selected fonts.
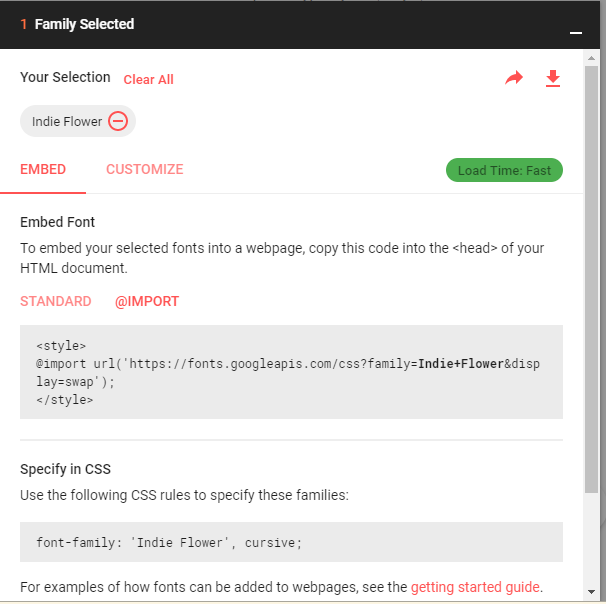
Then, I copy the @import... statement and paste it into the src/styles.scss file.
@import url('https://fonts.googleapis.com/css?family=Indie+Flower&display=swap');
Alternatively, you could insert the import into the src/app/app.scss or src/variables.scss file. It does not matter into which file you copy the code because the Angular CLI treats these three SCSS files the same and concatenates them together during the build process.
With the @import in place, you can now use the font like any other font. For this example, I want to change the font for the whole application, so I assign a new value to the --ion-font-family CSS custom property inside the :root selector of the file src/variables.scss.
:root {

  --ion-font-family: 'Indie Flower', cursive;

  /** primary **/
  ...
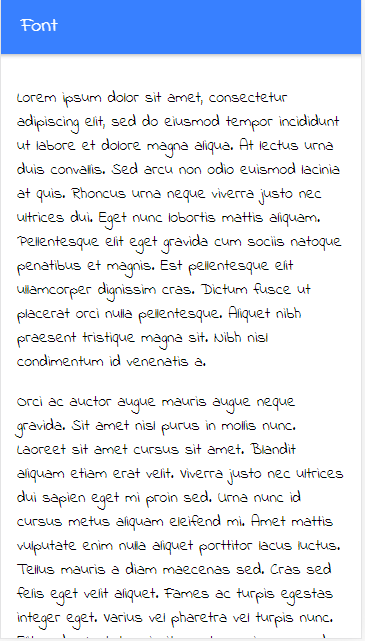
The font of the whole application is now set to "Indie Flower".
Download fonts and serve locally 
Linking to the Google Fonts server works fine but has the slight downside that your application has a dependency on an external service. Not a hard dependency because your application would still work if the user's browser can't download the font, but the application would look different.
Another issue is that every user of your application sends a request to Google to fetch the fonts if they are not already cached in the browser cache.
This might not be a big deal if your application is depending on many different third-party services. However, if this bothers you, and you want to minimize the dependencies in your project, you can use the approach I demonstrate in this section and download the fonts into your project. The fonts are going to be served from your web server, and the users no longer have to fetch the files from a Google server.
We are starting this process by installing a tool called goog-webfont-dl that takes care of downloading fonts from Google Fonts.
npm install goog-webfont-dl -g
For this example, I want to use two fonts, "Open Sans" and "Fresca". So to download them, I open a shell or command prompt and change into the root of the project and then issue the following two commands:
goog-webfont-dl -o src/font-opensans.css -p assets/OpenSans -d src/assets/OpenSans -a "Open Sans"
goog-webfont-dl -o src/font-fresca.css -p assets/Fresca -d src/assets/Fresca -a Fresca
The tool not only downloads the font files; it also creates a corresponding CSS file.
The -o option specifies the path to this file.
-d specifies the directory into which the tool downloads the font files. The tool creates the folder if it does not exist.
Because the paths inside the CSS file need to match the location of the font files, we need to specify the -p option, which is the path prefix used in the CSS rules.
With the -a option, we instruct the tool to download all available formats (TTF, EOT, WOFF, WOFF2, SVG).
Instead of downloading all formats, you can download only specific formats, and you can also specify the styles (for example, 400, 500, 700, 900). Visit the project page of the tool for more information: https://github.com/jrnewell/goog-webfont-dl#readme
Next, we import the two generated CSS files by adding the following two lines into src/styles.scss
@import 'font-opensans.css';
@import 'font-fresca.css';
Then I want to make "Open Sans" the default font for the whole application and set the CSS custom property --ion-font-family in src/variables.scss
:root {
  --ion-font-family: 'Open Sans', sans-serif;
}
The other font "Fresca" I want to use only for one paragraph on the home page. For that, I create a CSS class rule.
.fresca {
  font-family: 'Fresca', sans-serif;
}
and assign the class to an HTML element
  <p class="fresca">
    Orci ac auctor augue mauris augue neque gravida. Sit amet nisl purus in mollis nunc. Laoreet sit amet cursus sit
This setup gives me the following result.
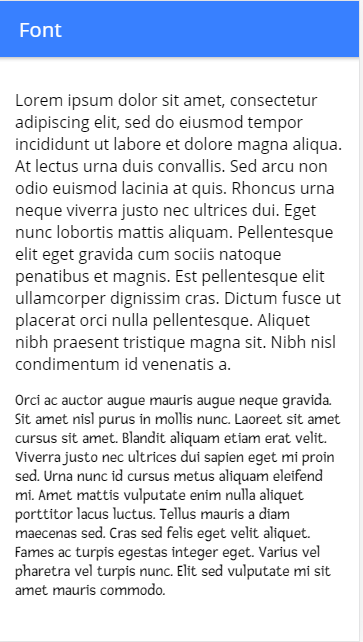
All your fonts are now served from your web server, and your users no longer have to send requests to a Google server.
Note that this approach also has a downside. If you create multiple web applications with the same hosted fonts and a user visits all of them, his browser has to download the fonts once for each application. Whereas with the Google Font link, the browser has to download the font only once even when the font is used on multiple websites.
postinstall 
A Google Font occupies some space and increases the size of the project source code repository. Maybe not a big deal if you only download one font. The files that comprise the "Open Sans" font, I use in the previous section occupy about 1MB of space.
If you want to keep your source code repository as small as possible and don't want to commit binary files into it, you can use the following approach.
We are going to leverage the npm pre-/post-scripts infrastructure. This allows us to run tasks before and after a particular script. For instance, if you run npm run build npm first looks for a script with the name "prebuild" and executes that first, then it runs "build" and if that script ended successfully it looks for a task with the name "postbuild". A convenient tool if you use the scripts infrastructure of npm a lot.
While install is not a task listed in the scripts section of your package.json npm still looks and runs the script with the name "postinstall" if you run npm install.
Instead of installing the goog-webfont-dl tool globally, we install it as a development dependency into our project.
npm install -D goog-webfont-dl
This way, we ensure that the tool is available when we run npm install.
Next, we add three new scripts to the scripts section of package.json. Two scripts for downloading the fonts and the "postinstall" script that calls the download scripts.
    "dl-font-fresca": "goog-webfont-dl -o src/font-fresca.css -p assets/Fresca -d src/assets/Fresca -a Fresca",
    "dl-font-opensans": "goog-webfont-dl -o src/font-opensans.css -p assets/OpenSans -d src/assets/OpenSans -a \"Open Sans\"",
    "ng": "ng",
    "postinstall": "npm run dl-font-opensans && npm run dl-font-fresca",
Whenever you call npm install, npm downloads the fonts and creates the CSS files. You no longer need to commit the src/font-opensans.css, src/font-fresca.css, and the font files in assets into your source code management system. If you use Git, you can add them to a .gitignore file.
Your repository is now more lightweight, and when new team members start working with the project, all they have to do is install Node.js, clone the project, and run npm install.
This concludes this tutorial about integrating Google Fonts into your project.
You find the source code for the "postinstall" example on GitHub:
https://github.com/ralscha/blog2019/tree/master/googlefont