In this blog post, I present three different approaches for incorporating speech recognition into a web app, specifically an Ionic app.
As an example, I created a simple movie search database with an Ionic front end and a Java/Spring Boot back end. The user can search for movie titles by speaking into the microphone, which a speech recognition library will transcribe into text. The web app then sends a search request to the Spring Boot application, where it searches for matching movies stored in a MongoDB database.
Test data 
Before I started with the app, I needed some data about movies to insert into the database. The Internet Movie Database (IMDb) provides a set of raw data files for free. You can find all the information about the data files here: https://developer.imdb.com/ Note that these data files are only available for personal and non-commercial use.
To download and import the data files, I wrote a Java application. The program parses the files with the Univocity library (the data in the files are stored as tab-separated values) and then inserts the data into a MongoDB database.
You can find the complete code of the importer on GitHub: src/main/java/ch/rasc/speechsearch/ImportImdbData.java
Client 
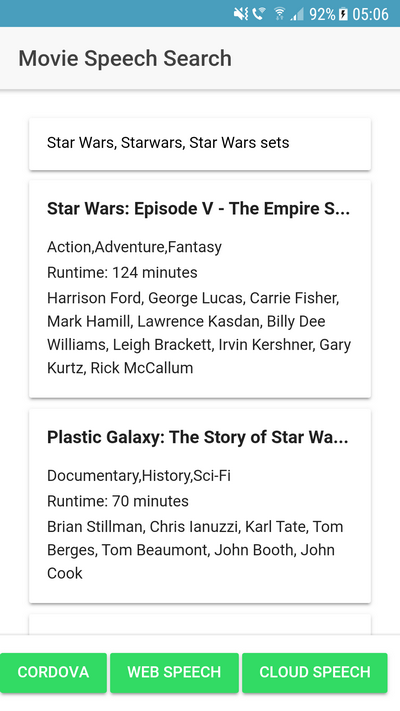
The client is written with the Ionic framework and based on the blank starter template. The app displays the movies as a list of cards. At the bottom, you will find three buttons to start the speech search with the three mechanisms I show you in this blog post.
Server 
The server is written in Java with Spring and Spring Boot. The search controller is a RestController that handles the search requests from the client.
  @GetMapping("/search")
  public List<Movie> search(@RequestParam("term") List<String> searchTerms) {

    Set<Movie> results = new HashSet<>();
    MongoCollection<Document> moviesCollection = this.mongoDatabase
        .getCollection("movies");

    MongoCollection<Document> actorCollection = this.mongoDatabase
        .getCollection("actors");

    List<Bson> orQueries = new ArrayList<>();
    for (String term : searchTerms) {
      orQueries.add(Filters.regex("primaryTitle", term + ".*", "i"));
    }

    try (MongoCursor<Document> cursor = moviesCollection.find(Filters.or(orQueries))
        .limit(20).iterator()) {
      while (cursor.hasNext()) {
        Document doc = cursor.next();
        Movie movie = new Movie();
        movie.id = doc.getString("_id");
        movie.title = doc.getString("primaryTitle");
        movie.adult = doc.getBoolean("adultMovie", false);
        movie.genres = doc.getString("genres");
        movie.runtimeMinutes = doc.getInteger("runtimeMinutes", 0);
        movie.actors = getActors(actorCollection, (List<String>) doc.get("actors"));
        results.add(movie);
      }
    }

    return results.stream().collect(Collectors.toList());
  }
The search method takes a list of search terms and starts a regular expression search over the movie title in the movies collection. The application limits the results to 20 entries and uses a cursor to iterate over the returned entries. It then converts the matching documents to POJOs (Movie) and returns them in a list to the client.
1. Cordova speech recognition plugin 
When creating a Cordova application with Ionic, if the browser doesn't support the required functionality, you'll need to look for a native plugin. Fortunately, there is a plugin that supports speech recognition: https://github.com/pbakondy/cordova-plugin-speechrecognition
ionic cordova plugin add cordova-plugin-speechrecognition
The method that handles the search looks a bit complicated because the API uses callbacks instead of Promises.
  searchCordova(): void {
    // @ts-ignore
    window.plugins.speechRecognition.hasPermission(permission => {

      if (!permission) {
        // @ts-ignore
        window.plugins.speechRecognition.requestPermission(() => {
          // @ts-ignore
          window.plugins.speechRecognition.startListening(terms => {
            if (terms && terms.length > 0) {
              this.movieSearch([terms[0]]);
            } else {
              this.movieSearch(terms);
            }
          });
        });
      } else {
        // @ts-ignore
        window.plugins.speechRecognition.startListening(terms => {
          if (terms && terms.length > 0) {
            this.movieSearch([terms[0]]);
          } else {
            this.movieSearch(terms);
          }
        });
      }
    });
  }
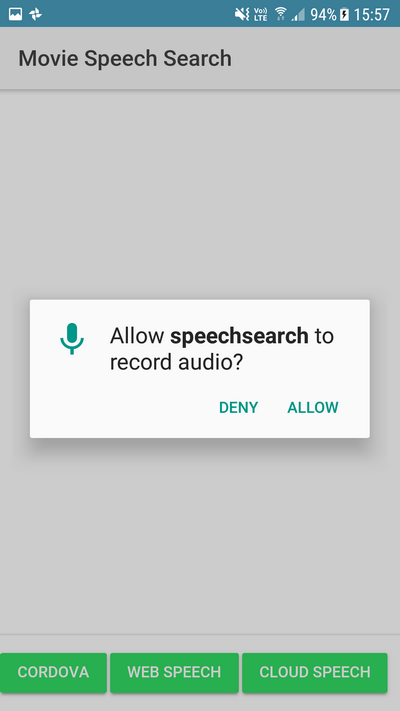
The method first checks if the app has permission to access the microphone of the device. If not, it requests permission. The device presents a dialog to the user that asks for permission.
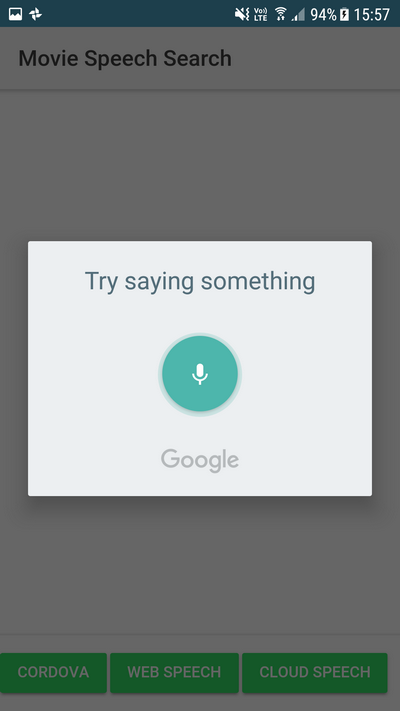
Then the method calls the startListening method of the plugin. This method starts listening, allowing the user to speak their search request into the microphone. The speech plugin automatically transcribes the spoken words into text and returns that to the application.
On Android, this functionality requires Internet access because the plugin sends the recorded speech sample to Google's servers for transcription. The documentation indicates that iOS devices follow a similar process, recording speech samples and sending them to Apple's servers for processing.
After the plugin returns an array of transcribed text strings, the searchCordova method calls movieSearch.
  async movieSearch(searchTerms: string[]): Promise<void> {
    if (searchTerms && searchTerms.length > 0) {

      const loading = await this.loadingCtrl.create({
        message: 'Please wait...'
      });
      loading.present();

      this.matches = searchTerms;
      let queryParams = '';
      searchTerms.forEach(term => {
        queryParams += `term=${term}&`;
      });
      const response = await fetch(`${environment.serverUrl}/search?${queryParams}`);
      this.movies = await response.json();
      loading.dismiss();
      this.changeDetectorRef.detectChanges();
    } else {
      this.movies = [];
    }
  }
This method is responsible for sending the search terms to the Spring Boot application and handles the response.
Because this example depends on a Cordova plugin, it does not work in a browser, and you need to run the app on a device or in an emulator to test it.
2. Web Speech API 
Next, I looked for a way that works without any native plugins. The good news is there is a specification that provides this functionality, the Web Speech API. The bad news is that, at the moment (December 2018), only Google has implemented this into their Chrome browser (https://caniuse.com/#search=speech). Based on publicly available information from browser vendors, the Web Speech API feature is currently under consideration by both Microsoft and Mozilla for future implementation.
The API is callback-based, and an app has to implement a few handlers.
The searchWebSpeech method first checks if the speech recognition object is available in the window object.
Then it instantiates the webkitSpeechRecognition object that handles the speech recognition.
  searchWebSpeech(): void {
    if (!('webkitSpeechRecognition' in window)) {
      return;
    }

    const recognition = new webkitSpeechRecognition();
    recognition.continuous = false;

    recognition.onstart = () => {
      this.isWebSpeechRecording = true;
      this.changeDetectorRef.detectChanges();
    };

    recognition.onerror = (event: any) => console.log('error', event);
    recognition.onend = () => {
      this.isWebSpeechRecording = false;
      this.changeDetectorRef.detectChanges();
    };

    recognition.onresult = (event: any) => {
      const terms = [];
      if (event.results) {
        for (const result of event.results) {
          for (const ra of result) {
            terms.push(ra.transcript);
          }
        }
      }

      this.movieSearch(terms);
    };

    recognition.start();
  }
Because I also wanted to disable the button when the recording is running, the onstart and onend handlers set and reset a flag.
The API automatically recognizes when the user stops speaking. It then sends the recorded speech sample to Google, where it gets transcribed to text. This is what the onresult handler receives as a parameter. In this handler, the code collects all the transcriptions into one array and calls the movieSearch method that sends the request to the server.
I tested this on Chrome on a Windows Desktop, and it works very well. Based on browser vendor roadmaps, as of December 2018, only Chrome has full support for the Web Speech API. This API would be a valuable addition to the web platform if more browsers implemented it.
3. Recording with WebRTC and sending it to the Google Cloud Speech API 
The second approach works well but is limited to Chrome, and I was more interested in a solution that works in most modern browsers without any additional plugin.
With WebRTC, it's not that complicated to record an audio stream in almost all modern browsers. There is an excellent library available that smooths out the different WebRTC implementations and can record audio: RecordRTC
The example I present here runs on Edge, Firefox, and Chrome on a Windows computer. I haven't tested Safari, but version 11 has a WebRTC implementation, so I guess the example should work on Apple's browser too.
After the speech is recorded, the app transfers it to our server and from there to the Google Cloud Speech-To-Text API. This is a service that transcribes spoken words into text. The first 60 minutes of recordings are free; then you have to pay $0.006 for each 15-second snippet you send to the service.
Unlike the other two examples, the application has to handle starting and stopping the recording manually. For that, the method uses a boolean instance variable and sets it to true when the recording is running. The user then needs to click the Stop button when they are finished speaking.
  async searchGoogleCloudSpeech(): Promise<void> {
    if (this.isRecording) {
      if (this.recorder) {
        // eslint-disable-next-line @typescript-eslint/no-unused-vars
        this.recorder.stopRecording(async (_: any) => {
          const recordedBlob = this.recorder.getBlob();

          const headers = new Headers();
          headers.append('Content-Type', 'application/octet-stream');

          const requestParams = {
            headers,
            method: 'POST',
            body: recordedBlob
          };
          const response = await fetch(`${environment.serverUrl}/uploadSpeech`, requestParams);
          const searchTerms = await response.json();
          this.movieSearch(searchTerms);
        });
      }
      this.isRecording = false;
    } else {
      this.isRecording = true;
      const stream = await navigator.mediaDevices.getUserMedia({video: false, audio: true});
      const options = {
        mimeType: 'audio/wav',
        recorderType: RecordRTC.StereoAudioRecorder
      };
      this.recorder = RecordRTC(stream, options);
      this.recorder.startRecording();
    }
  }
When the user starts the recording, the method accesses the audio stream with getUserMedia and calls the RecordRTC object with the stream as a source. In this example, I set the audio format to wav and use the stereo recorder. This works fine on all three browsers I tested.
When the recording stops, the method receives a blob from RecordRTC that contains the recorded audio in wav format. Then it uploads the binary data to Spring Boot (/uploadSpeech) and waits for the transcription to return. After that, it calls the movieSearch method.
On the server, I use the google-cloud-speech Java library to connect the application with the Google Cloud. The project needs this dependency in the pom.xml
    <dependency>
      <groupId>com.google.cloud</groupId>
      <artifactId>google-cloud-speech</artifactId>
      <version>4.65.0</version>
    </dependency>
Before you can access a service in the Google Cloud, you need a credentials file. To get that, you need to log in to your Google Account and open the Google API Console. There you either create a new project or select an existing one and add the Google Cloud Speech API to the project. Then open the credentials menu and create a new service account. You can then download a JSON file that you can add to the project. Don't commit this file into your git repository; it contains sensitive information that allows anybody who has the key to access the API. In this application, I externalize the path to this credential file with a configuration property class (AppConfig).
The SearchController needs to create a SpeechClient instance that allows it to send requests to the Google Cloud Speech API. The code first reads the credential file and then creates an instance of this class.
  public SearchController(AppConfig appConfig) throws IOException {
    MongoClientSettings mongoClientSettings = MongoClientSettings.builder()
        .writeConcern(WriteConcern.UNACKNOWLEDGED).build();
    this.mongoClient = MongoClients.create(mongoClientSettings);
    this.mongoDatabase = this.mongoClient.getDatabase("imdb");

    ServiceAccountCredentials credentials = ServiceAccountCredentials
        .fromStream(Files.newInputStream(Paths.get(appConfig.getCredentialsPath())));
    SpeechSettings settings = SpeechSettings.newBuilder()
        .setCredentialsProvider(FixedCredentialsProvider.create(credentials)).build();
    this.speech = SpeechClient.create(settings);
  }
The last piece of the puzzle is the handler for the /uploadSpeech endpoint.
This method receives the bytes of the recorded speech sample in wav format and stores them in a file.
  @PostMapping("/uploadSpeech")
  public List<String> uploadSpeech(@RequestBody byte[] payloadFromWeb) throws Exception {

    String id = UUID.randomUUID().toString();
    Path inFile = Paths.get("./in" + id + ".wav");
    Path outFile = Paths.get("./out" + id + ".flac");

    Files.write(inFile, payloadFromWeb);

    FFmpeg ffmpeg = new FFmpeg("./ffmpeg.exe");
    FFmpegBuilder builder = new FFmpegBuilder().setInput(inFile.toString())
        .overrideOutputFiles(true).addOutput(outFile.toString())
        .setAudioSampleRate(44_100).setAudioChannels(1)
        .setAudioSampleFormat(FFmpeg.AUDIO_FORMAT_S16).setAudioCodec("flac").done();

    FFmpegExecutor executor = new FFmpegExecutor(ffmpeg);
    executor.createJob(builder).run();

    byte[] payload = Files.readAllBytes(outFile);

    ByteString audioBytes = ByteString.copyFrom(payload);

    RecognitionConfig config = RecognitionConfig.newBuilder()
        .setEncoding(AudioEncoding.FLAC).setLanguageCode("en-US").build();
    RecognitionAudio audio = RecognitionAudio.newBuilder().setContent(audioBytes).build();

    RecognizeResponse response = this.speech.recognize(config, audio);
    List<SpeechRecognitionResult> results = response.getResultsList();

    List<String> searchTerms = new ArrayList<>();
    for (SpeechRecognitionResult result : results) {
      SpeechRecognitionAlternative alternative = result.getAlternativesList().get(0);
      searchTerms.add(alternative.getTranscript());
    }

    Files.deleteIfExists(inFile);
    Files.deleteIfExists(outFile);

    return searchTerms;
  }
The problem I had here was that the Cloud Speech API could not handle the wav file it gets from the web app. One problem is the unsupported format, and the other is the recording is in stereo, but the Speech API requires mono recordings. Unfortunately, I haven't found a pure Java library that can convert sound files. However, there is a way to do that with a native application and still support multiple operating systems.
ffmpeg is a program for handling multimedia files. One task it provides is converting audio files into other formats. On the download page, you can find builds for many operating systems.
For Windows, I downloaded the ffmpeg.exe file.
To call the exe from the Java code, I found a Java wrapper library that simplifies setting parameters and calling the exe.
    <dependency>
      <groupId>net.bramp.ffmpeg</groupId>
      <artifactId>ffmpeg</artifactId>
      <version>0.8.0</version>
    </dependency>
In the code, you can see how I use this library to specify the configuration parameter that converts the wav file into a mono flac file. Flac is one of the supported audio formats of the Cloud Speech API.
Calling the API itself is straightforward when you have the recording in a supported format.
All it needs is a call to the recognize method with the binary data of the recording and a few configuration parameters like the description of the format.
RecognizeResponse response = this.speech.recognize(config, audio);
The method returns the text transcription when the service is able to understand some words in the recording. The uploadSpeech method then sends back these strings to the Ionic app.
This concludes our journey into speech recognition land. If you are developing a Cordova app, the speech recognition plugin is the easiest way to support this use case.
The third solution is more complicated because it also depends on a server part but supports most modern browsers and does not depend on a plugin.
The Web Speech API looks promising, but as long as there is only one browser that supports it, it's not very useful.