With the release of Safari 11, we finally got a complete Web Cryptography implementation in Apple's browser. All major browsers now support Web Cryptography.
The Web Cryptography API provides several methods in the window.crypto namespace that allow an application to hash, sign and verify, encrypt and decrypt data, import and export keys, generate keys and key pairs, and wrap and unwrap keys. It also provides access to a cryptographically sound random number generator.
Example application 
The application I demonstrate in this blog post is a trivial password manager implemented with the Ionic framework on the client and Spring Boot on the server.
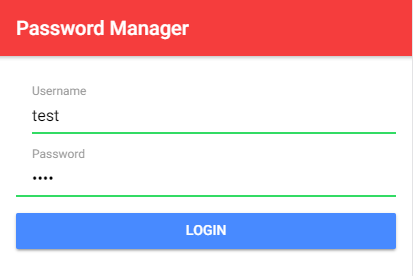
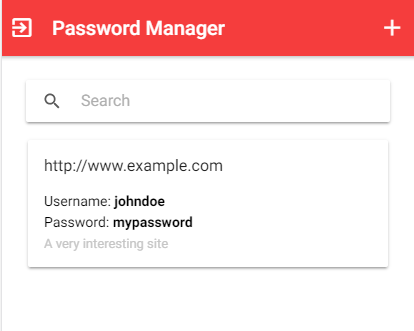
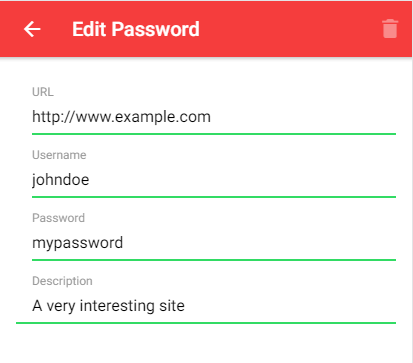
The user logs in with a username and a password. The application then fetches the password data stored on the server and displays it in a list. The user can now add new entries and modify existing ones. Every time the user changes something, the data is sent to the server. This application does not store anything on the client.
On the server-side, I use a Spring Boot application that stores the data from the users. To keep things simple, the data is stored in memory in a Map.
My trivial example follows a similar workflow that lastpass.com uses in their password manager: https://assets.cdngetgo.com/1c/e4/e53646f14a91a7c9cb7dd7afbb61/lastpass-technical-whitepaper.pdf
Overview 
Here is an overview of how the application works:
- The user enters a username and password.
- The app runs the password through 100,000 iterations of PBKDF2 SHA-256 with the username as the salt.
- The app runs the result from step 2 through another 10,000 iterations of PBKDF2 SHA-256. This is the master key used for encryption and decryption.
- The app runs the result from step 2 through another 100,000 iterations of PBKDF2 SHA-256 and uses the result as the authentication key.
- The app fetches the stored data from the server with the authentication key (step 4).
- The app displays the passwords.
- The user adds new records and modifies existing entries.
- Each time the user changes something, the application compresses and encrypts the password data with the master key (step 3) and sends the blob, together with the authentication key, to the server.
- The server stores the data into a Map with the authentication key as the key and the encrypted data block as the value.
Client 
I started the client application with the Ionic blank starter template and added a few additional libraries.
npm install text-encoding-shim
The Web Cryptography API works with ArrayBuffer and Uint8Array objects. The encoding API converts Uint8Array objects to and from string objects.
npm install lzutf8
This is a string compression library. It is perfect for our use case because the application can compress the data before encrypting it.
npm install uuid
The application uses this library for assigning a unique identifier to each newly created record.
Almost all methods in the Web Cryptography API are asynchronous and return a Promise. Therefore, I took advantage of the async and await keywords (ES2017).
All code that handles the cryptography is bundled in the PasswordService class: https://github.com/ralscha/blog/blob/master/pwmanager/client/src/app/password.service.ts
import {Injectable} from '@angular/core';
import {TextEncoder} from 'text-encoding-shim';
import * as LZUTF8 from 'lzutf8';
import {environment} from '../environments/environment';
import {Password} from './password';

@Injectable({
  providedIn: 'root'
})
export class PasswordService {
  private ivLen = 12;

  private passwords = new Map<string, Password>();
  private masterKey: CryptoKey | null = null;
  private authenticationKey: Uint8Array | null = null;
  private textEncoder = new TextEncoder('utf-8');
The ivLen variable specifies the length of the initialization vector that is needed for the AES-GCM algorithm. The passwords Map stores the records with the password data. The authenticationKey is the key that the application sends to the server, and the masterKey is used for client-side encryption and decryption and never leaves the client. The textEncoder is used for string to Uint8Array conversions.
  async fetchPasswords(username: string, password: string): Promise<void> {
    await this.initKeys(username, password);

    const headers = new Headers();
    headers.append('Content-Type', 'application/octet-stream');

    const response = await fetch(`${environment.serverUrl}/fetch`, {
      headers,
      method: 'POST',
      body: this.authenticationKey
    });

    const arrayBuffer = await response.arrayBuffer();
    if (arrayBuffer.byteLength > 0) {
      await this.decrypt(arrayBuffer);
    }
    this.loggedIn = true;
  }
The fetchPasswords() method is called immediately after the user enters the username and password. It calls the initKeys() method to initialize the authentication and master keys and then sends a POST request to the server to fetch the stored data. The body of the POST request contains the authentication key.
When the server sends a response back, the method calls decrypt() to decrypt the data.
  private async initKeys(username: string, password: string): Promise<void> {
    const salt = this.textEncoder.encode(username);
The initKeys() method is responsible for creating the master and authentication keys. It takes the username and password as arguments. First, it converts the username to a Uint8Array object because it uses the username as salt for the PBKDF2 algorithm.
    const importedPassword = await crypto.subtle.importKey('raw', this.textEncoder.encode(password),
      'PBKDF2', false, ['deriveKey']);
Then it calls the Web Cryptography method importKey(). The following deriveKey() method expects a CryptoKey object as input, and this is what importKey() returns. The importKey() method expects a Uint8Array object as input. The fourth parameter (false) indicates if the key that we generate here can be extracted from the CryptoKey object. Extracting means gaining access to the raw bytes of the key. The last parameter indicates for what function the generated key can be used.
    const tempKey = await crypto.subtle.deriveKey(
      {
        name: 'PBKDF2', salt,
        iterations: 100000, hash: 'SHA-256'
      },
      importedPassword,
      {name: 'AES-GCM', length: 256},
      true,
      ['encrypt']
    );
The deriveKey() method runs the password through the PBKDF2 algorithm. The first parameter specifies and configures the derivation algorithm. PBKDF2 needs to know the number of iterations, the salt, and the hash algorithm to use.
The second parameter is the password that we wrapped in a CryptoKey object from the previous step. The third parameter is an object that determines the algorithm the derived key is going to be used for. This is important because the length of the key depends on the encryption algorithm. AES-256 needs a key that is 256 bits long.
My initial intention was to use this key as the master key. However, Web Cryptography throws an exception when you specify the usage deriveKey in a derive key operation (['encrypt', 'decrypt', 'deriveKey']).
Therefore, I defined the generated key to be extractable (fourth parameter) and export and import the key in the next step. The usage parameter (fifth parameter) does not matter, but you cannot provide an empty object ([]); otherwise, Web Cryptography throws an exception.
    const exportedTempKey = await crypto.subtle.exportKey('raw', tempKey);
    const importedTempKey = await crypto.subtle.importKey('raw', exportedTempKey,
      'PBKDF2', false, ['deriveKey']);
exportKey() takes a CryptoKey object and returns the raw bytes of the key as an ArrayBuffer. exportKey() only works when the CryptoKey was created with the extractable option set to true.
    this.masterKey = await crypto.subtle.deriveKey(
      {
        name: 'PBKDF2', salt,
        iterations: 10000, hash: 'SHA-256'
      },
      importedTempKey,
      {name: 'AES-GCM', length: 256},
      false,
      ['encrypt', 'decrypt']
    );
Next, the code runs another 10,000 iterations of PBKDF2 on the temporary key and stores the result in the instance variable masterKey. This is the key the application uses for encryption and decryption (the fifth parameter). The key is not extractable (fourth parameter). You should make keys non-extractable when you store them in an instance variable. This prevents an attacker from opening the browser console and extracting the raw bytes from the key.
    const authKey = await crypto.subtle.deriveKey(
      {
        name: 'PBKDF2', salt,
        iterations: 100000, hash: 'SHA-256'
      },
      importedTempKey,
      {name: 'AES-GCM', length: 256},
      true,
      ['encrypt']
    );

    this.authenticationKey = new Uint8Array(await crypto.subtle.exportKey('raw', authKey));
For creating the authentication key, the application runs the temporary key through another 100,000 PBKDF2 iterations, exports the bytes from the key, and stores them in the instance field authenticationKey.
  private async encryptAndStore(): Promise<void> {
    if (this.authenticationKey === null) {
      return Promise.reject('authentication key is null');
    }

    const encryptedData = await this.encrypt();
    const authKeyAndData = this.concatUint8Array(this.authenticationKey, encryptedData);

    const headers = new Headers();
    headers.append('Content-Type', 'application/octet-stream');

    const requestParams = {
      headers,
      method: 'POST',
      body: authKeyAndData
    };
    fetch(`${environment.serverUrl}/store`, requestParams);
  }
The encryptAndStore() method is called each time the user adds, modifies, or deletes an entry. The method first calls encrypt(), which returns a Uint8Array that holds the encrypted data. Then, it concatenates the authentication key and the encrypted data block together and sends them with a POST request to the server.
  private async encrypt(): Promise<Uint8Array> {
    if (this.masterKey === null) {
      return Promise.reject('master key is null');
    }

    const compressed = LZUTF8.compress(JSON.stringify([...this.passwords]));

    const initializationVector = new Uint8Array(this.ivLen);
    crypto.getRandomValues(initializationVector);

    const encrypted = await crypto.subtle.encrypt({
        name: 'AES-GCM',
        iv: initializationVector
      },
      this.masterKey,
      compressed
    );

    return this.concatUint8Array(initializationVector, new Uint8Array(encrypted));
  }
The encrypt() method converts the passwords array to a JSON string, compresses it with the LZUTF8 library, and then encrypts it with the AES-GCM algorithm. AES-GCM needs an initialization vector (iv) for its work. This is an array, with the recommended size of 12 bytes, that is filled with random data. Your code must never use the same iv with the same key to encrypt a message. The application uses the Web Cryptography random generator to fill in the data into the iv array. crypto.getRandomValues() is the only method in the Web Cryptography API that is synchronous.
The crypto.subtle.encrypt() method expects three parameters: an object that describes and configures the algorithm, a CryptoKey object containing the key, and the data block in plaintext to be encrypted.
The initialization vector does not have to be secret, and the decryption process needs to use the same iv to decrypt the message successfully. Therefore, the application joins the iv together with the encrypted data block.
  private async decrypt(buffer: ArrayBuffer): Promise<void> {
    if (this.masterKey === null) {
      return Promise.reject('master key is null');
    }

    const iv = buffer.slice(0, this.ivLen);
    const data = buffer.slice(this.ivLen);

    const decrypted = await window.crypto.subtle.decrypt({
        name: 'AES-GCM',
        iv
      },
      this.masterKey,
      data
    );

    const uncompressed = LZUTF8.decompress(new Uint8Array(decrypted));
    this.passwords = new Map(JSON.parse(uncompressed));
  }
The decrypt() method does the same as the encrypt() method but in reverse order. First, it extracts the iv from the data block. Then it decrypts the data blob, decompresses it, and parses the string with JSON.parse.
crypto.subtle.decrypt() expects three parameters: a data object that configures the encryption algorithm, the key, and the encrypted data block. The first and second parameters must be the same objects as you use in the encrypt() call.
  private concatUint8Array(...arrays: Uint8Array[]): Uint8Array {
    let totalLength = 0;
    for (const arr of arrays) {
      totalLength += arr.length;
    }
    const result = new Uint8Array(totalLength);
    let offset = 0;
    for (const arr of arrays) {
      result.set(arr, offset);
      offset += arr.length;
    }
    return result;
  }
concatUint8Array() is a helper method that takes an arbitrary number of Uint8Array objects and concatenates them together. The application uses this method to join the authentication key, iv, and encrypted data block together.
This concludes the part of the client application that handles the cryptography. You can find the source code for the complete application on GitHub:
https://github.com/ralscha/blog/tree/master/pwmanager
Server 
The server is a Spring Boot application where I implemented one Controller class with two HTTP endpoints (/fetch and /store). The db instance field is our database and maps the encrypted data blobs to the authentication key.
@RestController
@CrossOrigin
public class PwManagerController {

  private final Map<ByteBuffer, byte[]> db = new ConcurrentHashMap<>();

  @PostMapping("/fetch")
  public byte[] fetch(@RequestBody byte[] authenticationKey) {
    ByteBuffer key = ByteBuffer.wrap(authenticationKey);
    return this.db.get(key);
  }
The fetch method takes the authentication key and returns the encrypted data blob it finds in the map. The application has to wrap the authentication key byte array in a ByteBuffer instance because it's not possible to use byte[] as the key of a Map.
  @PostMapping("/store")
  public void store(@RequestBody byte[] payload) {
    byte[] keyBytes = Arrays.copyOfRange(payload, 0, 32);
    byte[] value = Arrays.copyOfRange(payload, 32, payload.length);
    ByteBuffer key = ByteBuffer.wrap(keyBytes);
    this.db.put(key, value);
  }
The store() method takes the encrypted blob and stores it into the map. The client prepends the encrypted data blob with the authentication key. This key has a size of 32 bytes (256 bits). The code takes the first 32 bytes and uses them as the map key and stores the rest of the data block as the value in the Map.
Testing 
There is one problem when you want to test the application. It works fine when you test the application on the same server where ionic serve and the Spring Boot applications are running. You can open the URL http://localhost:8100 in the browser, and the application works fine.
But when you try to test the application on another device, you encounter the error that the window.crypto namespace is not available. The Web Cryptography specification contains a restriction that window.crypto is only accessible from secure origin pages. Secure origins follow these patterns (scheme, host, port):
https, *, *wss, *, **, localhost, **, 127/8, **, ::1/128, *file, *, —
Even websites served over HTTP from internal IP addresses like 192.168.. are considered to be unsafe and don't have access to the Web Cryptography API.
In a production environment, you usually have a web server with TLS certificates and proxy settings that forward the requests to Spring Boot. For testing, you could set up a similar environment, but a very trivial approach is using ngrok instead. ngrok is a service that creates publicly available tunnels to servers behind firewalls. ngrok gives you a non-secure and a secure (TLS) URL to access your service.
In our setup, we have two services. The Spring Boot application listens on port 8080, and the ionic serve command listens on port 8100, so we need to create two ngrok tunnels.
ngrok http 8100
ngrok http 8080
Open the file src/environments/environment.ts and change the value of serverUrl to the https URL you get from the 8080 port forward.
export const environment = {
  production: false,
  serverUrl: 'https://.....ngrok.io'
};
Now you should be able to open the application with the https URL you get from the 8100 port forward, and everything should work fine.
Disclaimer 
I'm not a security expert. Be cautious when you copy code from this example, double-check every line I wrote, and read the Web Cryptography API documentation thoroughly.
Send me feedback if there are errors in my explanations.