The lifecycle of a mobile app extends beyond its initial submission to the app stores. Developers must continuously fix bugs, modify existing features, and introduce new ones. For native applications, this typically involves resubmitting each new version to the app stores and awaiting approval.
With Cordova/PhoneGap (and React Native) apps, you have an additional option. These frameworks wrap JavaScript applications inside a native wrapper and can update, with the help of a plugin, the containing resources on the fly. This way, you can update, remove, and add JavaScript, HTML, CSS files, and assets like pictures and music without resubmitting the whole application to the stores. You can only update the resources that are embedded in the native wrappers. There is no way to update the wrapper itself. If you add a new Cordova plugin to an app, you always have to resubmit the app.
One question that always comes up when you talk about these kinds of updates is whether Apple allows them. According to the iOS Developer Program, these on-the-fly updates are allowed as long as you don't change the main purpose of the application. Don't transform your calculator app into a game.
3.3.2 Except as set forth in the next paragraph, an Application may not download or install executable code. Interpreted code may only be used in an Application if all scripts, code, and interpreters are packaged in the Application and not downloaded. The only exceptions to the foregoing are scripts and code downloaded and run by Apple's built-in WebKit framework or JavascriptCore, provided that such scripts and code do not change the primary purpose of the Application by providing features or functionality that are inconsistent with the intended and advertised purpose of the Application as submitted to the App Store.
Preparation 
In this article, we will look at how you can hot update an Ionic/Cordova app with Ionic Appflow Live Deploy. The service is part of Appflow. Ionic offers a free tier, which includes deployments to 100 devices per month.
Before we can use any Appflow service, we need to create an account. If you don't already have one, go to https://dashboard.ionicframework.com/signup or enter the command ionic signup in the shell.
Then, back in the shell, log in to Appflow.
ionic login
Next, open the Appflow dashboard and create a new app.
Initial version 
After you create the app in the Appflow dashboard, Appflow assigns a unique number to your project. In this example, it's the ID 512fe61e.

If you already have an Ionic app, you can link it to Appflow with the following command:
ionic link --pro-id 512fe61e
But for this tutorial, I'll start from scratch. The following command creates a new project with the name myapp, based on the blank starter template, and links it to the Appflow project. Replace <pro-id> with the ID of your project.
ionic start myapp blank --pro-id <pro-id>
cd myapp
The start command asks which Git hoster it should use. You have the choice between Ionic Appflow and GitHub. For this example, I'll host the project on Ionic Appflow.
Now open the file src/app/home/home.page.html and insert the following code. This allows us to verify if the update process works or not.
<ion-header>
  <ion-toolbar>
    <ion-title>
      Appflow Live Deploy
    </ion-title>
  </ion-toolbar>
</ion-header>

<ion-content padding>
  <ion-card>
    <ion-card-header>
      Version
    </ion-card-header>
    <ion-card-content>
      0.0.1
    </ion-card-content>
  </ion-card>
</ion-content>
Next, we set up Cordova. Live Deploy also works with apps installed on iOS, but for this tutorial, I only have access to an Android device.
ionic cordova prepare android
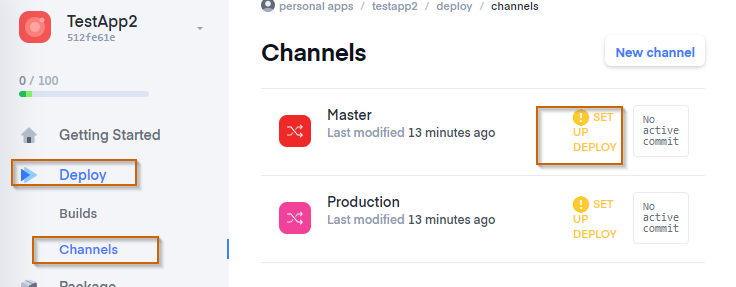
Then we need to install the Cordova Ionic plugin. Login to the Appflow Dashboard, open the Deploy and Channels menu, and click on Set up Deploy.
You can choose between the following update methods:
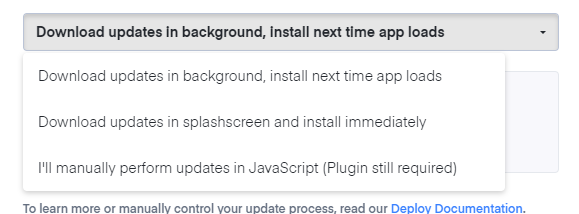
The auto and background methods allow the plugin to automatically manage updates. Alternatively, selecting the none option gives you full manual control over the update process. The Ionic plugin provides an API that can manage the whole update lifecycle via TypeScript code. See the documentation page
for more information.
For this example, I'll select the auto method. The plugin downloads the update during app start and installs it immediately.
cordova plugin add cordova-plugin-ionic --save --variable APP_ID="512fe61e" --variable CHANNEL_NAME="Master" --variable UPDATE_METHOD="auto"
Next, commit all the changes and push the code to Ionic Appflow.
git add -A && git commit -m "Initial commit"
git push ionic master
Now we are ready to build the app and install it on a phone.
ionic cordova run android
Update 
To create an update, we change the version in the src/app/home/home.page.html file.
    <ion-card-content>
      0.0.2
    </ion-card-content>
Then commit the change and push it to Ionic Appflow.
git commit -am "v0.0.2"
git push ionic master
Open the Appflow Dashboard. Select the menu Deploy/Builds. Click on New web build. The dashboard displays a list of commits. Click on the latest commit, select the channel Master, and click on Create build.

Appflow now builds the app and publishes it to the Master channel.
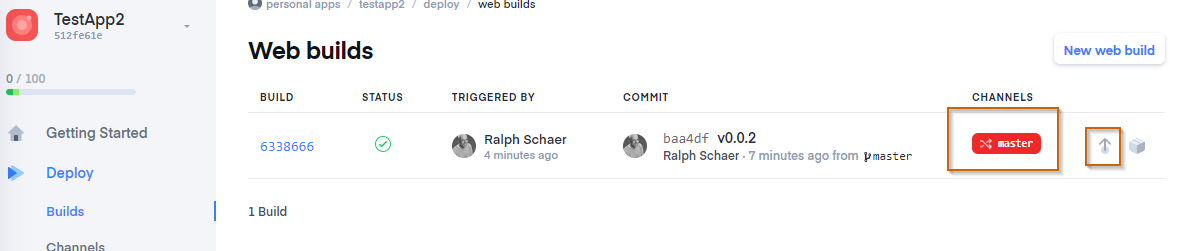
Wait until the build is finished. Open the Deploy / Builds menu and verify that the build is assigned to the Master channel. If not, click on the arrow up icon and deploy the build to the channel.
To test the update process, close the app on the device and re-open it. After a few seconds, you should see the updated version of your app.
If you want to learn more about Ionic Appflow Live Deploy, visit the official page: https://ionic.io/docs/appflow/deploy/intro