When you update a native mobile app, you submit it to the app stores, wait for approval, and then hope that users update the app. However, when you use a wrapper framework like Capacitor, Cordova, or React Native, you can update the app on the fly without submitting it to the stores. The update is limited to web content, such as HTML, CSS, and JavaScript files, and assets like images, music, and videos. You can't update the native container itself. If you add a new native plugin or update an existing one, you have to submit the app to the stores.
In this article, we will examine how to hot update an Ionic / Capacitor app with capacitor-updater.
Store Guideline Compliance 
When updating an app on the fly, we must be aware of the guidelines of the app stores. Both Google and Apple allow this kind of update as long as you don't change the app's main purpose. So, don't change your calorie counter app into a game.
Here are the relevant sections of the guidelines:
Keep in mind that both Google and Apple can change their rules at any time, but these rules have been in place for a couple of years.
Installation 
I'm starting with a trivial Ionic/Capacitor app. It only shows the current version in the middle of the screen.
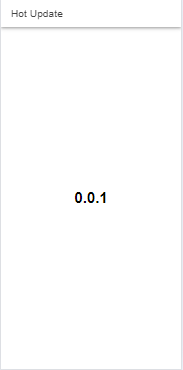
The version number is stored in the environment file src/environments/environment.ts.
export const environment = {
  production: true,
  version: '0.0.1'
};
Next, we add the capacitor-updater plugin to the project.
npm install @capgo/capacitor-updater
npx cap sync
For Android, you only need to do this, while for iOS, you need to add code to the Privacy manifest. See the official documentation for detailed instructions.
The plugin supports three ways to update the app:
- Hosted solution: Use capgo.app
- Self-hosted solution: Use your server
- Manual solution: Manually download the update from JavaScript code.
In this blog post, I'm going to show you the manual solution.
Manual Update 
The first thing we change is the capacitor.config.ts file. Here, we turn off
the plugin's autoUpdate feature because we want to control the update process manually.
import type { CapacitorConfig } from '@capacitor/cli';

const config: CapacitorConfig = {
  appId: 'io.ionic.starter',
  appName: 'hotupdate',
  webDir: 'www/browser',
  plugins: {
    CapacitorUpdater: {
      autoUpdate: false,
      statsUrl: ''
    }
  }
};

export default config;
Next, we add the following line to the constructor of the AppComponent class.
  constructor() {
    CapacitorUpdater.notifyAppReady()
The notifyAppReady() call is important and tells the Capacitor Updater plugin that the current update bundle has been installed successfully.
The app will be rolled back to the previous version if you forget this line.
By default, this method must be called within 10 seconds after the app has started. This duration
can be changed with the appReadyTimeout option in the capacitor.config.ts file.
I also added the following code to the AppComponent constructor. The #checkForUpgrade() method checks if
a new update is available. In this example, the application does this every time the app resumes
from the background and when the app has freshly started.
    App.addListener('appStateChange', (state: AppState) => {
      if (state.isActive) {
        this.#checkForUpgrade();
      }
    });
    this.#checkForUpgrade();
The #checkForUpgrade() method reads the update information from a JSON file on the server.
If the version number in the JSON file is different from the version number in the environment file,
the update process will be initiated by calling the #upgrade() method.
  #checkForUpgrade() {
    this.#readUpdateInfo().then(updateInfo => {
      if (updateInfo.version !== environment.version) {
        this.#upgrade(updateInfo);
      }
    });
  }

  #readUpdateInfo(): Promise<UpdateInfo> {
    return firstValueFrom(this.httpClient.get<UpdateInfo>('https://static.rasc.ch/update.json'));
  }
The JSON file looks like this: it contains the new version number and the download URL of the zip file.
{
  "version": "0.0.x",
  "downloadURL": "<url to zip file>"
}
Both files are hosted on a static web server. You can use any service that can host static files. For example, GitHub Pages, Netlify, Vercel, or AWS S3.
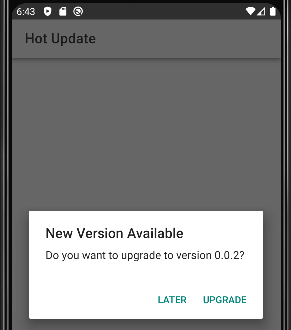
The #upgrade() method downloads the new version, shows a dialog to the user, and installs it if the user agrees.
The CapacitorUpdater.download method takes an object with the URL of the zip file and the version number
and downloads the zip file. In this example, the code shows a dialog to the user with the version number and asks if they want to install the update.
If the user agrees, the CapacitorUpdater.set method will install the new version and restart the app.
  async #upgrade(updateInfo: UpdateInfo): Promise<void> {
    const version = await CapacitorUpdater.download({
      url: updateInfo.downloadURL,
      version: updateInfo.version,
    })

    const {value: okButtonClicked} = await Dialog.confirm({
      title: 'New Version Available',
      message: `Do you want to upgrade to version ${updateInfo.version}?`,
      okButtonTitle: 'Upgrade',
      cancelButtonTitle: 'Later',
    });
    if (okButtonClicked) {
      await CapacitorUpdater.set(version);
    }

  }
The first version is ready to be deployed and submitted to the app stores.
Update 
After a while, you want to add a new feature or fix a bug. If these changes are only in the web content, you can update the app on the fly.
First, update the version in package.json and environment.ts.
{
  "name": "hotupdate",
  "version": "0.0.2",
export const environment = {
  production: true,
  version: '0.0.2'
};
Then, build the app
npm run build
The example app writes the build artifacts to the www/browser folder. Next, we need to create a zip file of this folder.
I'm using the archiver package here.
npm install --save-dev archiver
This script packages the build artifacts.
const fs = require('fs');
const archiver = require('archiver');
const {join} = require("node:path");

const packageJson = JSON.parse(fs.readFileSync(join(__dirname, 'package.json'), 'utf8'));
const name = packageJson.name;
const version = packageJson.version;

const output = fs.createWriteStream(join(__dirname, `${name}-${version}.zip`));
const archive = archiver('zip', {
  zlib: { level: 9 }
});

output.on('close', () => {
  console.log(`Zip file created successfully. Total bytes: ${archive.pointer()}`);
});

archive.on('error', err => {
  throw err;
});

archive.pipe(output);
archive.directory('www/browser/', '/', {});
archive.finalize();
Alternatively, you can also use a command-line tool like zip, but this approach is cross-platform.
Next, we create a new JSON file with the version number and the URL to the zip file.
{
  "version": "0.0.2",
  "downloadURL": "https://static.rasc.ch/hotupdate-0.0.2.zip"
}
Then upload both files to the service that hosts the static resources.
When the user now starts the app or resumes it from the background, the app will see that there is a new version available and ask the user if they want to upgrade.
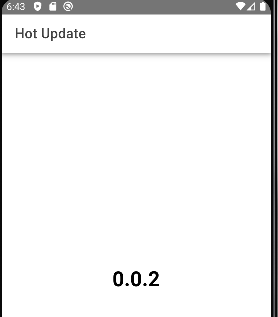
That's it. You can now ship fixes, changes, and features within minutes. Thanks to the capacitor-updater plugin, this is a simple process. As stated before, this only works for web resources; if you add or update a native Capacitor plugin, you must submit the app to the app stores.
The complete code of the example app is available on GitHub. The official documentation of the capacitor-updater plugin is available here. The source code of the plugin is hosted on GitHub.
.