In this article, I show you how to install Plausible Analytics, a self-hosted, open-source website analytics application.
Google Analytics is a popular solution for website analytics because it's free and straightforward to set up. The only thing you have to do is create an account and then paste a piece of JavaScript code into the website.
The problem with client-side tracking is that ad blockers can easily block it. If your website audience is very tech-savvy, many requests might be blocked. This makes the statistics in Google Analytics less meaningful.
Plausible Analytics is an alternative to Google Analytics. Plausible offers a hosted service and a version that can be self-hosted. Plausible works the same way as Google Analytics: you add a JavaScript snippet to the website, and when a user opens the page, this code sends a request to the Plausible server. That means that the Plausible tracker can potentially also be blocked by ad blockers. But because Plausible can be self-hosted and the JavaScript code can be served from the same domain as the website, it's less likely that an ad blocker will detect the code.
In the following tutorial, I show you how to install a static website and Plausible Analytics. For this demo installation, I used a VPS server from Hetzner (referral link). I chose the smallest server offering: CX11 with 2GB of RAM. For the operating system, I selected Debian 11.
Check out the Plausible requirements for choosing the correct server.
Caddy and Website 
This section shows you how to set up an HTTP server and a basic demo website. As a web server, I chose Caddy. Caddy is straightforward to set up and has excellent support for TLS. Caddy automatically creates Let's Encrypt TLS certificates and automatically renews them.
I run all the following commands as a root user. If you are not logged in as root, prepend sudo to the commands or switch to root with sudo -i.
First, make sure that the system is up to date.
apt update
apt full-upgrade
To install Caddy, follow the installation instructions on this page: https://caddyserver.com/docs/install#debian-ubuntu-raspbian
Open the Caddy configuration.
nano /etc/caddy/Caddyfile
Replace everything with the following configuration.
{
    email <valid_email_address>
    servers :443 {
      protocol {
        experimental_http3
      }
    }
}

demo.rasc.ch {
   root * /var/www
   file_server
}
Replace demo.rasc.ch with your domain. Enter a valid email address. This address is used for creating the TLS certificate with Let's Encrypt. Let's Encrypt sends you expiration notices and other important information regarding your certificate.
I enabled the experimental HTTP/3 support here. If you also do this, make sure to open port UDP/443 if a firewall blocks traffic to the server.
Before starting Caddy, make sure that DNS records are set up correctly. You need an A record that points to the server. If the server has an IPv6 address, insert an AAAA record, and I also recommend creating a CAA record.
Note that if the DNS is not set up correctly, Caddy will not create the Let's Encrypt TLS certificate.
systemctl restart caddy
Create the folder /var/www and set the owner and group to caddy.
mkdir /var/www
chown caddy:caddy /var/www
Copy the assets of your website into this folder. For this blog post, I created a simple index.html.
<!doctype html>
<html>
  <head>
    <title>Demo Web Site</title>
  </head>
  <body>
    <p>This is a demo website</p>
  </body>
</html>
Open a browser and enter the configured domain. You should see the site, and it should be served over TLS.
Plausible 
Docker 
Plausible consists of multiple services, and the easiest way to set it up is with Docker. Install Docker following the installation instructions on this web page: https://docs.docker.com/engine/install/debian/
Test the Docker installation with docker run hello-world. You should see the Hello from Docker! message if everything is set up correctly.
We also need to install docker compose. Installation instructions from: https://docs.docker.com/compose/
mkdir -p ~/.docker/cli-plugins/
curl -SL https://github.com/docker/compose/releases/latest/download/docker-compose-linux-x86_64 -o ~/.docker/cli-plugins/docker-compose
chmod +x ~/.docker/cli-plugins/docker-compose
Check if it works
$ docker compose version
Docker Compose version v2.2.3
Installation and configuration 
For the Plausible installation, I followed the instructions on this page: https://plausible.io/docs/self-hosting
First, we need to download two files from the following GitHub repository: https://github.com/plausible/hosting
You can clone the Git repository, download the tarball, or download the two files with curl.
mkdir /opt/plausible
cd /opt/plausible/
curl -O https://raw.githubusercontent.com/plausible/hosting/master/plausible-conf.env
curl -O https://raw.githubusercontent.com/plausible/hosting/master/docker-compose.yml
Next, we need to create a random string. This will be the secret key for this Plausible installation.
openssl rand -base64 64 | tr -d '\n' ; echo
Open plausible-conf.env and replace all replace-me strings with a value.
nano plausible-conf.env
Set SECRET_KEY_BASE to the secret key created before. The BASE_URL must match the URL where the Plausible web interface will be accessible, including the scheme and port.
Plausible should be installed under a separate subdomain. Subfolder installations (for example: https://demo.rasc.ch/stats) are currently (January 2022) not supported. For this example, I chose the subdomain a.rasc.ch. Ensure that you insert the proper A and AAAA (if IPv6 is available) DNS records.
The Plausible configuration for this demo site:
ADMIN_USER_EMAIL=ralphschaer@gmail.com
ADMIN_USER_NAME=admin
ADMIN_USER_PWD=this_is_an_unsecure_password_change_me
BASE_URL=https://a.rasc.ch
SECRET_KEY_BASE=j4CgYVbq4...
DISABLE_REGISTRATION=true
This configuration disables user registration, so only the admin user can log in.
Now start Plausible.
docker compose up -d
The first time you run the command, it takes longer because Docker has to download the images.
Caddy 
Next, we need to configure Caddy so that requests sent to https://a.rasc.ch are forwarded to the Plausible server. The Plausible server listens by default on port 8000.
nano /etc/caddy/Caddyfile
Insert the following configuration. Change the domain accordingly.
a.rasc.ch {
   uri replace /js/stats.js /js/plausible.js
   reverse_proxy localhost:8000
}
I also added an alias path for the JavaScript snippet we must insert into the website. I noticed that some ad blockers block requests to /js/plausible.js.
Restart Caddy.
systemctl restart caddy
Setup site 
Open the Plausible URL in a browser: https://a.rasc.ch/
Log in with the admin email and password you configured in the file plausible-conf.env.
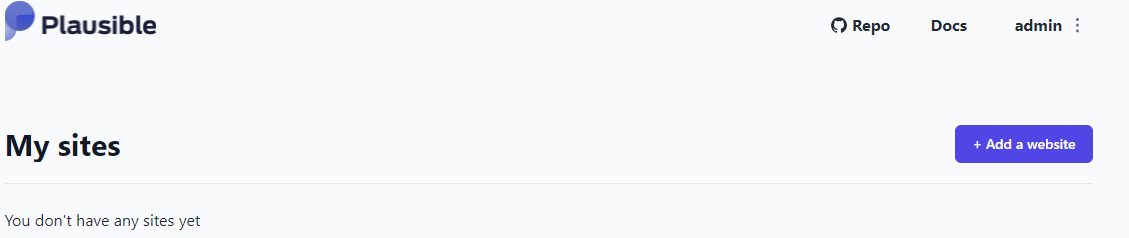
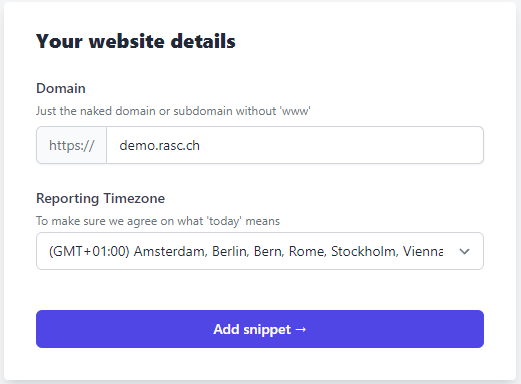
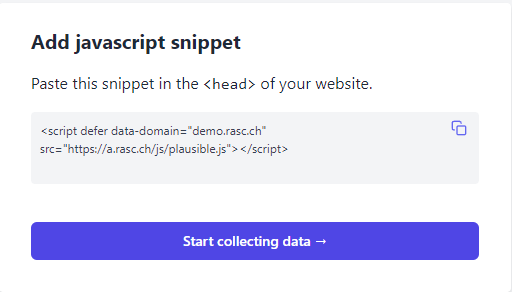
Set up a website. Click on Add a website, enter the domain, and copy the JavaScript snippet. Finalize the setup with a click on Start collecting data.
Open the HTML page you want to track. In my case, index.html.
nano /var/www/index.html
Paste the JavaScript snippet into the <head> section of the page. Optionally, replace plausible.js with the alias stats.js. Both paths work.
<!doctype html>
<html>
  <head>
    <title>Demo Web Site</title>
    <script defer data-domain="demo.rasc.ch" src="https://a.rasc.ch/js/stats.js"></script>
  </head>
  <body>
    <p>This is a demo website</p>
  </body>
</html>
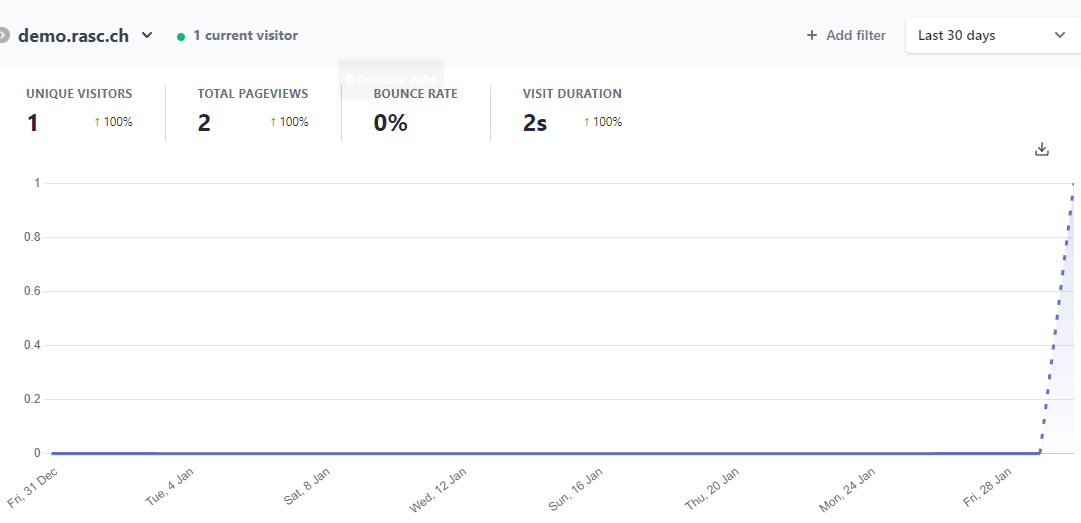
Open the demo web page a few times. Now open the Plausible web console, and you should see some visitor statistics.
Email 
You can configure weekly or monthly email reports in Plausible. If you want that, you need to configure an SMTP server. A simple solution is to use a third-party email service like SendGrid. SendGrid offers a free tier that allows you to send 100 emails per day, more than enough for a small Plausible installation.
First, stop Plausible.
docker compose down --remove-orphans
Open the configuration file.
nano plausible-conf.env
Enter the following information. This is an example of a SendGrid integration. You have to create a free account and an API key. Follow the instructions on this page.
MAILER_EMAIL=demo@rasc.ch
SMTP_HOST_ADDR=smtp.sendgrid.net
SMTP_HOST_PORT=587
SMTP_USER_NAME=apikey
SMTP_USER_PWD=U...
SMTP_HOST_SSL_ENABLED=true
Start Plausible again.
docker compose up -d
Log in to the Plausible web console. To enable the email reports, open the site settings and the Email reports tab.
Update 
You should regularly update your Plausible installation. You can do this either manually or create a scheduled job with the following commands.
docker compose down --remove-orphans
docker compose pull plausible
docker compose up -d
Conclusion 
You've reached the end of the tutorial about installing Plausible. You have seen that setting up a static website and Plausible is not that complicated. With a few commands and the help of Caddy and Docker, you can set up a complete website analytics solution in a short amount of time. Plausible can also be integrated with Google Search and Twitter. Check out the Plausible documentation for more information.
One thing I didn't mention in this article is backup. The easiest solution is to back up the whole server. If you run this installation on a VPS (virtual private server), check the VPS provider's offerings. Many providers offer the possibility to create a backup image of the whole server. If you only want to back up the Plausible data, check out this blog post: https://nicholas.cloud/blog/backing-up-and-restoring-a-self-hosted-plausible-instance/