In this blog post, I show you how to deploy an Angular application to Firebase Hosting and a Spring Boot application to Google Cloud Run.
For this blog post, I use the chat application I wrote for this blog post. It's an Angular/Ionic web and Spring Boot server application.
Prerequisites 
- You need a Google Account.
- Install the Google Cloud Command Line Interface. Follow the instructions from this quick start guide.
- Install Docker. Follow the instructions in the Docker documentation.
- Create a new Google project (or use an existing project). https://console.developers.google.com/
- Create a new Firebase project (or use an existing project). https://console.firebase.google.com/
When you create the Firebase project, you can select the Google project and connect it with Firebase or create a new project.
Application changes 
The client and server will be accessible under two different domains:
- Angular: https://cryptochat.ralscha.ch
- Spring Boot: https://cryptochatserver.ralscha.ch
With this configuration, requests the client sends to the server are considered cross-origin requests. It is, therefore, crucial that CORS handling is enabled on the server.
In a Spring WebFlux application, we can install a global CORS handler.
@SpringBootApplication
@EnableWebFlux
public class Application implements WebFluxConfigurer {

    @Override
    public void addCorsMappings(CorsRegistry registry) {
        registry.addMapping("/cettia/**")
                .allowedOrigins("https://cryptochat.ralscha.ch")
                .allowedMethods("GET", "POST")
                .allowCredentials(true)
                .maxAge(3600);
    }
On the client, I had to configure the URL of the server. I externalized this setting into the environment file, so I only need to change the SERVER_URL entry in src/environments/environment.prod.ts.
export const environment = {
  production: true,
  SERVER_URL: 'https://cryptochatserver.ralscha.ch'
};
Angular 
The Angular CLI supports deployment to the following providers:
- Firebase Hosting
- Vercel
- Netlify
- GitHub pages
- NPM
- Amazon Cloud S3
Check out the Angular documentation for more information:
https://angular.io/guide/deployment
We are going to deploy the application to Firebase. Firebase provides a free tier where you can store up to 10 GB of static resources and transfer 360 MB of data daily. The Firebase free tier supports custom domains and TLS support, and you can host multiple sites in one project.
We add Firebase deployment support with the following command to an Angular project:
ng add @angular/fire
During the installation, select the feature ng deploy -- hosting, choose the Firebase project, and select the default hosting site. This command also opens a browser where you have to log in to your Firebase account.
If the add command fails while downloading the Firebase projects, try to issue the following command:
firebase login --reauth
After the installation, you will find two new files at the root of your project: .firebaserc and firebase.json. The add command also added a new "deploy" configuration to the angular.json file and installed the necessary dependencies.
When you use the default settings of the Angular router, you have to ensure that requests for unknown sites are redirected to index.html. The ng add command already configured this in the firebase.json. When you open the file, you find a "rewrites" rule that redirects all requests to index.html.
Check out the Angular deployment documentation to learn more.
Note that this configuration is only necessary when you use the default settings of the Angular Router. This application uses the hash location strategy, so the server rewrite is unnecessary.
Before the deployment, I had to enable the experimental web frameworks support with the following command:
firebase experiments:enable webframeworks
With the Firebase deployment adapter in place, we can now issue the deploy command:
ng deploy
This command creates a production build of the Angular application and uploads it to Firebase. The application does not work yet. We have to deploy the server first.
Custom domain 
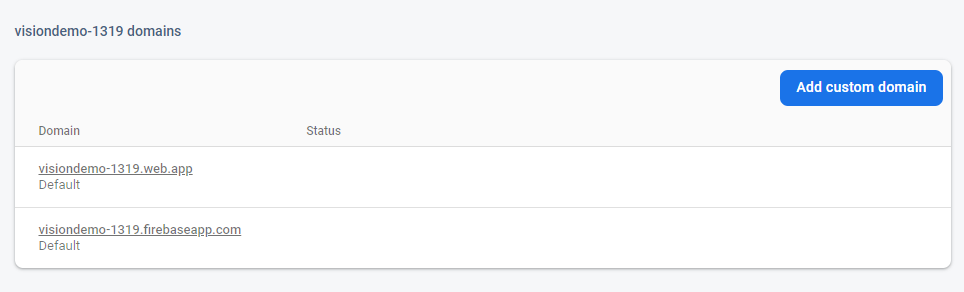
By default, you get a Firebase URL to access your application. This is usually not the URL you want to give to your users. Instead, you want to use your domain. To configure that, open the project console, open the menu Hosting, and click on Add custom domain.
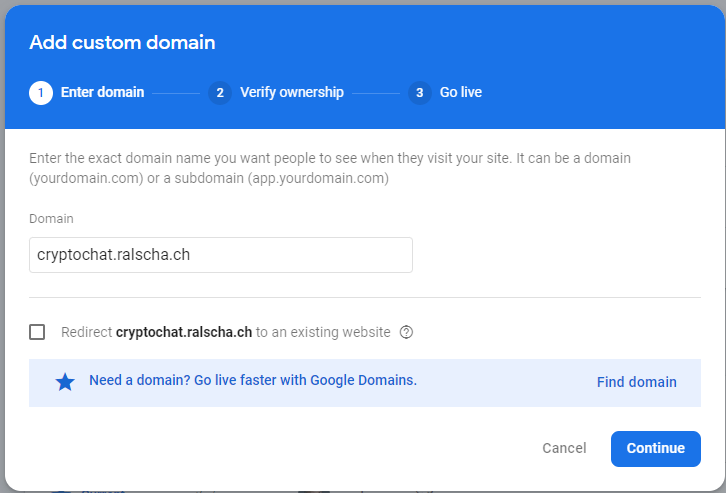
Enter the domain.
Firebase now needs to verify that you are the owner of this domain. Log in to your DNS hosting provider's website and insert the TXT record that Firebase displays. Verify the ownership with a click on Verify.
If verification is successful or the domain is already verified, Firebase presents the following dialog.
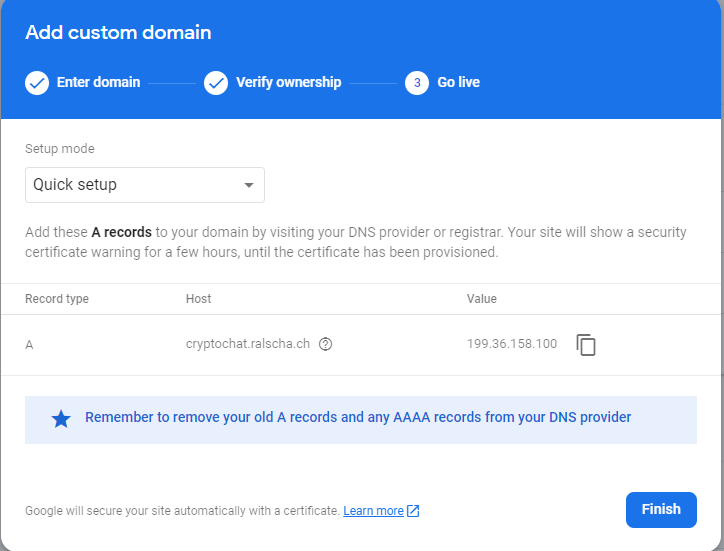
Insert the A record into your DNS configuration.
You should now be able to access your deployed application with the custom domain, but you might see a security certificate warning in the browser. It can take a few hours until the certificate has been provisioned.
Undeploy 
If you no longer want to host the application, run the following command from the root of your project:
npx firebase hosting:disable
Then, open the Firebase console, go to Hosting, and delete the files.
Spring Boot 
In this section, we are deploying the Spring Boot application to Google Cloud Run. Cloud Run is a fully managed platform where you can run containers. It is a paid service, but Google provides free quotas. Check out the pricing page to learn more.
Build image 
We use a feature introduced in Spring Boot 2.3.0 to create an image. The build-image goal of the Spring Boot Maven plugin builds Docker images. All you have to do is execute this command:
./mvnw spring-boot:build-image
You may add the build-image goal to the pom.xml to automate this process. Each time you invoke the package phase with ./mvnw package, the Docker image is built.
<build>
  <plugins>
    <plugin>
      <groupId>org.springframework.boot</groupId>
      <artifactId>spring-boot-maven-plugin</artifactId>
      <executions>
        <execution>
          <goals>
            <goal>build-image</goal>
          </goals>
        </execution>
      </executions>
    </plugin>
  </plugins>
</build>
build-image requires access to a Docker daemon.
When I run this command in the cryptochat server directory, an image named docker.io/library/cryptochat:0.0.1 will be created. The Maven plugin, by default, names the image docker.io/library/${project.artifactId}:${project.version}.
To test the image, run it with: docker run docker.io/library/cryptochat:0.0.1
Push image 
The image is currently stored in our local Docker installation. Google Cloud Run can access images that are stored in Artifact Registry or on Docker Hub.
So, before creating a Google Cloud Run service, we must push our image to one of these services. For this example, I push my image to Artifact Registry.
We need to create a repository before we can push an image to Artifact Registry. Follow the instructions on this page to enable the Artifact Registry API and to create a standard repository.
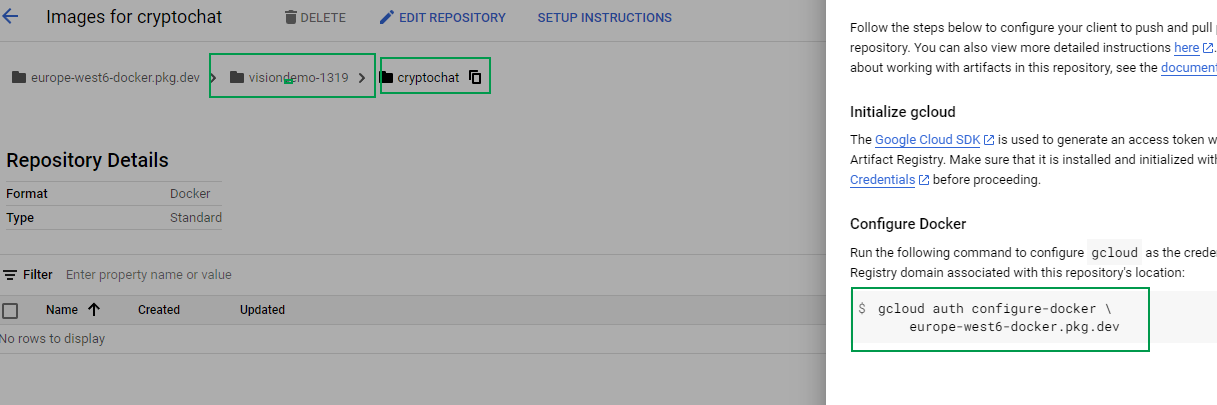
I named the repository cryptochat and created it in the europe-west6 region. Follow the instructions from the Setup instructions dialog and configure the credential helper. This is needed so the docker command can push images to Artifact Registry.
gcloud auth configure-docker europe-west6-docker.pkg.dev
Next, we need to tag our local image. The tag name must follow this pattern, according to the documentation: europe-west6-docker.pkg.dev/my-project/my-repo/my-image:v1
You can determine my-project with the Google Cloud CLI command: gcloud projects list.
my-repo is the repository name from the previous step.
my-image is an arbitrary name. Make sure it's unique if you push multiple images under the same project.
Issue the docker tag command. The first parameter is the name of the local image, and the second parameter is the new tag name.
docker tag docker.io/library/cryptochat:0.0.1 europe-west6-docker.pkg.dev/visiondemo-1319/cryptochat/cryptochat-backend:v1
We can now push the local image to Artifact Registry.
docker push europe-west6-docker.pkg.dev/visiondemo-1319/cryptochat/cryptochat-backend:v1
Check if your image is stored in the registry by opening the Artifact Registry console: https://console.cloud.google.com/artifacts/docker
Create Cloud Run Service 
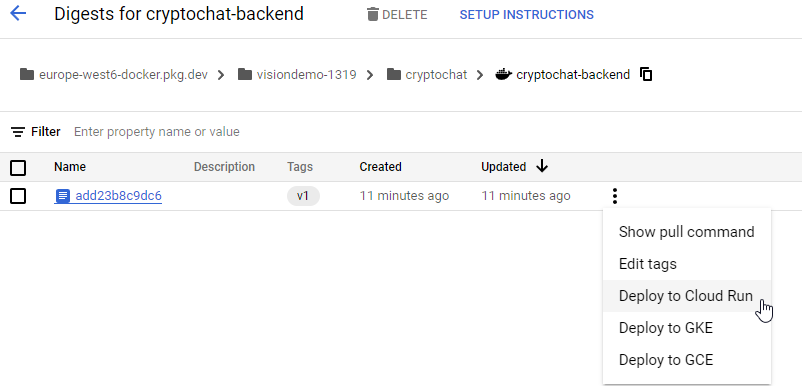
We can directly deploy a Cloud Run Service from the Artifact Registry console. Open the list of docker images and select the menu Deploy to Cloud Run.
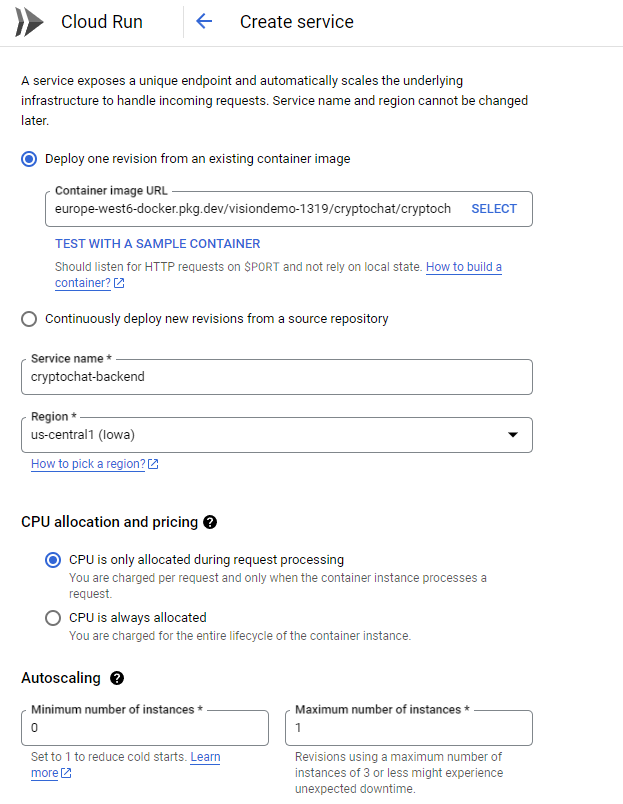
The following screenshots show you the config options I selected for this service. Allow unauthenticated invocations is important because we want to give everybody access to this web application.
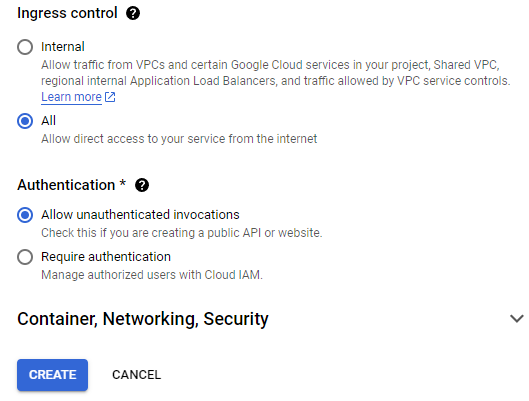
Clicking Create creates the service, which takes a few seconds. When the service runs, the console displays the URL under which this new service is accessible.

Like in Firebase Hosting, this is rarely the URL you want to use in production. Instead, you want to use your domain.
Custom domain 
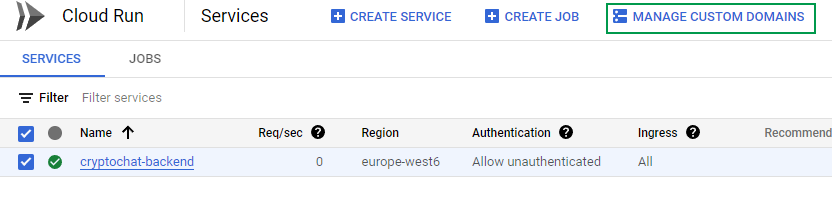
Click on Manage custom domains.
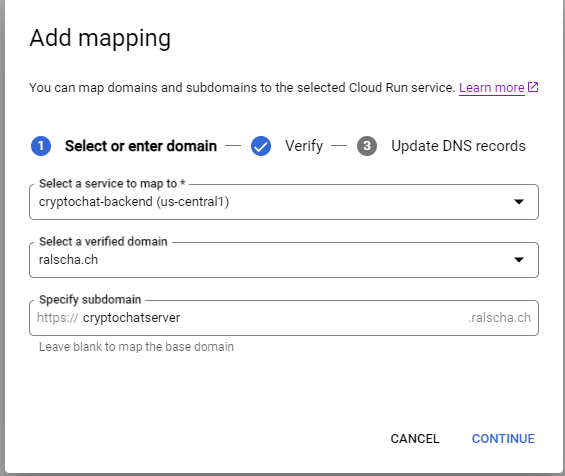
Then on Add Mapping.
Enter the domain. If you do this the first time, you must verify the domain so Google can check if you are the owner. Follow the instructions on the screen. Usually, you have to insert a TXT record into your DNS configuration. In this example, I use a domain that is already validated.
The last screen instructs you to add a specific record to your DNS configuration. For this setup, I had to add a CNAME record.
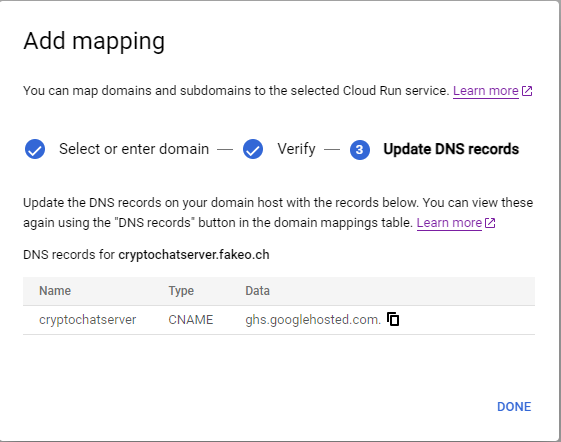
To learn more about Custom Domain mapping, visit the Cloud Run documentation page.
That concludes the deployment of our applications to the Google Cloud. The Angular application should work and be able to connect to the server.
Keep in mind that Firebase Hosting and Google Cloud Run cost money as soon as your applications use more resources than the free tiers provide. I recommend setting up alarms in the Google Cloud Console under the menu Billing->Budgets & alerts. Google then informs you when certain thresholds are reached.