In this blog post, we are going to explore the Web Workers API. First, we will examine the problem and why we need Web Workers. Then, we will create a few examples with Web Workers in plain JavaScript. In the second part of this blog post, we will look at the Angular build-time support for Web Workers, and lastly, we will check out the Comlink JavaScript library that simplifies the Web Worker programming model.
You can find the source code for all the examples on my GitHub account:
https://github.com/ralscha/blog2019/tree/master/webworkers
Problem 
JavaScript applications run in a single-threaded event loop. We don't have to worry about any concurrency and locking issues because our code always runs in a single thread. This also means we need to make sure that our application never blocks this event loop because that would prevent the application from receiving any asynchronous callbacks, and it stops the GUI from updating. It essentially freezes the browser tab.
See the MDN page for more information about the Event Loop:
https://developer.mozilla.org/en-US/docs/Web/JavaScript/Event_loop
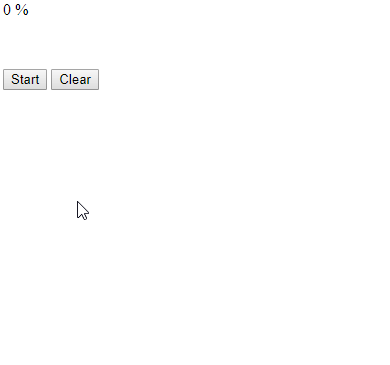
But what if we have no choice, and we have to run a time-consuming algorithm in our application? The following application runs the Mandelbrot set algorithm and draws the famous Mandelbrot set into a canvas.
const myCanvas = document.getElementById('myCanvas');
const ctx = myCanvas.getContext('2d');
ctx.fillStyle = 'black';

const timeElement = document.getElementById('time');
const progressElement = document.getElementById('progress');
let progress = 0;

const height = myCanvas.height;
const width = myCanvas.width;
const maxIteration = 20000;
const totalPixels = height * width;

document.getElementById('startButton').addEventListener('click', () => {
  progressElement.innerText = '0 %';
  ctx.clearRect(0, 0, myCanvas.width, myCanvas.height);
  timeElement.innerText = 'working...';
  performance.clearMarks();
  performance.clearMeasures();
  performance.mark('start-mandelbrot');

  drawMandelbrotSet();

  performance.mark('end-mandelbrot');
  performance.measure('mandelbrot', 'start-mandelbrot', 'end-mandelbrot');
  timeElement.innerText = performance.getEntriesByName('mandelbrot')[0].duration + 'ms';
  progressElement.innerText = '100 %';
});

document.getElementById('clearButton').addEventListener('click', () => {
  progressElement.innerText = '0 %';
  timeElement.innerHTML = ' ';
  ctx.clearRect(0, 0, myCanvas.width, myCanvas.height);
});

function drawMandelbrotSet() {
  for (let iy = 0; iy < height; iy++) {
    for (let ix = 0; ix < width; ix++) {
      const cRe = (ix - width / 2.0) * 4.0 / width;
      const cIm = (iy - height / 2.0) * 4.0 / width;
      let x = 0;
      let y = 0;

      let iteration = 0;
      while (x * x + y * y <= 4 && iteration < maxIteration) {
        const xNew = x * x - y * y + cRe;
        y = 2 * x * y + cIm;
        x = xNew;
        iteration++;
      }
      if (iteration >= maxIteration) {
        ctx.fillRect(ix, iy, 1, 1);
      }
      progress++;
    }
    progressElement.innerText = progress * 100 / totalPixels + ' %';
  }
}
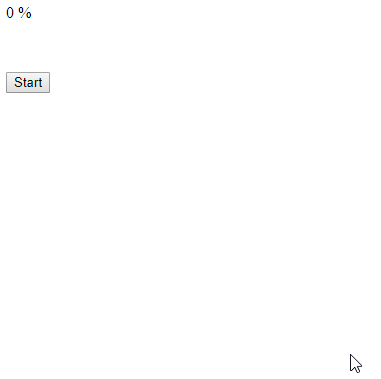
This algorithm runs for a few seconds and blocks the event loop during that time. We immediately see the effect of this blocking; the GUI stops updating. The start button stays in the pressed state, the progress text is not updated, and we don't see anything on the canvas.
As soon as the algorithm is finished, the event loop is unblocked, and the GUI updates. We see the Mandelbrot set appear on the screen, and the progress field updates.
Web Workers 
We have seen the problem; now, the question is, how can we solve it? Fortunately, the JavaScript environment has a solution for this: the Web Workers API.
Web Workers allow a JavaScript application to run code in background threads. These worker threads can perform tasks without blocking the event loop.
Visit the MDN page for more information about Web Workers:
https://developer.mozilla.org/en-US/docs/Web/API/Web_Workers_API/Using_web_workers
Basic Usage 
Let's start with a simple example. We will create a worker that adds two numbers together. First, we create two JavaScript files: main.js and worker.js. The code for a Web Worker needs to be loaded from a separate file.
The code in main.js, which runs on the main thread, creates and starts the Web Worker. You create a Web Worker
by creating a new Worker object and passing the path to a JavaScript file as the argument. The code in this
JavaScript file runs in a background thread.
const worker = new Worker('worker.js');
worker.addEventListener('message', message => {
  console.log('result: ' + message.data);
});

worker.postMessage({ a: 1, b: 2 });
worker.postMessage({ a: 3, b: 6 });
worker.postMessage({ a: 4, b: 4 });
self.addEventListener('message', messageEvent => {
  const data = messageEvent.data;
  const result = data.a + data.b;
  postMessage(result);
});
You can run any code in a Web Worker, with some exceptions. The most significant limitation is that you can't access the DOM from a Web Worker. Also, other APIs, like the Web Storage API, are not available from the Web Worker context.
MDN maintains a list of APIs that are available to Web Workers:
https://developer.mozilla.org/en-US/docs/Web/API/Web_Workers_API/Functions_and_classes_available_to_workers
For example, you can issue HTTP requests, open WebSocket connections, and access IndexedDB from a Web Worker. In the last part of this blog post, I'm going to show you an example that fetches resources from a network and inserts them into IndexedDB.
It's important to note that workers and the main application run in different contexts. Thus, Web Workers don't have access to the code in the main application, and vice versa. The only way to exchange data between the main application and a Web Worker is with the messaging system.
Both sides can send messages with postMessage(), and both sides can listen to messages by registering a listener for the message event.
The payload of the message is contained in the data attribute of the message event object.
The data we pass to the postMessage() method is, by default, copied. We will later see an example where
we pass an object by reference. This is useful for applications that need to exchange huge messages, for
example, a Web Worker that runs image manipulations where the application passes a whole image
to a Web Worker. Copying the message, in this case, would be detrimental to performance and memory usage.
In our simple application, you see that both the main application and the Web Worker register a message event
listener.
The main application then sends three messages with postMessage() to the worker. The worker
receives these events one by one, adds the two numbers together, and returns the result with postMessage()
back to the main thread.
The application on the main thread receives the result in the message event handler and prints the result
into the console.
It's worth noting that you are not limited to just one Worker. You can instantiate multiple Worker objects with
the same code, and you can create multiple Worker objects with different code. In the next section, we will see an example that creates multiple Worker objects with the same code.
The Web Worker interface also provides the worker.terminate() method to immediately terminate a worker.
This method stops the worker and does not wait until the worker has finished its operations.
You can no longer use this worker and need to instantiate a new Worker object if you want to run
the code again.
Make sure, when you play with Web Workers, that you serve your HTML pages from an HTTP server. Web Workers
don't work when you load a page with the file:// scheme. My preferred solution for non-Angular examples is
by installing the local-web-server package and then creating a npm script.
{
  "name": "basic",
  "version": "1.0.0",
  "scripts": {
    "start": "ws -d . -p 1234"
  },
  "devDependencies": {
    "local-web-server": "5.4.0"
  }
}
With this package.json in place, I can start the server with npm start, and it serves everything from
the local directory.
Run Mandelbrot in a Web Worker 
Back to our initial Mandelbrot set example. We want to run the code in a Web Worker. First, we need
to create a new JavaScript file that contains the Mandelbrot set algorithm. Then, we need
to register handlers for the message event.
On the Web Worker side, the message event contains the width, height, and maxIteration parameters that
the main application sent. After the Web Worker receives the event, it starts the algorithm.
self.addEventListener('message', messageEvent => {
  computeMandelbrotSet(messageEvent.data);
});

function computeMandelbrotSet({ width, height, maxIteration }) {
  for (let iy = 0; iy < height; iy++) {
    for (let ix = 0; ix < width; ix++) {
      const cRe = (ix - width / 2.0) * 4.0 / width;
      const cIm = (iy - height / 2.0) * 4.0 / width;
      let x = 0;
      let y = 0;

      let iteration = 0;
      while (x * x + y * y <= 4 && iteration < maxIteration) {
        const xNew = x * x - y * y + cRe;
        y = 2 * x * y + cIm;
        x = xNew;
        iteration++;
      }
      if (iteration >= maxIteration) {
        postMessage([ix, iy]);
      }
    }
  }
  postMessage(null);
}
Remember that we can't update the DOM, and thus the canvas, from the worker, so we have to send back the results with postMessage() calls. In this version, we do this
for each pixel that is part of the Mandelbrot set. The last postMessage() with the argument
null signifies the end of the computation.
In the main application, we call postMessage(), the counterpart to
the message event listener above. Here, we pass the height, width, and maxIteration parameters to the
Web Worker.
worker.postMessage({ height, width, maxIteration });
Before we can use the worker, we need to create it with new and register an event listener
that receives the results from the background thread.
In this listener, the application draws the pixels onto the canvas with fillRect().
When the worker sends back a null response, the application knows that the computation is finished.
const worker = new Worker('mandelbrot.js');
worker.addEventListener('message', message => {
  const data = message.data;
  if (data !== null) {
    ctx.fillRect(data[0], data[1], 1, 1);
    progress = data[0] + (data[1] * width);
    progressElement.innerText = Math.round(progress * 100 / totalPixels) + ' %';
  } else {
    performance.mark('end-mandelbrot');
    performance.measure('mandelbrot', 'start-mandelbrot', 'end-mandelbrot');
    timeElement.innerText = performance.getEntriesByName('mandelbrot')[0].duration + 'ms';
    progressElement.innerText = '100 %';
  }
});
This does work; we no longer block the event loop, but we also see that this does not run very smoothly, and the algorithm takes longer than the first blocking example. The reason for this is that we send a lot of messages from the worker thread to our main thread. The overhead of the messaging systems increases the run time in this example.
To solve this issue, we have to decrease the number of messages we send from the worker. In this particular case,
this is straightforward to achieve. Instead of calling postMessage() for each pixel, we collect
the pixels in an array. When the array contains 1000 elements, we send it with a postMessage()
call to the main application.
function computeMandelbrotSet({ width, height, maxIteration }) {
  let batch = [];
  for (let iy = 0; iy < height; iy++) {
    for (let ix = 0; ix < width; ix++) {
      const cRe = (ix - width / 2.0) * 4.0 / width;
      const cIm = (iy - height / 2.0) * 4.0 / width;
      let x = 0;
      let y = 0;

      let iteration = 0;
      while (x * x + y * y <= 4 && iteration < maxIteration) {
        const xNew = x * x - y * y + cRe;
        y = 2 * x * y + cIm;
        x = xNew;
        iteration++;
      }
      if (iteration >= maxIteration) {
        batch.push([ix, iy]);
        if (batch.length === 1000) {
          postMessage(batch);
          batch = [];
        }
      }
    }
  }

  if (batch.length > 0) {
    postMessage(batch);
  }

  postMessage(null);
}
In the main application, we have to adjust the code that draws the pixels onto the canvas.
worker.addEventListener('message', message => {
  const data = message.data;
  if (data !== null) {
    for (let i = 0; i < data.length; i++) {
      ctx.fillRect(data[i][0], data[i][1], 1, 1);
    }
This version of the application now runs much smoother and takes about the same time as the initial blocking version.
Multiple Web Workers 
So far, we have only created one Worker. The Mandelbrot set algorithm is an algorithm that runs the calculation for each pixel independently of all the other pixels. The algorithm does not need information about the surrounding pixels, and it does not hold any state across the whole calculation. For these reasons, we can efficiently parallelize the algorithm and start multiple Web Workers. This should increase the performance significantly.
In the following example, the application creates four Workers; they all load the same JavaScript code (mandelbrot-multi.js).
const workers = [];

for (let w = 0; w < numberOfWorkers; w++) {
  workers[w] = new Worker('mandelbrot-multi.js');
I'm using a straightforward approach here. I divide the canvas into quadrants of 100 by 100 pixels.
The main application creates the Worker objects and then starts the calculation by assigning a quadrant to
each of the four Web Workers.
  for (let w = 0; w < numberOfWorkers; w++) {
    workers[w].postMessage({
      startX: workX,
      startY: workY,
      width: 100,
      height: 100,
      totalWidth: width,
      totalHeight: height,
      maxIteration
    });
    workX += 100;
    if (workX === width) {
      workY += 100;
      workX = 0;
    }
  }
The global variables workX and workY keep track of the quadrants.
Each worker runs the algorithm for their quadrant in parallel and sends back the result
with postMessage().
self.addEventListener('message', messageEvent => {
  computeMandelbrotSet(messageEvent.data);
});

function computeMandelbrotSet({ startX, startY, width, height, totalWidth, totalHeight, maxIteration }) {
  const result = [];
  for (let iy = startY; iy < startY + height; iy++) {
    for (let ix = startX; ix < startX + width; ix++) {
      const cRe = (ix - totalWidth / 2.0) * 4.0 / totalWidth;
      const cIm = (iy - totalHeight / 2.0) * 4.0 / totalWidth;
      let x = 0;
      let y = 0;

      let iteration = 0;
      while (x * x + y * y <= 4 && iteration < maxIteration) {
        const xNew = x * x - y * y + cRe;
        y = 2 * x * y + cIm;
        x = xNew;
        iteration++;
      }
      if (iteration >= maxIteration) {
        result.push([ix, iy]);
      }
    }
  }
  postMessage(result);
}
In the main application, each of the four workers has a message handler attached to it. Each time one worker finishes his job, it sends back a message which, in turn, then calls the corresponding listener.
  workers[w].addEventListener('message', message => {
    const data = message.data;
    for (let i = 0; i < data.length; i++) {
      ctx.fillRect(data[i][0], data[i][1], 1, 1);
    }

    const last = data[data.length - 1];
    if (last) {
      progress = last[0] + (last[1] * width);
      progressElement.innerText = Math.round(progress * 100 / totalPixels) + ' %';
    }

    if (workY < height) {
      workers[w].postMessage({
        startX: workX,
        startY: workY,
        width: 100,
        height: 100,
        totalWidth: width,
        totalHeight: height,
        maxIteration
      });

      workX += 100;
      if (workX === width) {
        workY += 100;
        workX = 0;
      }
    } else {
      endCounter++;
      if (endCounter === numberOfWorkers) {
        performance.mark('end-mandelbrot');
        performance.measure('mandelbrot', 'start-mandelbrot', 'end-mandelbrot');
        timeElement.innerText = performance.getEntriesByName('mandelbrot')[0].duration + 'ms';
        progressElement.innerText = '100 %';
      }
    }
  });
In the event handler, the application draws the pixels onto the canvas and checks, with the global variables workX and workY,
if there are more quadrants available. If there is more work available, it sends a message to the worker with the coordinates of the next quadrant.
We don't have to worry about concurrency issues because our main application runs in the single-threaded event loop, so the message handler will never run multiple times at the same time. The messages will be handled one after the other.
If there are no more quadrants available, the application increments the endCounter variable. If this variable is equal to the number
of workers, we know that all workers have finished their work, and the application prints out the elapsed time.
Transfer messages 
As mentioned before, arguments you pass to postMessage() will be copied. In these examples, this is not a problem, even
our 1000 element array is not that big, and each element only contains two numbers. But when the messages are getting bigger,
the overhead of copying the arguments increases the run time and memory usage.
For these cases, the postMessage() supports a second optional parameter called transfer. This parameter must be an array
of objects that the method should transfer as a reference rather than copying it. Transferring a reference also has the effect
that the ownership of the object changes to the receiver of the message. The sender can no longer access these objects.
Only instances of ArrayBuffer, MessagePort, and ImageBitmap can be transferred this way. To demonstrate this behavior, the following example shows a modified version of the previous example where the worker wraps the result array into a Uint16Array object and then sends it to the main application. As the second argument of postMessage(), I specify here the buffer property, which is the ArrayBuffer part of the Uint16Array object. Because of this second argument, buffer will no longer be copied; instead, the
reference to the object is transferred to the receiver.
  const message = new Uint16Array(result);
  console.log('before', message.buffer.byteLength);
  postMessage(message, [message.buffer]);
  console.log('after', message.buffer.byteLength);
With the log statements, we can observe the change of ownership. After the postMessage() call, the length of the ArrayBuffer object is 0. The owner of the object is now the receiver of the message.
In this application, we don't see any difference in performance if we copy the message or send a reference. It uses a bit less memory because the application no longer has to allocate memory for the copy, but that is almost negligible in this application.
The code in the main application that receives the message also has to change because it now receives a Uint16Array object. The application uses an iterator to loop over all x/y coordinates.
  workers[w].addEventListener('message', message => {
    const data = message.data;
    const arrayIterator = data.values();
    let result = arrayIterator.next();
    let x;
    let y;
    while (!result.done) {
      x = result.value;
      y = arrayIterator.next().value;
      ctx.fillRect(x, y, 1, 1);
      result = arrayIterator.next();
    }
Angular support for Web Workers 
After the basic introduction, let's shift focus to a new feature introduced in Angular 8. With Angular 8, it has now become much easier to work with Web Workers. The programming model does not change, but Angular 8 introduced build-time support that takes care of bundling the Web Worker code.
This is one of the challenges of Web Worker development where you have to bundle the code into its own file. In the examples we have seen so far, this is not a big problem, but as soon as you start importing 3rd party libraries into your Web Worker code, you need to set up a build system that takes care of bundling all the libraries into one file.
With the new build-time support in Angular 8, it's getting straightforward to write Web Worker code. You import 3rd party libraries and write your code in TypeScript, and the Angular CLI takes care of the rest.
You can add the Web Worker support to any Angular application that has been created with ng new.
To create a Web Worker, you issue this command: ng generate webWorker mandelbrot
The last argument is the name of the web worker file. The generate command adds .worker.ts to the name.
In this example, the command creates the file mandelbrot.worker.ts in the src folder.
The first time you run this command, the CLI not only creates the Web Worker file, but it also updates angular.json and creates tsconfig.worker.json.
Later calls of the generate command only create a new Web Worker file. You can create multiple worker source files;
make sure that you give each a unique name.
You can find an Angular version of the Mandelbrot set example here:
https://github.com/ralscha/blog2019/tree/master/webworkers/angular/src/app
The code is almost the same as the plain JavaScript version, with one crucial difference. When we create
the Worker object, we need to pass the type of the Web Worker as an option in the second argument.
    this.workers = [];
    for (let w = 0; w < this.numberOfWorkers; w++) {
      this.workers[w] = new Worker(new URL('./mandelbrot.worker', import.meta.url), {type: 'module'});
      this.workers[w].addEventListener('message', message => this.handleWorkerMessage(this.workers[w], message));
    }
The type value is either classic or module. If not specified, the default used is classic. This is also what we
used so far, which specifies a pure JavaScript file. But in this case, the Angular CLI builds a module, and we have to
load it accordingly.
Also, notice that you don't specify the suffix .ts in the path. TypeScript code would not run in a browser anyway and needs to be transpiled to JavaScript first. The CLI automatically adjusts the name of the Web Worker when you build the application.
Comlink 
In all the examples so far, you have seen that setting up the messaging infrastructure requires a bit of
coding. In these examples, it was not a big deal because the messages the application sends are very trivial, but still,
we have to register listeners on both sides, and we have to send messages with postMessage(). The complexity increases
when you exchange multiple types of messages.
There are many JavaScript libraries available that simplify this programming model. In this blog post, we will take a closer look at Comlink.
Comlink is a tiny library (1.1 KB) that completely hides the messaging infrastructure behind proxy objects and instead exposes your worker code as an asynchronous API that returns Promises.
Notice that Comlink requires a browser that supports the ECMAScript 2015 proxy feature (https://caniuse.com/#search=proxy). If you need to support browsers without built-in proxy support (IE11), you have to add a polyfill: proxy-polyfill.
Let's start with a plain Web Worker example. In this demo application, we calculate the Fibonacci sequence and return the number at the requested index.
Like in all the examples before, we create a Worker object and register event handlers in the main application and the worker.
Lastly, we kick off the calculation with a postMessage() call from the main application.
function startPlainCalculation() {
  const worker = new Worker('./worker-plain.js');
  writeOutput(' ');
  worker.addEventListener('message', messageEvent => writeOutput(messageEvent.data));
  worker.postMessage(1000);
}
self.addEventListener('message', messageEvent => {
  const result = fibonacci(messageEvent.data);
  postMessage(result);
});

function fibonacci(num) {
  let a = 1;
  let b = 0;

  while (num >= 0) {
    const temp = a;
    a = a + b;
    b = temp;
    num--;
  }

  return b;
}
Next, we implement the same example with Comlink. First, we remove the message listeners and import the Comlink library into the worker and the main application. Notice that you need a build system that can bundle the Comlink library to the main application and the Web Worker. In this example, I'm using Parcel, which has built-in build support for Web Workers, like Angular 8.
Next, we need to call Comlink.expose with a reference to the function we want to expose to the main application.
import * as Comlink from 'comlink';

function fibonacci(num) {
  let a = 1;
  let b = 0;

  while (num >= 0) {
    const temp = a;
    a = a + b;
    b = temp;
    num--;
  }

  return b;
}

Comlink.expose(fibonacci);
On the other side, in the main application, we instantiate the Worker object like before, but also, we wrap the Worker object with
Comlink.wrap. wrap is the counterpart to the expose method. You can only wrap objects that you expose in a worker.
async function startCalculation() {
  const fibonacci = Comlink.wrap(new Worker('./worker.js'));
  writeOutput(' ');
  const result = await fibonacci(1000);
  writeOutput(result);
}
wrap returns a proxy to the function in the worker, but access to the function is asynchronous. This means that the function
that returns a number in the Web Worker now returns a Promise in the main thread. This is an ordinary Promise, and you can either use
then and catch or async/await, as I do in this example.
You see that Comlink significantly simplifies the programming model. Under the hood, the main application and the worker
still exchange messages with postMessage() and the message event handler, but this is completely hidden from our application.
We work with the Web Worker like with any Promise-based API.
Like with the plain Web Workers API, all messages you send are, by default, being copied. Comlink also supports transferring
objects by reference. You have to use the Comlink.transfer() method for this purpose.
See the project page for more information about this topic:
https://github.com/GoogleChromeLabs/comlink#comlinktransfervalue-transferables-and-comlinkproxyvalue
Another interesting feature is Comlink.proxy. This allows you to send a proxy of an object to the other side.
This is especially useful for callback functions because functions can't be transferred.
In the following example, we transfer not only the index of the Fibonacci sequence but also a proxy to a function that updates the DOM.
function startCalculationWithProxy() {
  const fibonacci = Comlink.wrap(new Worker('./worker-proxy.js'));
  fibonacci(1000, Comlink.proxy(writeOutput));
}

const outputElement = document.getElementById('output');

function writeOutput(value) {
  outputElement.innerHTML = value;
}
In the Worker code, we add a second parameter to the fibonacci method that receives the proxy of the writeOutput
function. The function no longer returns any value; instead, it calls the output function and writes the result directly into the DOM.
import * as Comlink from 'comlink';

function fibonacci(num, outputFunction) {
  let a = 1;
  let b = 0;

  outputFunction(' ');

  while (num >= 0) {
    const temp = a;
    a = a + b;
    b = temp;
    num--;
    outputFunction(b);
  }

}

Comlink.expose(fibonacci);
Visit the Comlink project page for more information:
https://github.com/GoogleChromeLabs/comlink
Mandelbrot set with Angular and Comlink 
In this example, we combine all the knowledge we have learned so far and create an Angular 8 application that draws the Mandelbrot set and uses Comlink for exchanging data with the Web Workers.
This is a port of the previous Angular 8 Mandelbrot application. The only difference is that we use Comlink instead of a plain Web Worker.
First, I created the Angular application with ng new and then added Web Worker support with ng generate webWorker mandelbrot.
In the Web Worker, we implement the algorithm as a regular function that returns a value. Then, we import the Comlink
library and expose the function with Comlink.expose.
import * as Comlink from 'comlink';

function computeMandelbrotSet({startX, startY, width, height, totalWidth, totalHeight, maxIteration}:
                              {
                                startX: number, startY: number, width: number, height: number,
                                totalWidth: number, totalHeight: number, maxIteration: number
                              }): number[][] {
  const result = [];
  for (let iy = startY; iy < startY + height; iy++) {
    for (let ix = startX; ix < startX + width; ix++) {
      const cRe = (ix - totalWidth / 2.0) * 4.0 / totalWidth;
      const cIm = (iy - totalHeight / 2.0) * 4.0 / totalWidth;
      let x = 0;
      let y = 0;

      let iteration = 0;
      while (x * x + y * y <= 4 && iteration < maxIteration) {
        const xNew = x * x - y * y + cRe;
        y = 2 * x * y + cIm;
        x = xNew;
        iteration++;
      }
      if (iteration >= maxIteration) {
        result.push([ix, iy]);
      }
    }
  }
  return result;
}

Comlink.expose(computeMandelbrotSet);
In the main application, we create the Worker and wrap it with Comlink.wrap.
    this.workers = [];
    for (let w = 0; w < this.numberOfWorkers; w++) {
      this.workers[w] = new Worker(new URL('./mandelbrot.worker', import.meta.url), {type: 'module'});
      this.computeMandelbrotSetMethods[w] = wrap(this.workers[w]);
    }
  }
With this in place, we can now call the exposed computeMandelbrotSet function.
The method is synchronous in the Web Worker, but when you wrap it with Comlink, it changes to an asynchronous method that returns a Promise.
    while (this.workY < this.height) {
      const result = await computeMandelbrotSetMethod({
        startX: this.workX,
        startY: this.workY,
        width: 100,
        height: 100,
        totalWidth: this.width,
        totalHeight: this.height,
        maxIteration: this.maxIteration
      });
Web Worker example with Ionic/Angular and Comlink 
In this last section, we will look at a more business-like example. The example displays a list of earthquakes that happened in the previous month. In this example, we use the Fetch API to download the list of earthquakes from usgs.gov, parse the CSV file with the Papa Parse library, and insert the data into IndexedDB with Dexie.js. We run all these steps in a Web Worker.
The application is based on the Ionic blank starter template. I added the Comlink, Papa Parse, and Dexie.js library to the project.
npm install comlink
npm install papaparse
npm install dexie
And created the Web Worker and added the build-time support with ng generate webWorker earthquakes-loader.
First, we create the Earthquake interface and EarthquakeDb Dexie object. See also my blog post about Dexie.js if you want to know more about IndexedDB with Dexie.js: https://golb.hplar.ch/2018/01/Using-Dexie-js-in-a-TypeScript-application.html
import Dexie from 'dexie';

export class EarthquakeDb extends Dexie {
  earthquakes!: Dexie.Table<Earthquake, string>;

  constructor() {
    super('Earthquake');
    this.version(1).stores({
      earthquakes: 'id,mag,time'
    });
  }
}

export interface Earthquake {
  id: string;
  time: number;
  place: string;
  mag: number;
  depth: number;
  latLng: [number, number];
}
In the Web Worker, we import the Comlink and Papa Parse libraries. We also import the earthquake-db.ts into the Web Worker.
import {parse} from 'papaparse';
import {Earthquake, EarthquakeDb} from './earthquake-db';
import * as Comlink from 'comlink';
Thanks to Angular's new build-time support, we can import anything we want, and the CLI bundles the imported libraries and classes into a separate Web Worker bundle.
The Web Worker code is organized as a TypeScript class with two methods.
The code is straightforward and looks the same as if you create a class for the main application.
The only difference is that, in the end, we expose the class with a call to Comlink.expose.
type EarthquakeRow = {
  id: string;
  time: string;
  place: string;
  mag: string;
  depth: string;
  latitude: string;
  longitude: string
};


class EarthquakesLoader {
  private db: EarthquakeDb;

  constructor() {
    this.db = new EarthquakeDb();
  }

  async load(url: string): Promise<void> {
    const response = await fetch(url);
    const text = await response.text();
    const data = parse<EarthquakeRow>(text, {header: true});

    const earthquakes: Earthquake[] = [];

    for (const row of data.data) {
      if (row.id) {
        earthquakes.push({
          time: new Date(row.time).getTime(),
          place: row.place,
          mag: Number(row.mag),
          depth: Number(row.depth),
          latLng: [Number(row.latitude), Number(row.longitude)],
          id: row.id
        });
      }
    }

    return this.db.transaction('rw', this.db.earthquakes, async () => {
      await this.db.earthquakes.bulkPut(earthquakes);
    });
  }
In the main application, we create a Worker object and then wrap it with Comlink.wrap.
We can now instantiate the class, like any other class, with new. The difference to a regular class
is that this operation is asynchronous, so new returns a Promise.
      const EarthquakesLoader = Comlink.wrap(new Worker(new URL('./earthquakes-loader.worker', import.meta.url), {type: 'module'}));
      // @ts-ignore
      const earthquakesLoader = await new EarthquakesLoader();

      await earthquakesLoader.load(url);
      console.log('records loaded');
      localStorage.setItem('lastUpdate', Date.now().toString());

      await earthquakesLoader.deleteOldRecords();
      console.log('old records deleted');

      this.changeSubject.next('changed');
The two methods, load and deleteOldRecords, are asynchronous as well. They are already asynchronous in
the source class. The Comlink proxy does not change that; they are not twice asynchronous or something like that.
Notice when you expose/wrap synchronous methods with Comlink that they are always asynchronous and return a Promise afterward.
This concludes the journey around the Web Workers API. It's a handy API for starting background threads. With Angular's 8 new build-time support, it's straightforward to write Web Workers in TypeScript and import 3rd party libraries. And a library like Comlink simplifies the programming model, and you can work with the Web Worker like with any other asynchronous API. All the messaging infrastructure is hidden behind proxies.
The source code for all the examples is hosted on GitHub:
https://github.com/ralscha/blog2019/tree/master/webworkers