Seafile is an open-source file sync and share application. You can upload files and sync them across different devices. Seafile provides a web interface but also native clients for macOS, Linux, Windows, and for the mobile platforms Android and iOS. These clients share the files across different devices. Seafile also provides drive clients that enable you to access files on the server without syncing to a local disk, like a network drive.
You can use Seafile by subscribing to a hosting provider. But in this tutorial, I will show you how-to self-host Seafile and install it on a VPS. For this example, I use a VPS from Hetzner (referral link). I'm installing this on the smallest Hetzner server offering (CX22) with 4GB of RAM and 40GB of disk space. If you are looking for a VPS with much more disk space, I recommend looking at Contabo. The smallest Contabo VPS presently (September 2025) for EUR 4.50 / month includes a 150 GB SSD.
In this tutorial, I will install the free Community Edition of Seafile. There is also a Pro Edition that includes additional features like LDAP integration, advanced search, and office document collaboration. The Pro Edition is free for up to 3 users, making it a viable option for small teams. Check out this page to see the differences between the Community and Pro Editions.
DNS 
Before setting up the server, I created a subdomain in the DNS configuration. This is needed if you want to use TLS, which is highly recommended. For this demo, I use the domain sea.rasc.ch.
In the web console of my DNS provider, I inserted an A record that points to the IP address of my VPS. Also, add an AAAA record if the server has a public IPv6 address.
sea.rasc.ch. 86400 IN A 51.38.124.133
If your DNS provider supports this feature, I also recommend adding a CAA record, either for the whole domain if you get all your certificates from one CA or just for the subdomain if you use multiple certificate authorities.
rasc.ch.            86400   IN      CAA     0 issue "letsencrypt.org"
// OR
sea.rasc.ch.        86400   IN      CAA     0 issue "letsencrypt.org"
Docker 
I run all the following commands as a root user on Debian 13. If you are not logged in as root, prepend sudo to the commands or switch to root with sudo -i.
First, make sure that the system is up to date.
apt update
apt dist-upgrade
The easiest way to install Seafile is with Docker. Install Docker following the installation instructions on this web page: https://docs.docker.com/engine/install/debian/
Seafile 
For the installation of Seafile I follow the description from this page:
https://manual.seafile.com/12.0/setup/setup_ce_by_docker/
mkdir /opt/seafile
cd /opt/seafile

# Seafile CE 12.0
wget -O .env https://manual.seafile.com/12.0/repo/docker/ce/env
wget https://manual.seafile.com/12.0/repo/docker/seadoc.yml
wget https://manual.seafile.com/12.0/repo/docker/ce/seafile-server.yml
wget https://manual.seafile.com/12.0/repo/docker/caddy.yml

nano .env
Update the SEAFILE_SERVER_HOSTNAME config option.
SEAFILE_SERVER_HOSTNAME=sea.rasc.ch
SEAFILE_SERVER_PROTOCOL=https
Generate three random passwords using the following command:
openssl rand -base64 32
Then update the following passwords
JWT_PRIVATE_KEY=9ILkA...
SEAFILE_MYSQL_DB_PASSWORD=92c5...
INIT_SEAFILE_MYSQL_ROOT_PASSWORD=mN8f...
Update the admin user email and password.
INIT_SEAFILE_ADMIN_EMAIL=me@example.com
INIT_SEAFILE_ADMIN_PASSWORD=myverylongsupersecretpassword
Start the Seafile containers.
docker compose up -d
Open a browser and enter the configured URL. Seafile should greet you with the login screen. Log in with the configured admin email and password.
If you are interested in installing the Pro Edition, visit the Seafile 12 Pro Docker guide:
https://manual.seafile.com/12.0/setup/setup_pro_by_docker/
Client 
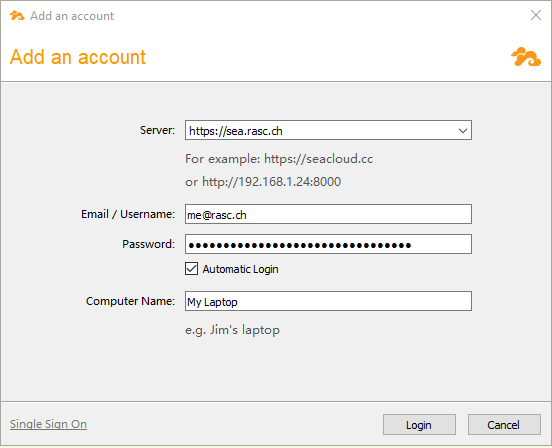
You can upload and download files over the web interface, but installing a client is more convenient. Here, I installed the Windows syncing client. You can find all provided clients on the download page: https://www.seafile.com/en/download/
The first time you start a native client, it presents a dialog where you must enter the server address and your login credentials.
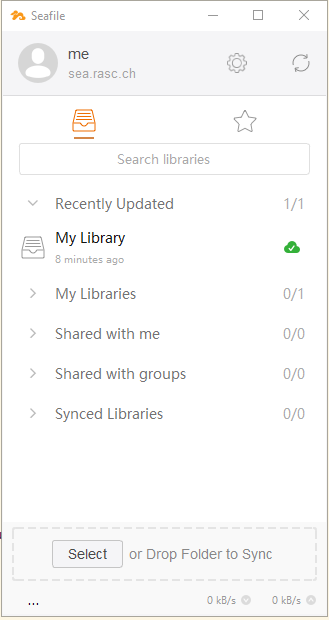
If you install a syncing client, it syncs the remote library to your local computer, and each time you add files locally, it syncs them to the remote server. On the other hand, a drive client enables you to access files without syncing to the local disk. It works like a network drive.
Upgrade 
It is recommended to update Seafile from time to time. Run the following commands manually or create a scheduled job that does it automatically.
cd /opt/seafile
docker compose pull
docker compose down
docker compose up -d --remove-orphans
Backup 
You usually don't have a backup on a VPS out of the box. Some VPS providers have snapshot tools where you can take a snapshot of the whole server.
For a mission-critical Seafile installation, you should look at installing a Seafile cluster. Check out the Seafile 12 cluster deployment guide for Docker:
https://manual.seafile.com/12.0/setup/cluster_deploy_with_docker/
In this section, I show you a simple backup approach where a script runs once a day and copies everything to an Amazon S3 bucket.
If you want to follow this tutorial, create a user on AWS. Then, take a note of the access and secret key. This is the policy I attached to the user.
{
    "Version": "2012-10-17",
    "Statement": [
        {
            "Sid": "VisualEditor0",
            "Effect": "Allow",
            "Action": [
                "s3:PutObject",
                "s3:GetObject",
                "s3:ListBucket",
                "s3:GetBucketLocation"
            ],
            "Resource": [
                "arn:aws:s3:::rasc.seafile/*",
                "arn:aws:s3:::rasc.seafile"
            ]
        }
    ]
}
Also, create an S3 bucket. I created a bucket with the name rasc.seafile. Change this name in the policy and script to the bucket you created.
Install the Amazon S3 command-line tools.
apt install s3cmd
In the /opt/seafile folder, create a new file called backup-seafile.sh and paste the following code.
#!/bin/sh
DATE=$(date +"%Y-%m-%d-%H-%M-%S")
rm -fr /opt/seafile/backup
mkdir /opt/seafile/backup
cd /opt/seafile/backup
docker exec -it seafile-mysql mariadb-dump  -uroot --opt ccnet_db > ccnet_db.sql
docker exec -it seafile-mysql mariadb-dump  -uroot --opt seafile_db > seafile_db.sql
docker exec -it seafile-mysql mariadb-dump  -uroot --opt seahub_db > seahub_db.sql

cp -R /opt/seafile-data/seafile /opt/seafile/backup/data/
cd /opt/seafile/backup/data && rm -rf ccnet

cd /opt/seafile
tar czf backup-$DATE.tar.gz backup

s3cmd --access_key=AK... --secret_key=cd... sync /opt/seafile/backup-$DATE.tar.gz s3://rasc.seafile

rm -fr /opt/seafile/backup-$DATE.tar.gz
rm -fr /opt/seafile/backup
Make the script executable:
cd /opt/seafile
chmod 700 backup-seafile.sh
Next, install a timer service in systemd. This takes care of starting our backup job daily at a specified time.
Create a file seafile-backup.timer and paste this code into the file.
[Unit]
Description=Run seafile-backup once a day

[Timer]
OnCalendar=*-*-* 05:00:00
RandomizedDelaySec=30
Persistent=true

[Install]
WantedBy=timers.target
Change OnCalendar if you want to run this script at a different time or more often than just daily. See the documentation for information about the supported format:
https://www.freedesktop.org/software/systemd/man/latest/systemd.time.html
Create the systemd service file seafile-backup.service and paste this code into the file:
[Unit]
Description=backup-seafile

[Service]
WorkingDirectory=/opt/seafile
Type=oneshot
ExecStart=/opt/seafile/backup-seafile.sh
Then, link these files into the systemd folder, reload systemd, start, and enable the timer:
ln -s /opt/seafile/seafile-backup.timer /lib/systemd/system/seafile-backup.timer
ln -s /opt/seafile/seafile-backup.service /lib/systemd/system/seafile-backup.service
systemctl daemon-reload
systemctl start seafile-backup.timer
systemctl enable seafile-backup.timer
Check if the timer is installed correctly.
systemctl list-timers
Manually start the job.
systemctl start seafile-backup
journalctl -u seafile-backup
To recover a backup, check out the Seafile 12 backup & recovery documentation:
https://manual.seafile.com/12.0/administration/backup_recovery/?h=backup
This concludes the tutorial about self-hosting Seafile. A powerful file sync software and a good alternative to Dropbox, Google Drive, and others.