In December, I built a firewall/router with pfSense and an APU2 board, a single-board computer from pcengines.ch. These boards are great for building routers and firewalls because of the multiple Ethernet ports they have built-in.
I also have a Netgear Aircard 790 laying around that I use when I'm on the road, and I was interested to see if it is possible to configure the Aircard as an Internet gateway in pfSense.
It turns out not to be that complicated. The current version of pfSense already includes all the necessary drivers it needs to access the Aircard. The following guide describes, step-by-step, how to make this work.
IP Address 
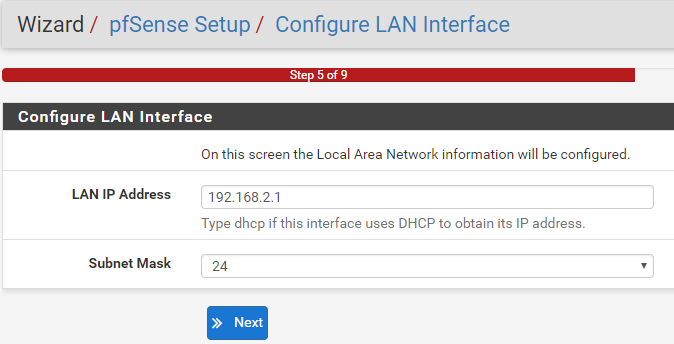
Both devices, the computer running pfSense and the Netgear Aircard, use the IP address 192.168.1.1. To resolve that conflict, change the IP address in pfSense. In my installation, I changed it to 192.168.2.1.
You can do this during installation in step 5:
Or, when pfSense is already installed, open the menu Interfaces -> LAN and change the IPv4 address in the section Static IPv4 Configuration.

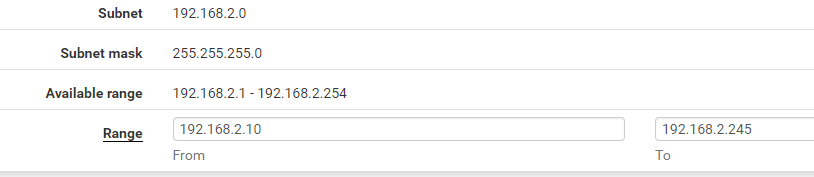
When you change the address afterward, also don't forget to change the DHCP address range (if DHCP is enabled) in the menu Services -> DHCP Server under General Options.
Reboot the computer.
USB 
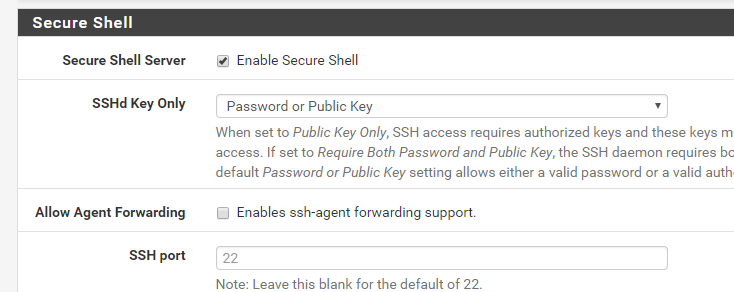
Connect the Netgear Aircard with a USB cable to the pfSense computer. Open the menu System -> Advanced. On the tab Admin Access, under the section Secure Shell, enable the checkbox Enable Secure Shell and click Save.
In a shell on your computer, open an SSH connection to the pfSense computer. Log in with the admin password.
ssh root@192.168.2.1
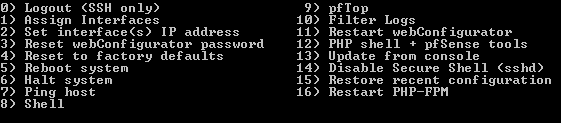
You should see the following menu. Select option 8 Shell.
Execute the following command:
usbconfig dump_device_desc
This lists all currently connected USB devices. You should find an entry that corresponds with the Aircard.
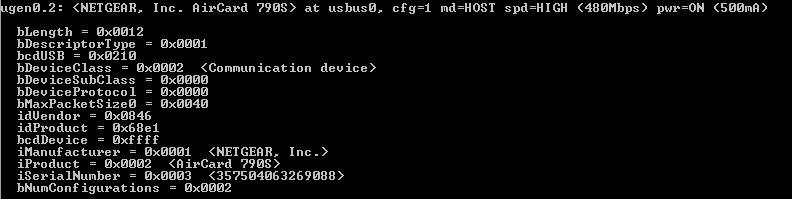
Note the idVendor and idProduct numbers. We need both numbers in the next step.
idVendor = 0x0846
idProduct = 0x68e1
Open the following configuration file with vi:
vi /boot/loader.conf.local
Press 'i' and paste the following line into the editor. Replace <idVendor> and <idProduct> with the numbers from the previous step.
hw.usb.quirk.0="<idVendor> <idProduct> 0 0xffff UQ_CFG_INDEX_1"
In my case, the content of the file looks like this:
hw.usb.quirk.0="0x0846 0x68e1 0 0xffff UQ_CFG_INDEX_1"
Press ESC and enter :wq. This saves the file and closes the editor. Check the content with cat /boot/loader.conf.local.
This setting forces the USB driver to use configuration index 1 each time pfSense boots up. Only in index 1 does the operating system recognize the USB device as a network device and assign an Ethernet adapter to it.
Reboot the computer.
Open the pfSense web console and disable SSH access in the menu System -> Advanced.
Network 
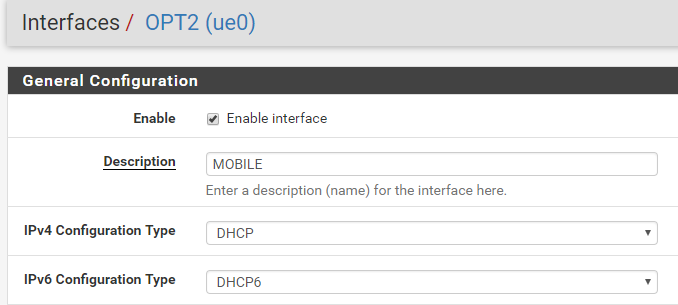
Open the menu Interfaces -> Assignments. If everything is set up correctly, you should see a new network interface.
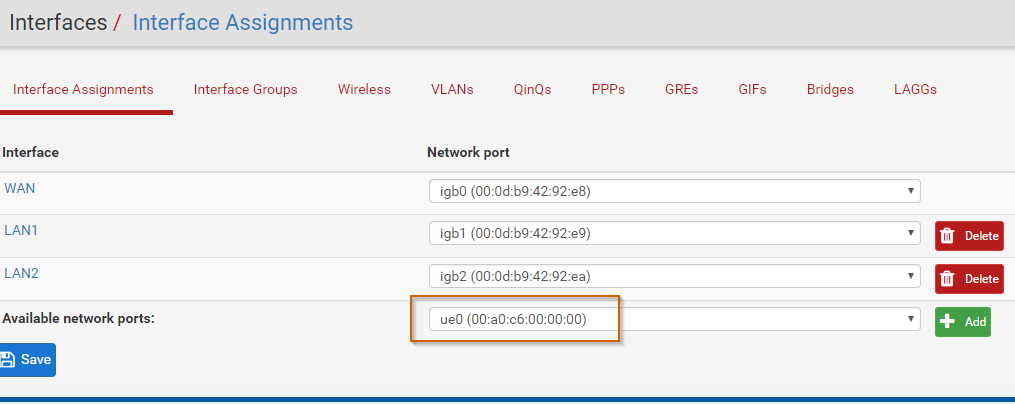
Click Add, enable it, give it a name, and set the type to DHCP.
Next, open the menu System -> Routing. Add a new Gateway and select the interface created in the previous step.
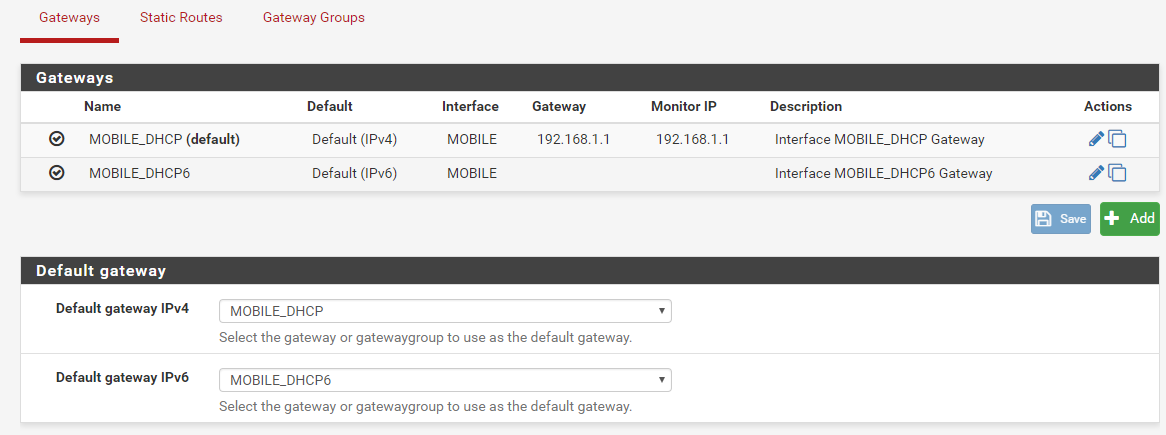
You should now be able to connect to the Internet from any device that is connected to the pfSense router. All the traffic is routed through the Netgear Aircard mobile Internet connection.
Smartphones 
I also tried to connect an Android smartphone with USB tethering to pfSense. Unfortunately, the current version 2.4.4 of pfSense does not include the necessary drivers.
There is an open issue (https://redmine.pfsense.org/issues/7467) targeted for the 2.4.5 release.
When this issue is resolved, it should be possible to connect an iOS or Android phone, enable USB tethering, and then use it as an Internet gateway.