WireGuard is a VPN solution. It claims to be faster, simpler, and leaner than other solutions like IPSec and OpenVPN. You can read all about it on the official homepage: https://www.wireguard.com/
In the following sections, we're going to install WireGuard on an Amazon Lightsail virtual server and install the WireGuard Android app on a smartphone. This is one use case of a VPN: to hide network traffic from an ISP. This is especially useful for mobile devices when you are connecting to public internet access points, such as in hotels. All they see is a connection to the VPN server, but nothing else.
Another use case of a VPN, especially for companies, is connecting local networks of remote offices to the main company network. A VPN allows them to connect these two local networks securely over the public internet. A company can also use a VPN for employees who work at home to allow them to connect to the internal network securely.
WireGuard can be used for all these use cases. WireGuard runs on Linux, Windows, FreeBSD, OpenBSD, macOS, iOS, and Android.
Lightsail 
Lightsail is Amazon's answer to all the inexpensive VPS providers. It provides virtual servers that run on Amazon EC2. You don't have to be familiar with EC2. Amazon makes it very simple to set up a virtual server with a web interface.
Prices start at USD 3.50 and go up to $160 per month depending on the CPU, RAM, SSD, network data transfer, and operating system. Visit the pricing page to learn more: https://aws.amazon.com/lightsail/pricing/
Lightsail supports Linux and Windows-based virtual servers. Windows servers cost a bit more because of the additional license they have to pay Microsoft.
For this setup, we create a Linux VPS and choose the least expensive server for $3.50. The first month is free, so it's a great way to test these servers.
If you want to follow this tutorial, you need an Amazon account. To sign up, you can go to https://aws.amazon.com/ and click on the "Sign Up" button.
Setup VPS 
Go to https://lightsail.aws.amazon.com and sign in with your Amazon account. Click on Create instance.
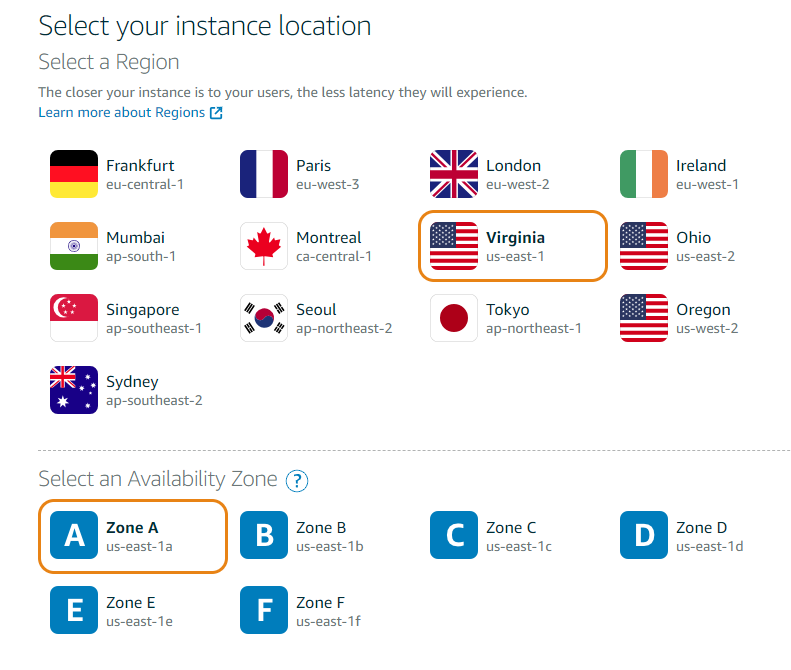
First, you need to select the Region and Availability Zone where Amazon should create your new virtual server.
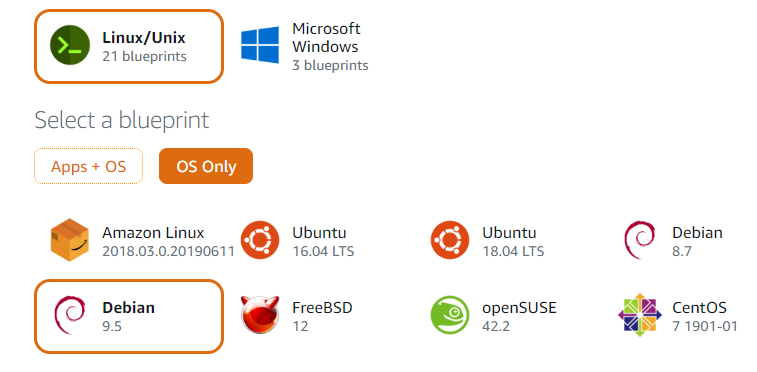
Next, select the operating system. We don't need any pre-installed applications, just a plain operating
system. I select Debian 9.5, which is one of the operating systems that WireGuard supports. Check the WireGuard install page for more information: https://www.wireguard.com/install/
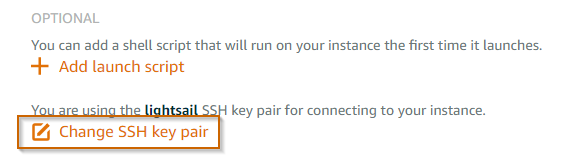
Next, we create a public/private key for connecting to the server with SSH. On your local computer, run this command:
ssh-keygen -N "mysupersecretpassphrase" -t rsa -b 4096 -C "mydesktopcomputer" -f lightsail
The passphrase (string after -N) protects your private key. Replace it with something else! This command creates two files in the current directory: a public key (lightsail.pub), and a private key (lightsail).
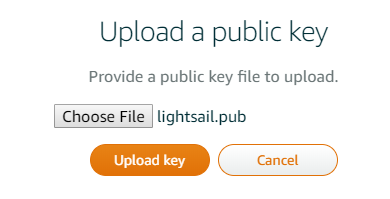
On the server creation page, click on "Change SSH key pair."
Then click "Upload New."
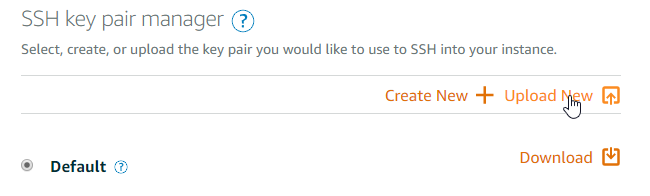
Select the public key file (lightsail.pub) and upload the key.
Lastly, choose the instance plan. The least expensive server is powerful enough for just running WireGuard.

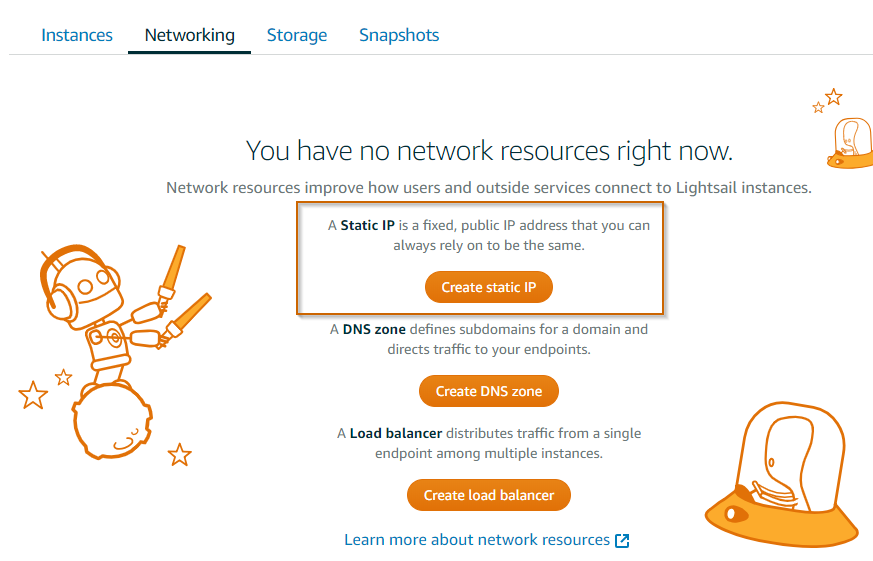
Click "Create" and wait about a minute while Amazon is preparing and starting your virtual server. By default, Lightsail virtual servers get a new IP address each time you reboot them. However, what we want is a static IP address that never changes. A static IP address for your server is included in the monthly fee.
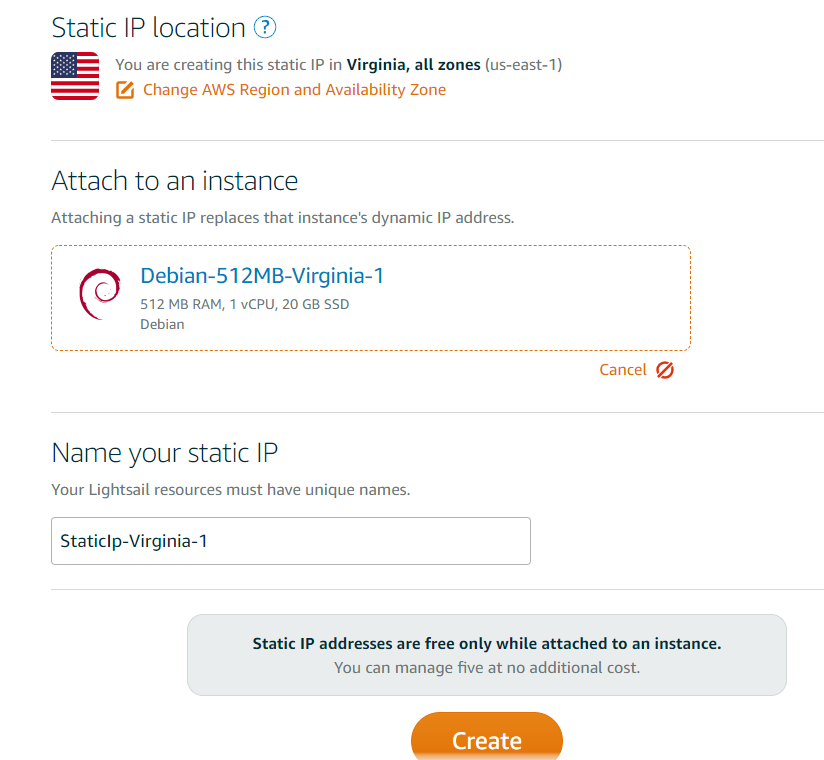
After your VPS is running, click on the "Networking" tab and create a static IP address.
Attach your instance to this static IP address and click "Create."
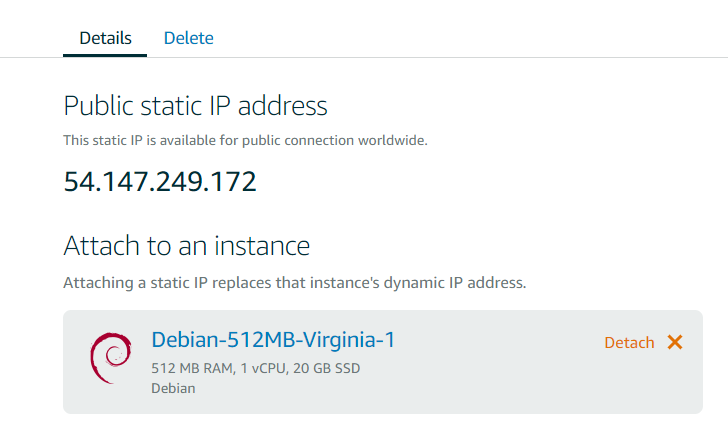
The website should now show you the static IP address for your server.
Click on the name of your instance. In my case, "Debian-512MB-Virgina-1". This opens the configuration page for a specific instance.
Here we need to add a new firewall rule. Click on "Networking" and "Edit rules".
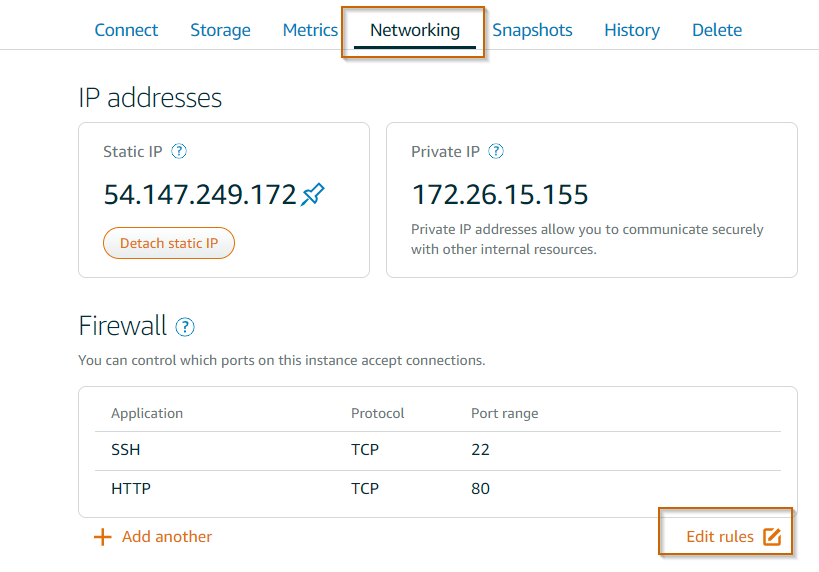
Delete the HTTP TCP 80 rule. We don't run a web server on this server and add a new UDP rule. You can choose any free port you want. Usually, I pick a port between 32768 and 65535. For this blog post, I'm going to use port 54321.

That concludes the configuration of our virtual server. You can close the website, and we're going to continue on the command line.
Install required packages 
Connect to the server with SSH.
ssh -i lightsail admin@54.147.249.172
-i specifies the path to the private key file. SSH asks you for the private key passphrase, and when everything is correct, connects you to your new virtual server.
First, we make sure that all installed packages are up to date.
sudo -i
apt update
apt full-upgrade
Next, we install all the required packages for this tutorial: WireGuard, unbound (DNS server), and qrencode.
echo "deb http://deb.debian.org/debian/ unstable main" > /etc/apt/sources.list.d/unstable.list
printf 'Package: *\nPin: release a=unstable\nPin-Priority: 90\n' > /etc/apt/preferences.d/limit-unstable
apt update
apt install wireguard unbound qrencode curl
Next, we need to enable IP Forwarding. Open /etc/sysctl.conf and search for the line #net.ipv4.ip_forward.
Uncomment this line by removing the # at the beginning. It should look like this:
net.ipv4.ip_forward=1
Lastly, we do some cleanup and remove unused packages.
apt-get autoremove
Set up WireGuard 
WireGuard uses public/private key cryptography. For that, we need to create a public/private key pair for each participant of the VPN. In this setup, we have the server and one Android phone, so we create two key pairs.
cd /etc/wireguard/
umask 077
wg genkey | tee server_private.key | wg pubkey > server_public.key
wg genkey | tee client_private.key | wg pubkey > client_public.key
Create the file wg0.conf.
nano wg0.conf
and insert the following text:
[Interface]
Address = 192.168.2.1
PrivateKey = server_private_key
ListenPort = 54321
SaveConfig = false
PostUp = iptables -A FORWARD -i wg0 -j ACCEPT; iptables -t nat -A POSTROUTING -o eth0 -j MASQUERADE; iptables -A INPUT -s 192.168.2.0/24 -p udp -m udp --dport 53 -m conntrack --ctstate NEW -j ACCEPT
PostDown = iptables -D FORWARD -i wg0 -j ACCEPT; iptables -t nat -D POSTROUTING -o eth0 -j MASQUERADE; iptables -D INPUT -s 192.168.2.0/24 -p udp -m udp --dport 53 -m conntrack --ctstate NEW -j ACCEPT

[Peer]
PublicKey = client_public_key
AllowedIPs = 192.168.2.2/32
For the ListenPort, you need to use the same port number that you specified in the UDP firewall rule on the Lightsail configuration page. This is the port where WireGuard is listening for incoming VPN connections.
Save the file and close Nano.
Next, we replace the strings server_private_key and client_public_key with the content of the files.
sed -i "s/server_private_key/$(sed 's:/:\\/:g' server_private.key)/" wg0.conf
sed -i "s/client_public_key/$(sed 's:/:\\/:g' client_public.key)/" wg0.conf
Check the wg0.conf file.
cat wg0.conf
It should look similar to this:
[Interface]
Address = 192.168.2.1
PrivateKey = cMgbJqIl6CuU6U6gpXu4TwUlJ+TnAgaSa6Dc8b5g1F8=
ListenPort = 54321
...

[Peer]
PublicKey = GXehejiGNxfOk5bEKECYgQg0nM9cu80BxPJap47s3QE=
AllowedIPs = 192.168.2.2/32
Set up a DNS server 
Next, we configure the DNS server unbound. This server is going to answer all DNS queries from
the VPN clients.
I use the configuration described in this WireGuard article: https://www.ckn.io/blog/2017/11/14/wireguard-vpn-typical-setup/
curl -o /var/lib/unbound/root.hints https://www.internic.net/domain/named.cache
chown -R unbound:unbound /var/lib/unbound

cd /etc/unbound/unbound.conf.d
nano unbound_srv.conf
Insert the following text into the editor:
server:
  num-threads: 4
  verbosity: 1
  root-hints: "/var/lib/unbound/root.hints"

  interface: 0.0.0.0
  max-udp-size: 3072

  access-control: 0.0.0.0/0        refuse
  access-control: 127.0.0.1        allow
  access-control: 192.168.2.0/24   allow

  private-address: 192.168.2.0/24

  hide-identity: yes
  hide-version: yes

  harden-glue: yes
  harden-dnssec-stripped: yes
  harden-referral-path: yes

  unwanted-reply-threshold: 10000000

  val-log-level: 1
  cache-min-ttl: 1800
  cache-max-ttl: 14400
  prefetch: yes
  prefetch-key: yes
Save the file and exit Nano, restart the process, and enable it so it automatically starts each time you boot the server.
systemctl restart unbound
systemctl enable unbound
Check if the service is running. You should see a green active (running) text.
systemctl status unbound
Reboot 
After setting everything up, we reboot the server.
reboot
The reboot closes your SSH connection. Reconnect.
ssh -i lightsail admin@54.147.249.172
Check if unbound is running.
sudo -i
systemctl status unbound
Now we start the WireGuard wg0 network interface and enable it so Linux automatically creates
the interface each time we boot the server.
wg-quick up wg0
systemctl enable wg-quick@wg0.service
When you enter ifconfig, you should see the WireGuard interface.
wg0       Link encap:UNSPEC  HWaddr 00-00-00-00-00-00-00-00-00-00-00-00-00-00-00-00
          inet addr:192.168.2.1  P-t-P:192.168.2.1  Mask:255.255.255.255
          UP POINTOPOINT RUNNING NOARP  MTU:8921  Metric:1
          RX packets:0 errors:0 dropped:0 overruns:0 frame:0
          TX packets:0 errors:0 dropped:0 overruns:0 carrier:0
          collisions:0 txqueuelen:0
          RX bytes:0 (0.0 B)  TX bytes:0 (0.0 B)
Client setup 
If you want to connect from an Android phone to a WireGuard server, you need to install the WireGuard app from the Play Store: https://play.google.com/store/apps/details?id=com.wireguard.android&hl=en
Next, we need to create a new configuration in the app. We can do this either from scratch by entering all the information manually or by importing a file. In this tutorial, we're going to use the third option and create the configuration file on the server, display a QR code, and then scan the QR code with the app.
First, we create the configuration file. I call it client2 in this example.
cd /etc/wireguard/
nano client2
Paste the following text into the editor.
[Interface]
Address = 192.168.2.2/32
PrivateKey = client_private_key
DNS = 192.168.2.1
MTU = 1280

[Peer]
PublicKey = server_public_key
Endpoint = 54.147.249.172:54321
AllowedIPs = 0.0.0.0/0
PersistentKeepalive = 25
Make sure that the Endpoint points to the static IP address of your virtual server. The port must be the same as ListenPort in the wg0.conf file. If you have multiple clients, you need to make sure that Address
is free and not already assigned to another client.
Next, we replace the strings client_private_key and server_public_key with the real keys.
sed -i "s/client_private_key/$(sed 's:/:\\/:g' client_private.key)/" client2
sed -i "s/server_public_key/$(sed 's:/:\\/:g' server_public.key)/" client2
Run the following command to display the QR code of the client2 file content.
qrencode -t ansiutf8 < client2
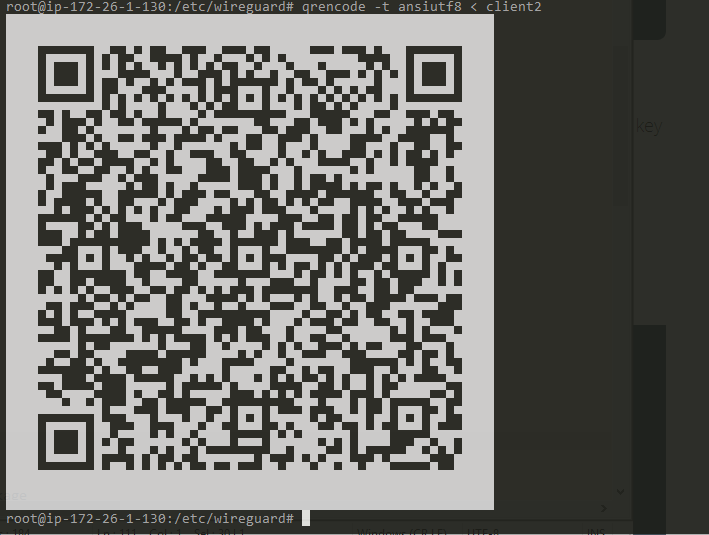
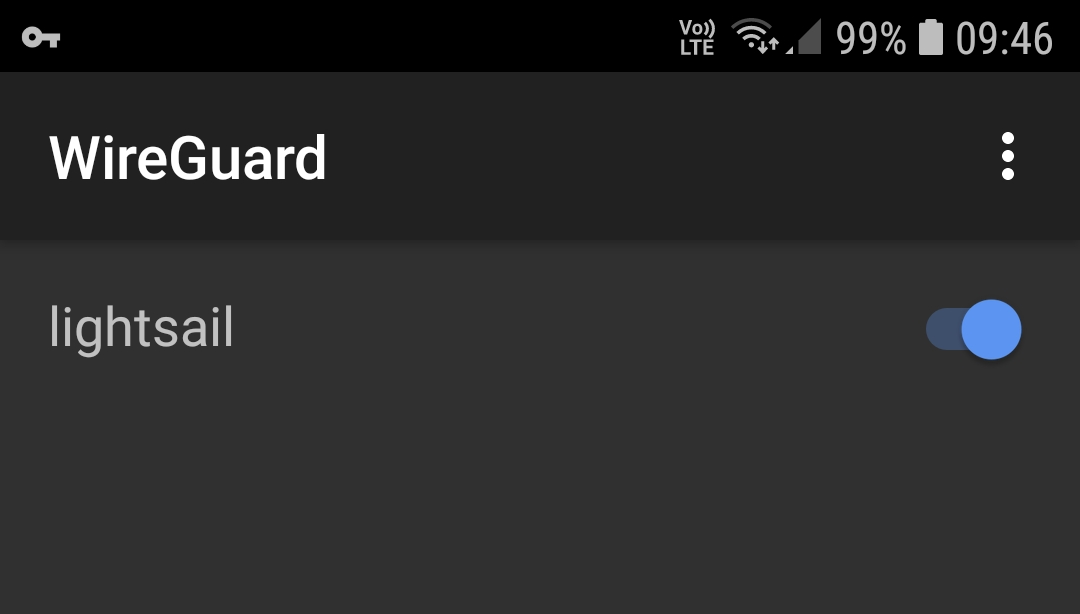
Open the WireGuard app on your Android phone, click on the + button, select "Create from QR code," and then point the camera to the QR code on your screen. If the app was able to scan the code successfully, it asks for a tunnel name. Enter a name and tap on "Create tunnel".
Enable the tunnel with the slider. You should see a key icon at the top of your screen.
To check if the VPN works, open a browser and go to the URL: https://www.whatismyip.com/ Alternatively, enter the search term "my ip" into the Google search.
If the connection is routed through the VPN, it should show the IP address of the virtual server as the public address.
To check if DNS requests are routed through the VPN, go to https://www.dnsleaktest.com and run the extended test. The test runs for a few seconds and displays a list of servers that answered the DNS queries. Make sure that this list only contains your Lightsail server.
Read this guide about DNS leaks to learn more why you want to test for DNS leaks, and it also shows you other methods for preventing leaks.
Additional clients 
If you want to connect more clients, you repeat the client configuration.
- Create a public/private key pair.
- Create a client configuration file. Make sure
Addressis not already assigned. - Add a new
[Peer]section towg0.conf. - Restart the
wg0interface.wg-quick down wg0 && wg-quick up wg0 - Display the QR code and scan it with the app.
Links 
In this blog post, I showed how to connect an Android device to the WireGuard server. If you want to connect a Linux or macOS computer to the VPN, you can find many tutorials on the web. Here are a few links:
- https://wiki.debian.org/Wireguard
- https://www.linode.com/docs/guides/set-up-wireguard-vpn-on-ubuntu/
- https://www.ckn.io/blog/2017/11/14/wireguard-vpn-typical-setup/
- https://techcrunch.com/2018/07/28/how-i-made-my-own-wireguard-vpn-server/
- https://www.digitalocean.com/community/tutorials/how-to-create-a-point-to-point-vpn-with-wireguard-on-ubuntu-16-04