This is a follow-up to my previous blog post about setting up a VPS server. In that article, I used the command-line SSH client, which is pre-installed on macOS, Linux, and Windows 10 (April 2018 Update). However, on older Windows versions, you need to download an SSH client.
In this blog post, I'll show you how to install and use the Windows SSH client Putty.
Visit the Putty homepage and download either the installer (.msi) or the individual executable files.
To follow this tutorial, you'll need putty.exe, puttygen.exe, and pageant.exe.
Connect with Putty 
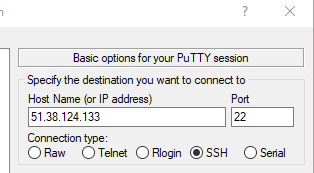
When following the steps in my VPS tutorial, you'll do this at the beginning, when logging in with the root user and password. Start putty.exe, enter the IP address, select the connection type SSH, and click Open.
Putty will ask for the password and then open the connection.
From here, continue with the configuration steps in my previous post.
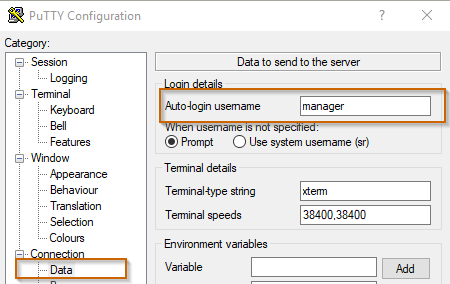
When you need to log in with the unprivileged user manager, enter the username in the following dialog.
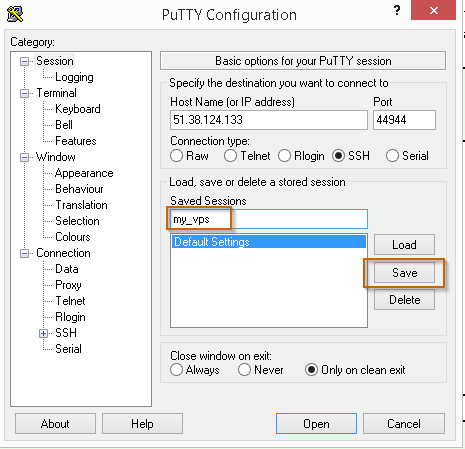
You can save these settings by entering a session name and clicking Save. To load and open a stored configuration, double-click the session name or select the entry and click Load.
Generate Keys 
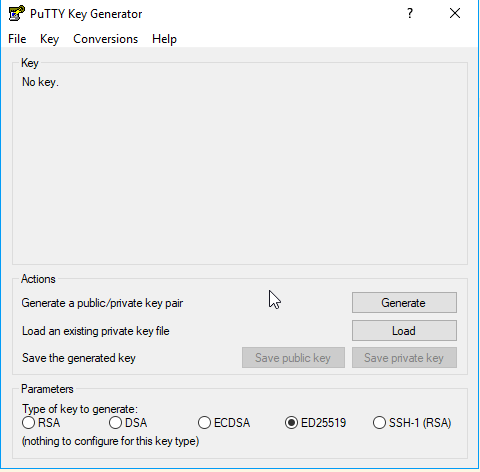
To generate keys for public/private key authentication, start puttygen.exe, select the parameter ED25519, and click Generate. You'll need to move the mouse a bit during key generation to create some random data.
Enter a Key comment and a Key passphrase to protect the private key.
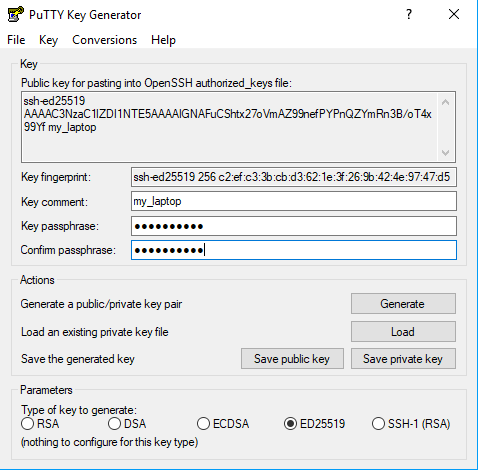
Click Save private key and select a directory. puttygen saves the key into a text file with the .ppk extension. This file also contains the public key.
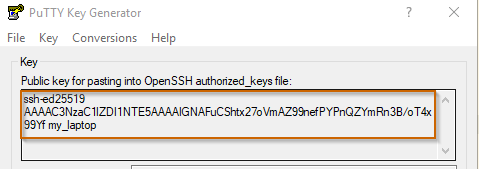
Copy the public key into the clipboard.
On the VPS, open the authorized_keys file in a text editor:
sudo nano /home/manager/.ssh/authorized_keys
Paste the public key from puttygen into the editor, then save and close the file (Ctrl+O, Ctrl+X).
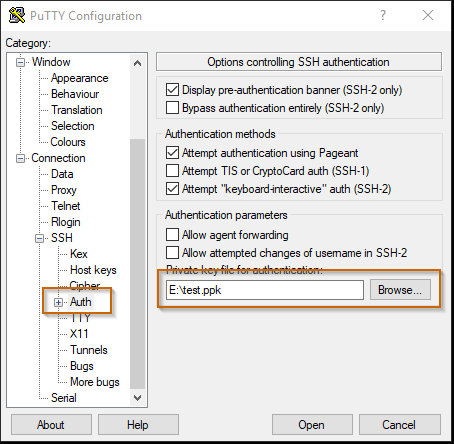
In Putty, set the path to the key file in the Connection -> SSH -> Auth dialog.
Go back to the Session dialog, save the settings, and try to open the connection. Putty should first ask for the private key's passphrase and then establish the SSH connection.
Key management with pageant 
If you don't want to enter the passphrase each time you connect to the server, you can add the key to pageant.
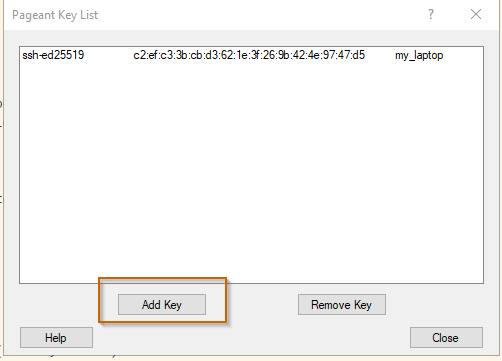
Start pageant.exe and add the private key with Add Key. pageant will ask for the passphrase, and while pageant is running, you won't have to enter the passphrase again.
Try opening the connection with Putty. If everything is set up correctly, Putty will no longer ask for the passphrase as long as pageant is running.
For further information, I recommend reading the following article from Digital Ocean. It describes how to create a shortcut for pageant that automatically loads the keys.
https://www.digitalocean.com/community/tutorials/how-to-use-pageant-to-streamline-ssh-key-authentication-with-putty