This blog post is based on a Traversy Media video. If you do not already know Traversy, you should check out his content. He publishes a lot of free videos on his YouTube channel and has created courses on Udemy, among other resources. Visit his homepage to find out more. He provides great learning resources for full-stack developers.
In this blog post, we will create a polling application where users can vote for their favorite operating system and see the vote results in real-time in a pie chart. It's not a one-to-one copy of Traversy's project (although I copied the HTML code) and uses a different technology stack behind the scenes.
Here is a list of all the tools and libraries we are using in this project:
Client 
| Library | Homepage |
|---|---|
| Parcel | https://parceljs.org/ |
| echarts | https://echarts.apache.org/en/index.html |
| muicss | https://www.muicss.com/ |
| uuid | https://www.npmjs.com/package/uuid |
Server 
| Library | Homepage |
|---|---|
| Maven | https://maven.apache.org/ |
| Spring | https://spring.io/projects/spring-framework/ |
| Spring Boot | https://spring.io/projects/spring-boot/ |
| sse-eventbus | https://github.com/ralscha/sse-eventbus |
| MapDB | https://mapdb.org/ |
Overview 
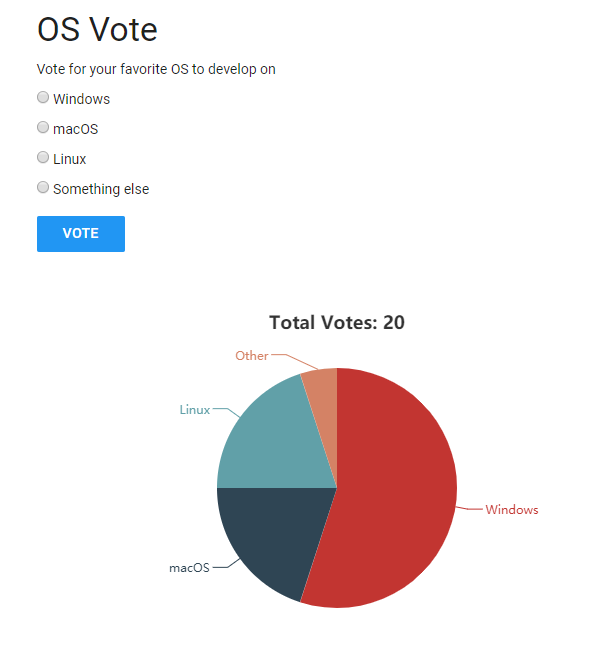
The visible part of the application is an HTML page consisting of a form where users can vote for their favorite operating system and a pie chart that shows the polling results in real-time.
Behind the scenes, we have a JavaScript application that sends the vote to a Spring Boot server with a POST request. The JavaScript application also opens a server-sent event connection to the server and receives the vote results in real-time as soon as users vote and then displays the results with a pie chart.
The server is written in Java and is based on Spring and Spring Boot. It handles the vote POST request, stores the poll data in a MapDB database to make it persistent, and broadcasts the current vote results to all connected clients via server-sent events.

Server 
As usual, I start my Spring Boot application by visiting the https://start.spring.io page. For this project, we only need the Web dependency.
Then we add the additional dependencies to the pom.xml
    <dependency>
      <groupId>ch.rasc</groupId>
      <artifactId>sse-eventbus</artifactId>
      <version>2.0.1</version>
    </dependency>

    <dependency>
        <groupId>org.mapdb</groupId>
        <artifactId>mapdb</artifactId>
        <version>3.0.10</version>
    </dependency>
Next, we open the main class (I renamed it to Application.java) and enable the SSE event bus with the @EnableSseEventBus annotation. Behind the scenes, this configures a SseEventBus singleton that we can inject into other Spring-managed beans.
@SpringBootApplication
@EnableSseEventBus
public class Application {
Next, we create a custom resource configuration.
@Configuration
class ResourceConfig implements WebMvcConfigurer {

  @Autowired
  private Environment environment;

  @Override
  public void addResourceHandlers(ResourceHandlerRegistry registry) {
    if (this.environment.acceptsProfiles(Profiles.of("development"))) {
      String userDir = System.getProperty("user.dir");
      registry.addResourceHandler("/**")
          .addResourceLocations(Paths.get(userDir, "../client/dist").toUri().toString())
          .setCachePeriod(0);
    }
    else {
      registry.addResourceHandler("/index.html")
          .addResourceLocations("classpath:/static/")
          .setCacheControl(CacheControl.noCache()).resourceChain(false)
          .addResolver(new EncodedResourceResolver());

      registry.addResourceHandler("/**").addResourceLocations("classpath:/static/")
          .setCacheControl(CacheControl.maxAge(365, TimeUnit.DAYS).cachePublic())
          .resourceChain(false).addResolver(new EncodedResourceResolver());
    }
  }

  @Override
  public void addViewControllers(ViewControllerRegistry registry) {
    registry.addViewController("/").setViewName("redirect:/index.html");
  }
If the application runs with the "development" profile, the configuration sets the webroot to ../client/dist. This way, we don't have to restart the Spring Boot service whenever
we change code on the client-side during development.
When we start a production build, the build system bundles the client code into the server JAR file, and for that, we configure the resource handler to look for these resources in the classpath:/static/ folder. The configuration also ensures that index.html is served with a no-cache caching header, and the other resources are sent with a cache-control header with an expiry date one year in the future.
The client build system pre-compresses the resources with gzip and brotli, so we add the EncodedResourceResolver that can serve these pre-compressed files. This saves a few server CPU cycles because the server no longer needs to compress resources on the fly.
The configuration also adds a redirect configuration from / to index.html.
The main application logic is located in the PollController class.
The class's constructor creates or opens the MapDB database and initializes the votes with zeros if the database is empty.
MapDB provides Maps, Sets, Lists, and Queues that are backed by off-heap or on-disk storage.
It's a combination of a collection library and a database engine. For this example, we use a Map that is backed by a file (./counter.db) and therefore is persistent and survives a server restart.
  PollController(SseEventBus eventBus) {
    this.eventBus = eventBus;

    this.db = DBMaker.fileDB("./counter.db").transactionEnable().make();
    this.pollMap = this.db.hashMap("polls", Serializer.STRING, Serializer.LONG)
        .createOrOpen();

    for (String os : oss) {
      this.pollMap.putIfAbsent(os, 0L);
    }
  }
The poll() method implements the POST endpoint that handles the user vote. First, it inserts the vote into the database.
  @PostMapping("/poll")
  @ResponseStatus(code = HttpStatus.NO_CONTENT)
  public void poll(@RequestBody String os) {
    this.pollMap.merge(os, 1L, (oldValue, one) -> oldValue + one);
    this.db.commit();
    sendPollData(null);
  }
After that, the method broadcasts the new results to all connected clients with a server-sent event.
The payload of the server-sent event is a simple comma-separated string (e.g., 10,11,4,1), each number represents the current voting total
for one of the four operating systems ("Windows", "macOS", "Linux", "Other").
  private void sendPollData(String clientId) {
    StringBuilder sb = new StringBuilder(10);

    for (int i = 0; i < oss.length; i++) {
      sb.append(this.pollMap.get(oss[i]));
      if (i < oss.length - 1) {
        sb.append(',');
      }
    }

    SseEvent.Builder builder = SseEvent.builder().data(sb.toString());
    if (clientId != null) {
      builder.addClientId(clientId);
    }
    this.eventBus.handleEvent(builder.build());
  }
The register() method implements the endpoint for the initial server-sent event request. The sse-eventbus library requires the client
to send a unique id that identifies the client. The method then registers the client and sends the current voting results back to the browser.
This way, the client does not have to wait until somebody votes and instead immediately receives the current voting results and can display the pie chart.
  @GetMapping("/register/{id}")
  public SseEmitter register(@PathVariable("id") String id,
      HttpServletResponse response) {
    response.setHeader("Cache-Control", "no-store");
    SseEmitter sseEmitter = this.eventBus.createSseEmitter(id, SseEvent.DEFAULT_EVENT);

    // send the initial data only to this client
    sendPollData(id);

    return sseEmitter;
  }
For bundling the client and server into one package, we use the frontend-maven-plugin and maven-antrun-plugin.
Client 
The client dependencies are managed by npm. We start this project in an empty directory and call npm init to create the package.json file.
Then create a src directory and install the dependencies.
mkdir src
npm install echarts muicss uuid
The main application method checks if the user has already voted. It does that by checking for an entry in localStorage.
This is a very rudimentary check and not recommended for real-world usage. An experienced user can simply delete this entry in the storage with the browser developer tools.
If the user has already voted, the GUI displays a message that they have already voted. If not, the application presents the operating system selection.
The init() method then registers a click listener on the vote button. The handler sends the user's choice with a POST request to the /poll endpoint
and inserts the hasVoted entry into localStorage.
export function init() {

    const alreadyVoted = localStorage.getItem('hasVoted');
    document.getElementById('hasVotedAlreadyErrorMsg').classList.toggle('hidden', !alreadyVoted);
    document.getElementById('vote-form').classList.toggle('hidden', alreadyVoted);

    const voteButton = document.getElementById('vote-button');

    voteButton.addEventListener('click', e => {
        localStorage.setItem('hasVoted', true)
        const choice = document.querySelector('input[name=os]:checked').value;

        fetch('poll', {
            method: 'POST',
            body: choice
        }).then(() => {
            document.getElementById('voted').classList.remove('hidden');
            document.getElementById('hasVotedAlreadyErrorMsg').classList.add('hidden');
            document.getElementById('vote-form').classList.add('hidden');
        }).catch((e) => console.log(e));
    });
The next part of the init() method configures the pie chart, starts the server-sent events connection with new EventSource(...)
and registers a message listener for incoming events.
The handler splits the comma-separated string from the server, calculates the total, and updates the chart.
    const chart = echarts.init(document.getElementById('chart'));
    chart.setOption(getChartOption());

    const eventSource = new EventSource(`register/${uuidv4()}`);
    eventSource.addEventListener('message', response => {
        const pollData = response.data.split(',').map(Number);
        const total = pollData.reduce((accumulator, currentValue) => accumulator + currentValue);

        chart.setOption({
            title: {
                text: `Total Votes: ${total}`
            },
            series: {
                data: [
                    { value: pollData[0], name: oss[0] },
                    { value: pollData[1], name: oss[1] },
                    { value: pollData[2], name: oss[2] },
                    { value: pollData[3], name: oss[3] }
                ],
            }
        });

    }, false);
CSS 
The CSS file only contains two rules. The primary purpose is to import the MUI CSS library. This is a lightweight CSS framework that implements Google's Material design.
@import '../node_modules/muicss/dist/css/mui.min.css';

body {
  font-family: "Roboto", "Helvetica Neue", Helvetica, Arial, serif;
}

.hidden {
  display: none;
}
This is everything we need to implement for the client application.
As mentioned above, we use Parcel 2 for building and bundling the application. First, we need to install it.
npm install -D parcel
For pre-compressing the assets, we use two Parcel 2 plugins.
npm install @parcel/compressor-gzip @parcel/compressor-brotli -D
To enable compression, you have to create a file with the name .parcelrc in the root of the project and insert this configuration.
{
  "extends": ["@parcel/config-default"],
  "compressors": {
    "*.{html,css,js,svg,map}": [
      "...",
      "@parcel/compressor-gzip",
      "@parcel/compressor-brotli"
    ]
  }
}
By default, Parcel does not perform any code transpilation. If you use modern JavaScript features and target older browsers, you need to configure browserslist in your package.json. When Parcel sees this field, it will transpile the code accordingly.
"browserslist": "> 0.5%, last 2 versions, not dead",
Check out the browserslist documentation page to learn more about the supported syntax. If you want to know what browsers are supported with the provided string, run npx browserslist.
Next, we add two scripts to the scripts section of the package.json file.
  "scripts": {
    "build": "parcel build",
    "watch": "parcel watch"
  },
The watch script is used during development, where Parcel starts a file watcher and rebuilds changed resources on the fly.
The watch option only starts a file watcher. It does not start an HTTP server like the parcel command.
Because we serve the content with the Spring Boot application, there is no need for an additional web server during development.
Serving the client application through Spring Boot has the advantage that we don't need a CORS configuration. This only works if you are planning to install the client and server on the same origin.
If you want to install the client and server on different origins (different protocol, host, or port), you need to enable CORS on the PollController.
@Controller
@CrossOrigin
public class PollController {
If everything is in place, you can test the application.
First, build the client with the watch command from the client directory.
npm run watch
Then start the server from the server directory.
.\mvnw.cmd spring-boot:run -Dspring-boot.run.profiles=development
If you are working with macOS or Linux, start Maven with the ./mvnw script.
Open the browser with the URL http://localhost:8080, and you should see the application.
For a production build, issue this command from the server directory.
.\mvnw.cmd clean package
This command automatically starts the npm run build command in the client folder and copies the
client code from the client/dist folder into the jar file.
If the build was successful, start the application with
java -jar target/poll-0.0.1.jar
Test the application with the URL http://localhost:8080
You can find the complete source code for the project on GitHub:
https://github.com/ralscha/blog/tree/master/poll